Triggers
From VersaVision Support
Triggers are functions that are setup to monitor specific items and either take action or take no action depending on the result.
An example of this functionality would be to send an email to a manager once a machine has been down more that 5 times in one shift.
There are pre-made triggers that can be setup quickly and custom triggers that allow the user the ability to configure something specific.
This page will concentrate on Adding & Editing Pre-Made Triggers as well as Adding & Editing Custom Triggers. Duplicating and Deleting Triggers will apply to either type of Trigger.
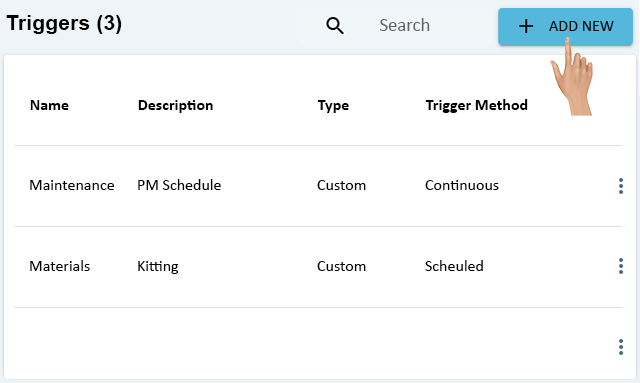
Triggers can be accessed via the Home page menu or the Triggers icon under Applications.

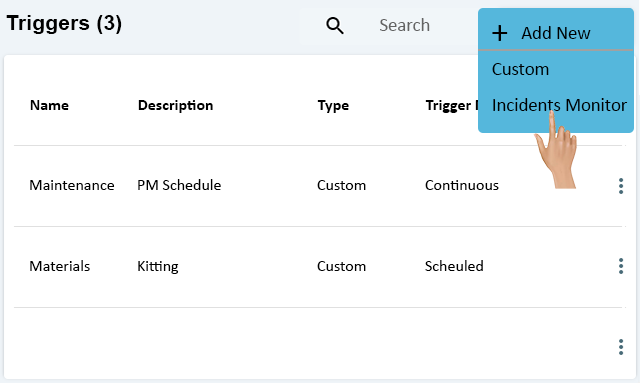
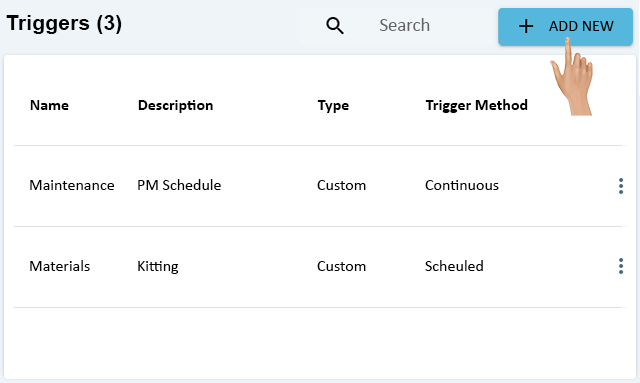
On the Triggers page click on the Add New button in the top right corner of the page.
Select Incident Monitor from the pop-up menu.
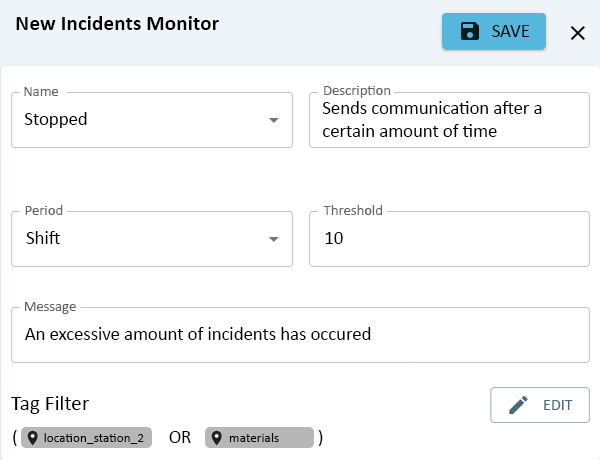
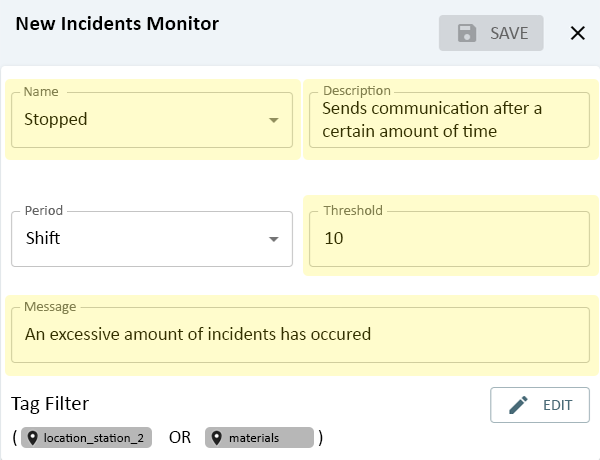
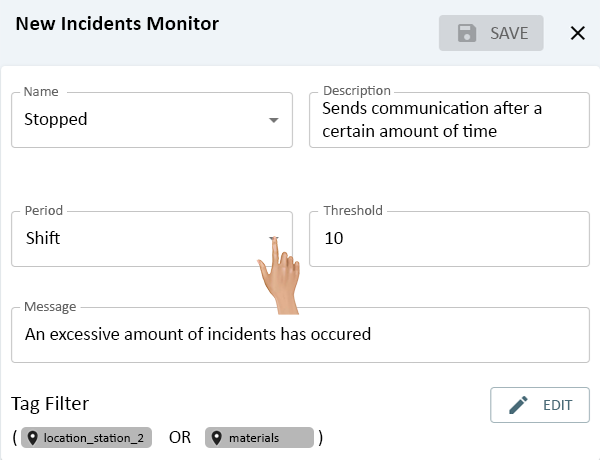
The New Incidents Monitor page will load. Click in the Name field and enter a name for the Trigger.
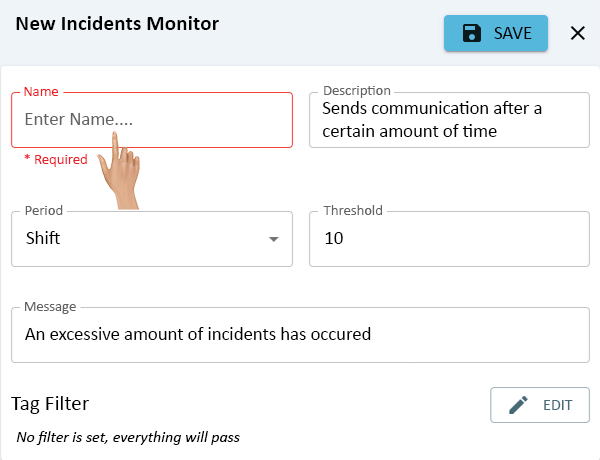
The Description field is pre-filled. If a different description is required, click in the field and enter the description.
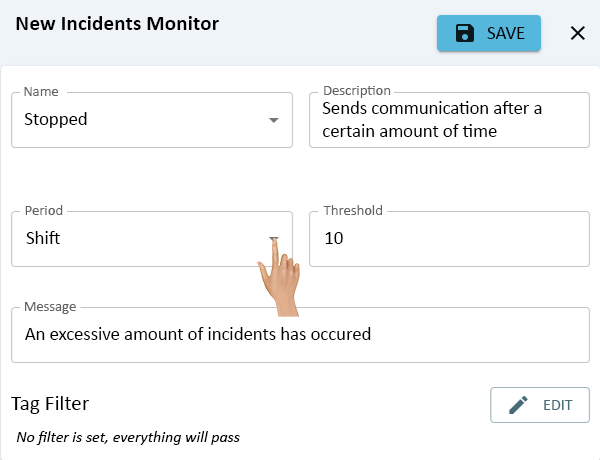
The Period is set to Shift by default. This means the monitor will total the incidents for the shift only.
If there is a need to monitor the number of incidents for all shifts in a day, select the down arrow and select Day from the list.
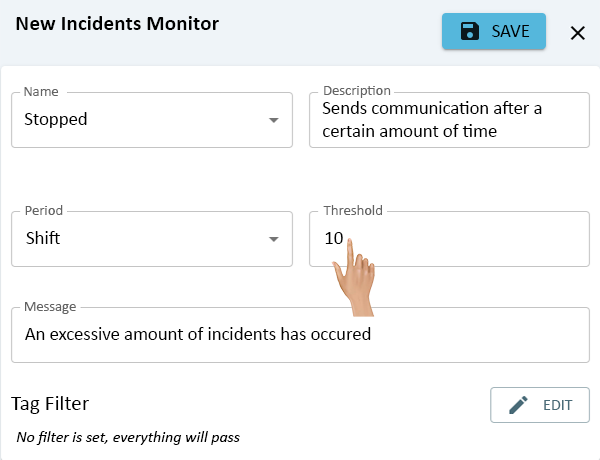
The Threshold field is where the user enters the number of incidents that are to accumulate before a communication is sent out.
By default, the system is set to 10. This means that a communication will be sent out when 10 incidents accumulate for the time period (Shift or Day).
To change the number, click in the field and enter an new number.
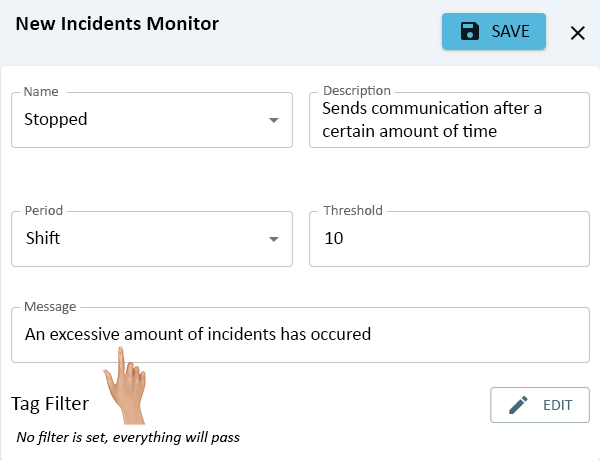
The Message field is where the text for the outgoing communication is setup.
By default, the message is set to send out "An excessive amount of incidents has occurred".
To change the outgoing message, click in the field and enter a new message.
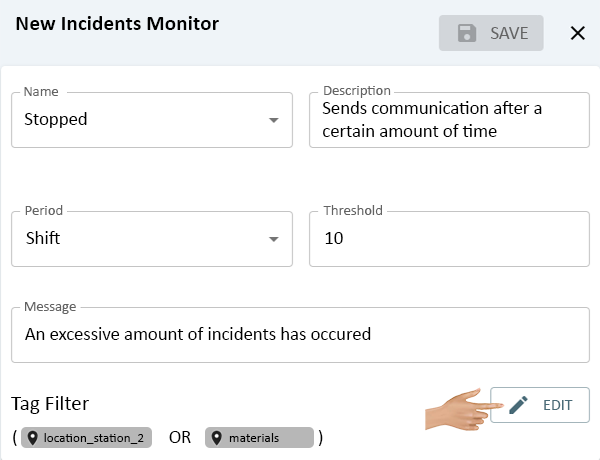
The Tag Filter is where the user selects what Locations, Modules and/or Monitoring Points the Trigger is to monitor.
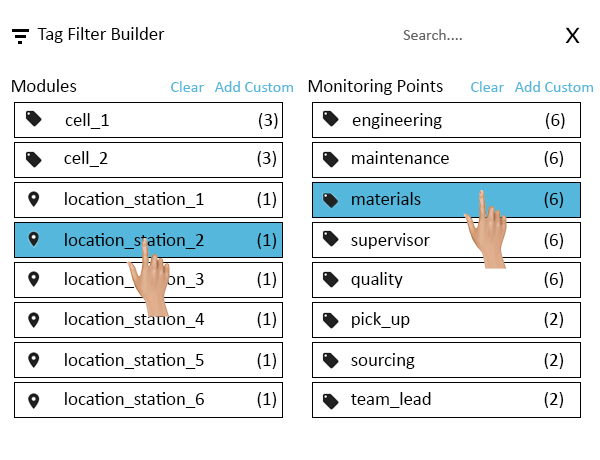
Click on the Edit button to access the Tags Filter Builder interface.

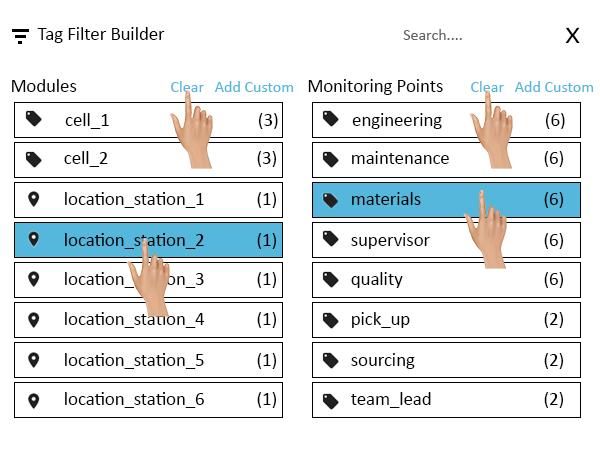
The Builder has 2 columns, Modules and Monitoring Points.
Modules is where the user will select either one or more module configuration tags and/or location tags. Multiple tags and types of tags can be selected.
Monitoring Points is where the user will select one or more monitoring point tags.
Any tag(s) selected will be evaluated in the total number of incidents.
Click on a tag in either column to select it.
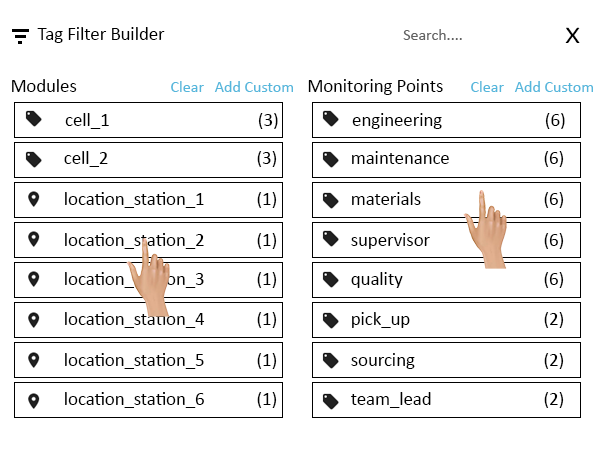
If a tag is selected in error, the user can clear tags individually by clicking on the tag a second time. The blue highlight will be removed.
If there is a need to restart the tag selection process, the user can click on the Clear option at the top of the column. This will clear all the selected tags in that column.
Once all of the tags required have been selected, click on the X in the top right corner of the builder window.
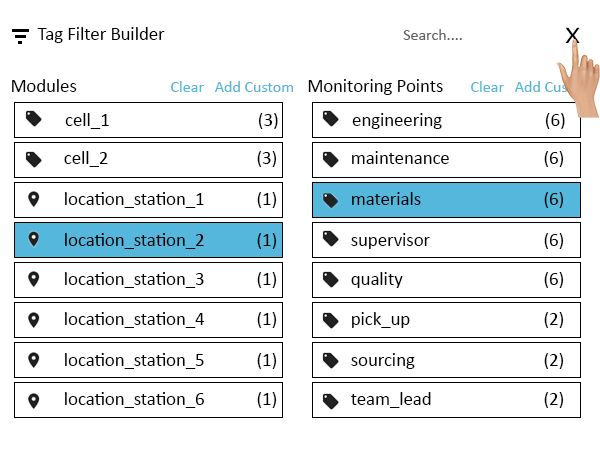
The Trigger page will reload, all the triggers selected will show under the Tag Filter heading.
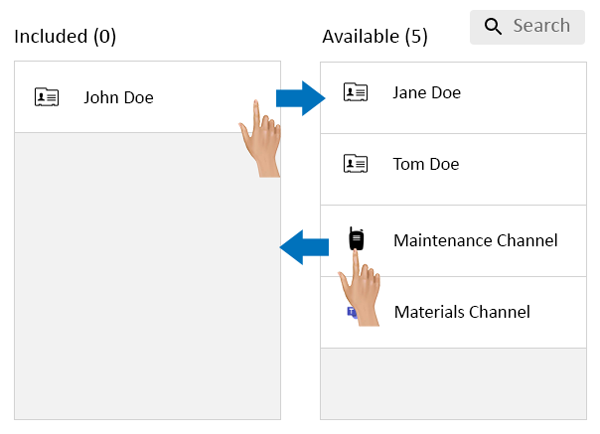
Below the Trigger setup menu there is a communication setup area.
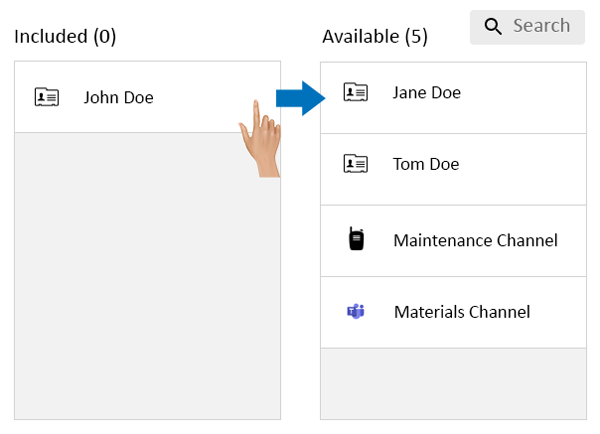
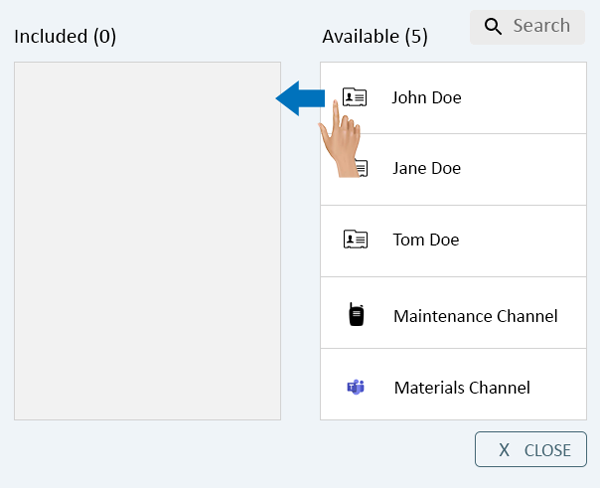
There are 2 columns in this section, Included and Available.
Any contacts in the Included column will receive the message once the threshold has been reached.
Any contact in the Available column will NOT receive the message. The column will display all contacts that have been setup in the system.
To add a contact to the communication, drag and drop the contact from the Available column to the Included column.
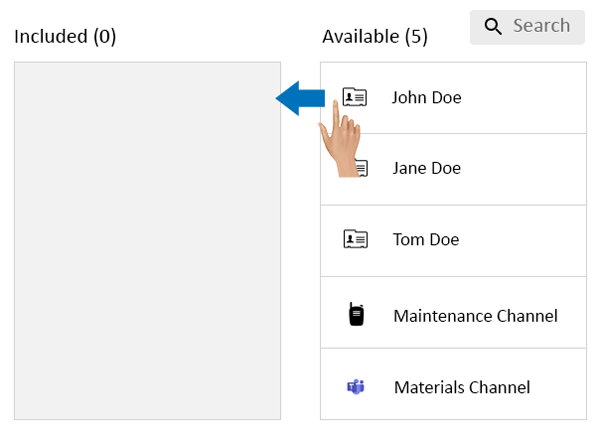
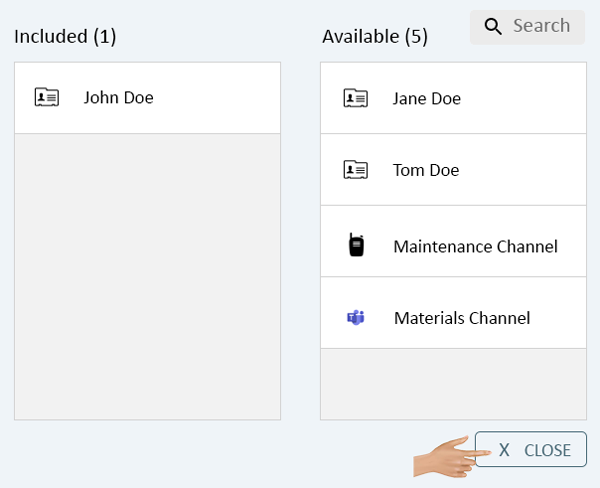
To remove a contact from the Included list, drag and drop the contact into the Available column.
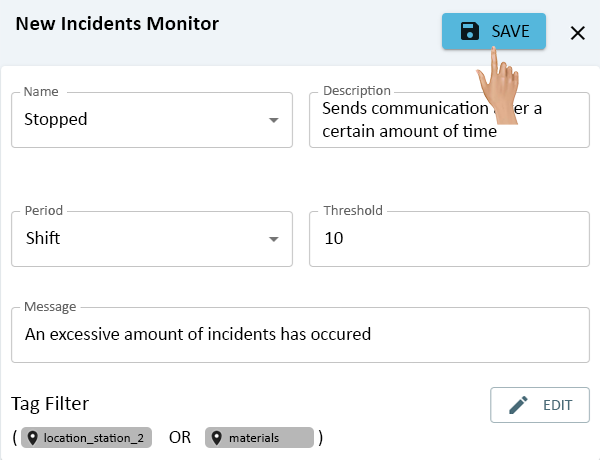
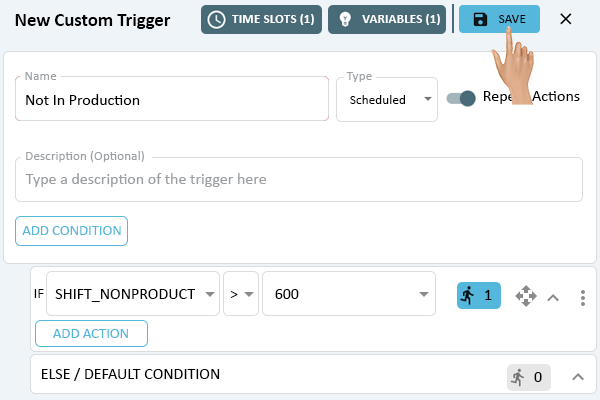
After all fields have been setup, click on the Save button in the top right corner of the window.

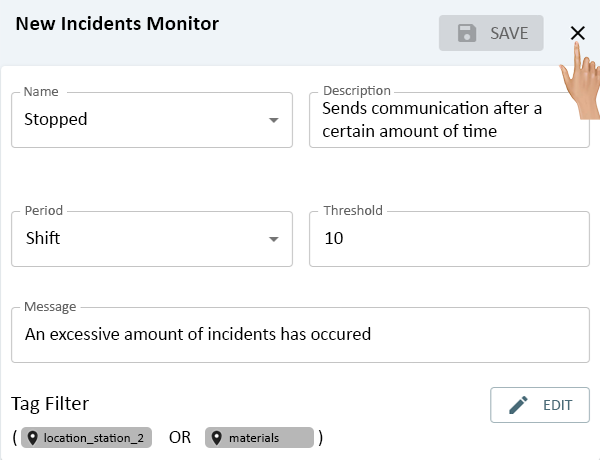
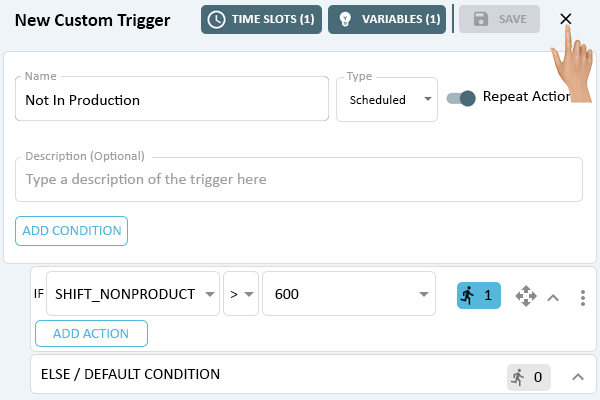
Click on the "X" next to the Save button to return to the Triggers page.

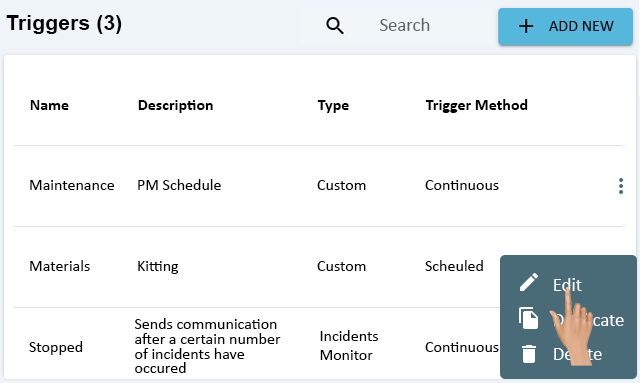
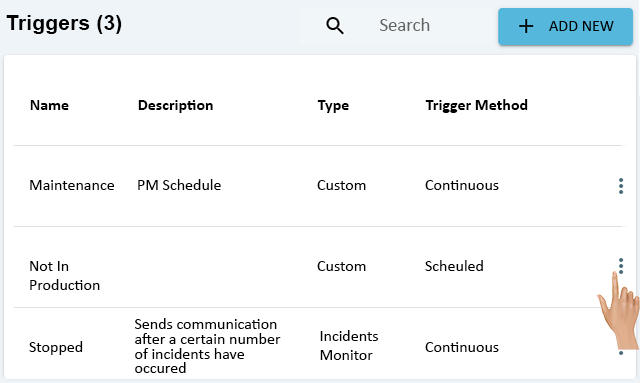
Click on the 3 dot menu in-line with the pre-made Trigger that needs to be edited.
All pre-made Triggers will have a name in the Type column. All other Triggers will show Custom in the Type column.
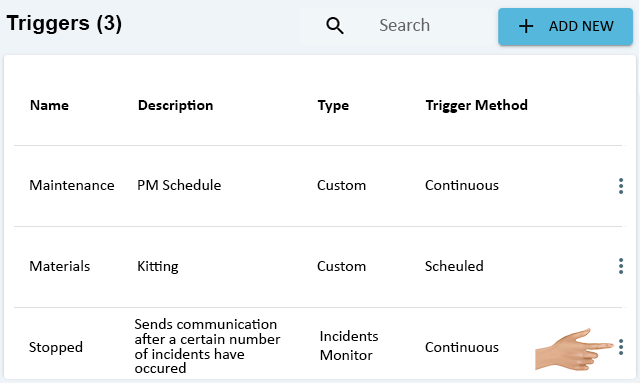
Select Edit from the pop-up menu.
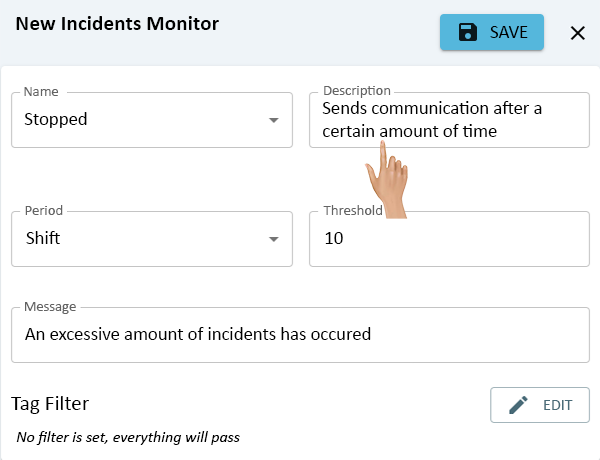
All fields on the Trigger can be changed. On the monitor setup menu, click on the Name, Description, Threshold or Message fields to edit them.
The Period field can be changed by click on the down arrow. The user can select either Shift or Day.
Tags can be changed by clicking on the Edit button.
Clear selected tags from either column by clicking on them. The blue highlight will be removed thus removing the tag.
To clear all tag selections, click on the Clear option at the top or either column.
Below the Monitor setup menu is the Contacts setup menu. Contacts in the Included column will receive the message setup.
Remove Contacts from the Included column by dragging and dropping them to the Available column.
Add Contacts to the Included column by dragging and dropping them from the Available column.
After all fields have been edited, click on the Save button in the top right corner of the window.
Click on the "X" next to the Save button to return to the Triggers page.
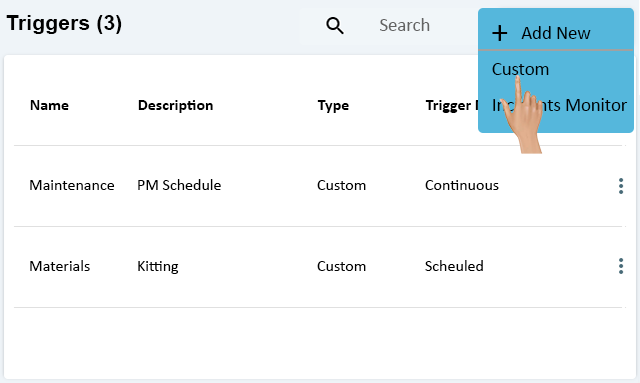
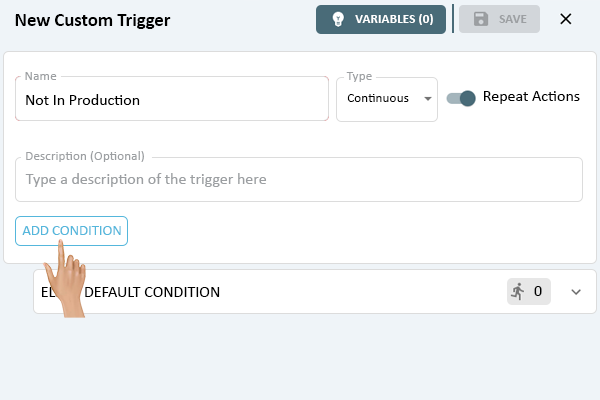
On the Triggers page click on the Add New button in the top right corner.
Select Custom from the pop-up menu.
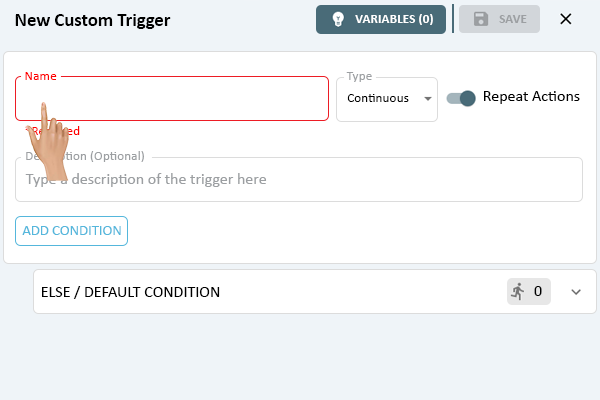
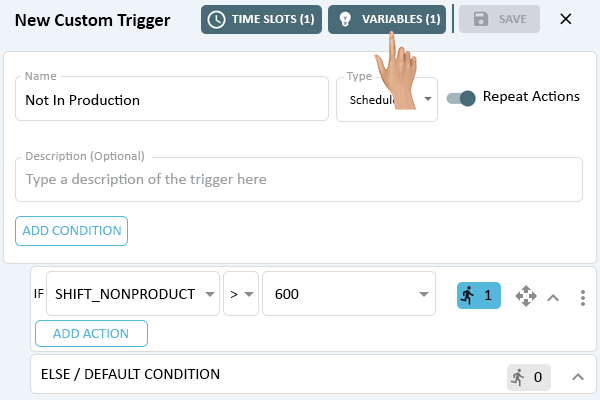
Click on the Name field and enter a name for the Trigger.
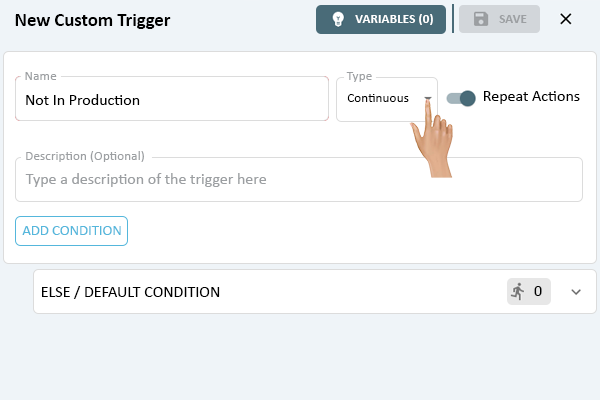
The Type field is where the user will define whether the monitor will run at all times or during scheduled times.
By default the Trigger will be set to Continuous which means it will always be active evaluating the Variables and Conditions.
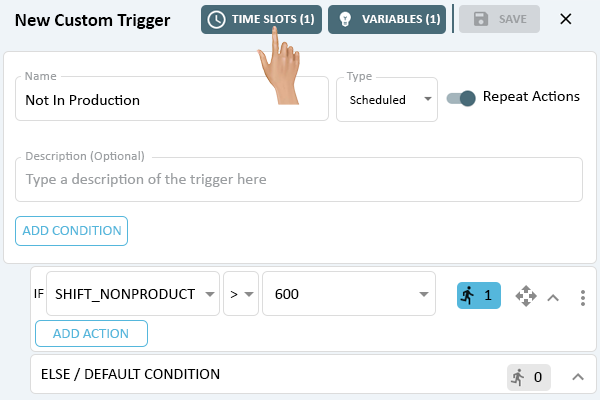
If the trigger should only be run at specific times, click on the down arrow in the field and select Scheduled. Time Slots is discussed later in the document.
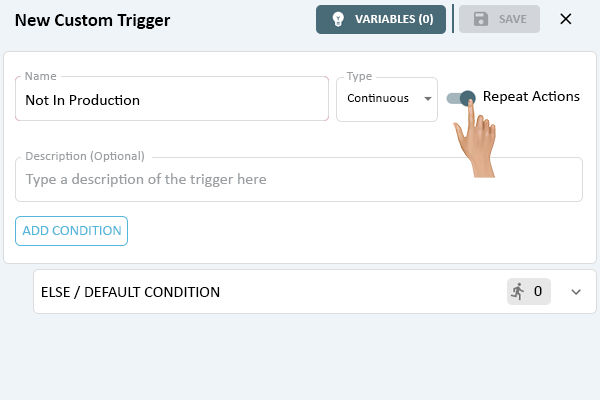
The Repeat Actions switch is where the user will define whether actions on conditions will repeat or if they will only occur once when the condition is met.
By default the switch will be active/on. To turn this option off, click on the toggle switch.
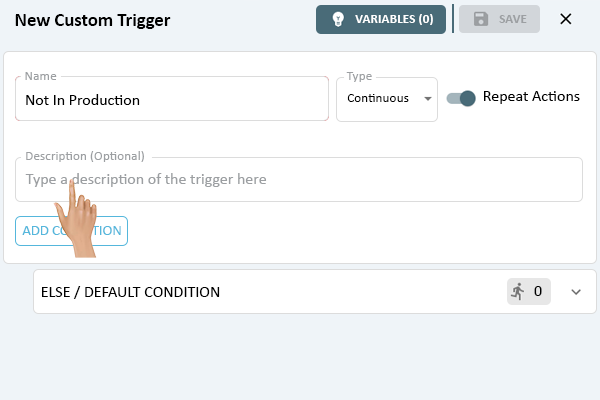
The Description field is optional, select the field to enter a brief description of what the Trigger does. VersaCall suggests that all triggers have a description.
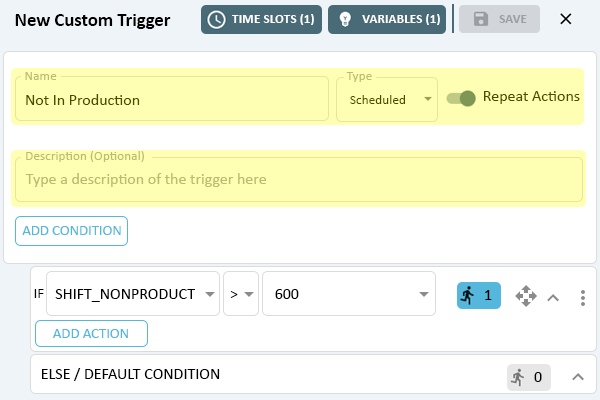
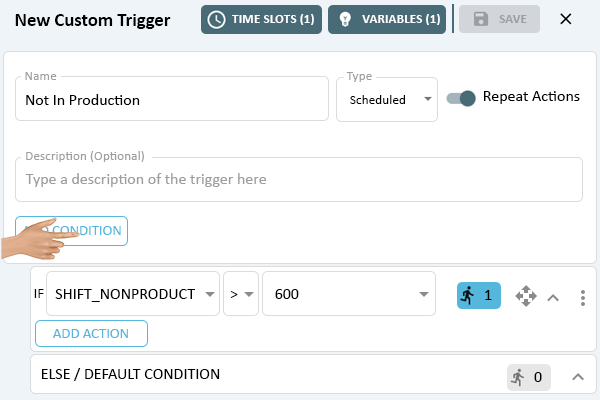
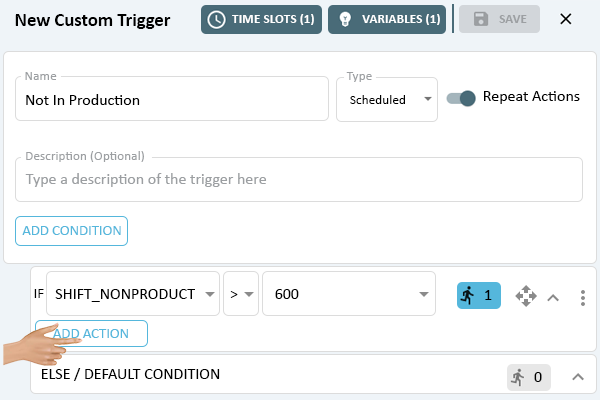
To add an evaluation of Variables, click on the Add Condition button.
NOTE: Variables must be setup before adding a condition. Variable setup is not discussed on the page, please see the Variables page for more information.
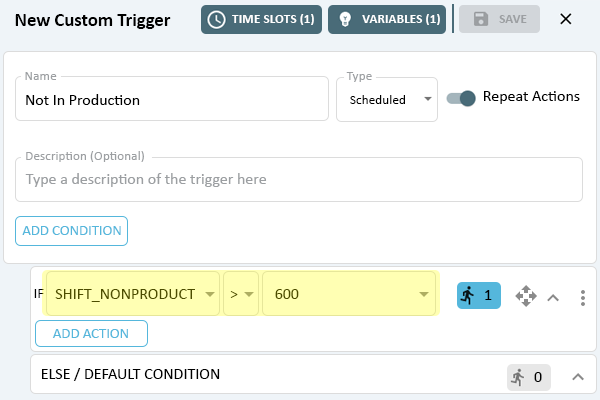
A condition setup menu will load under the Trigger properties. The setup presents a simple IF statement.
In the first Variable field the user will either type in a value or click on the down arrow to select a Variable.
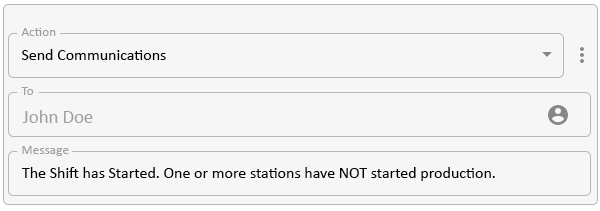
For this example, the images will show an evaluation of Production Time not being started at the beginning of the shift. When it exceeds 10 minutes the system will set the Downtime alarm.
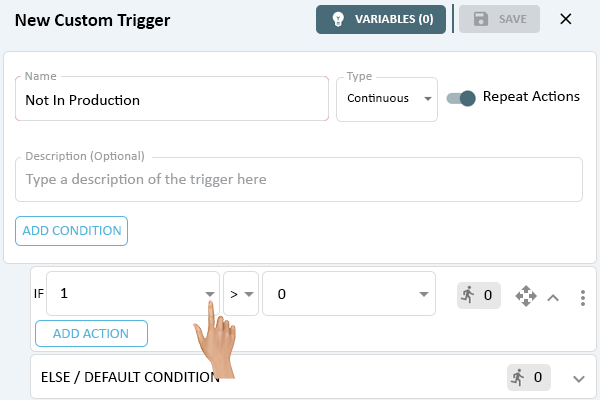
In the middle of the 2 Variable fields there is a comparator. Click on the down arrow to select a specific comparator.
All the comparators are typical math symbols.
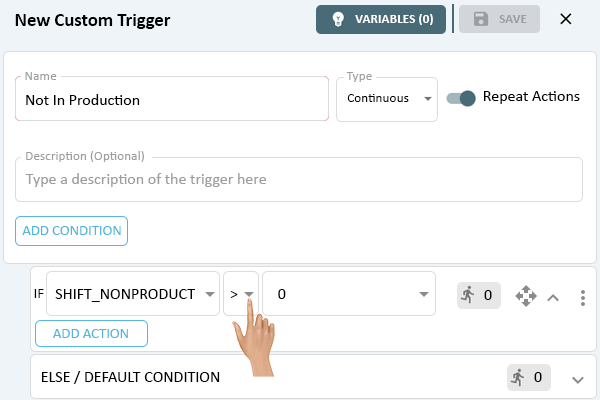
In the second Variable field the user will either type in a value or click on the down arrow to select a Variable.
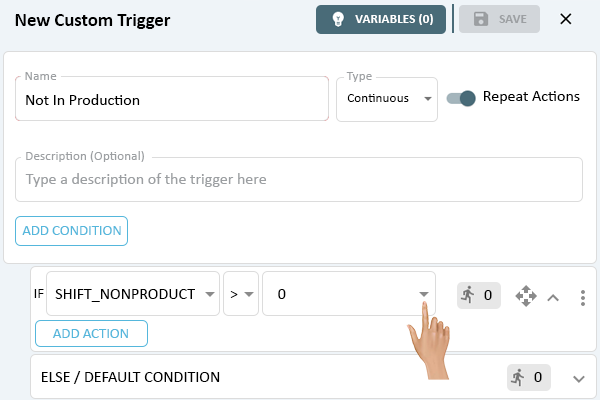
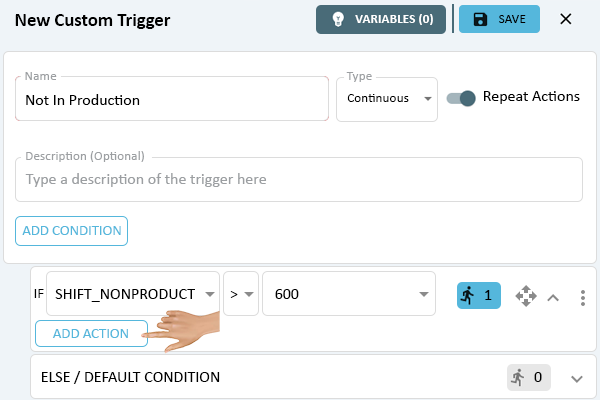
If an Action needs to occur when this IF statement is met, click on the Add Action button below the first Variable field.
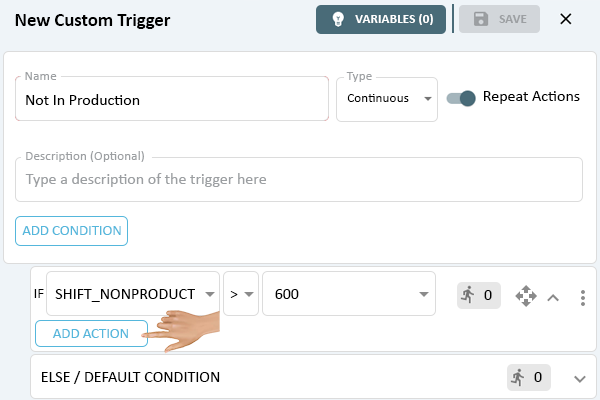
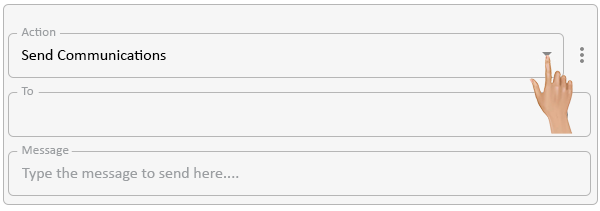
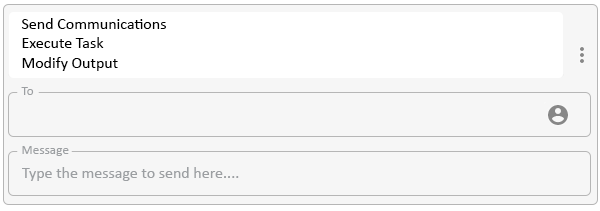
An Action setup menu will load below the Condition setup menu. Click on the down arrow in the Action field.
Step. 13
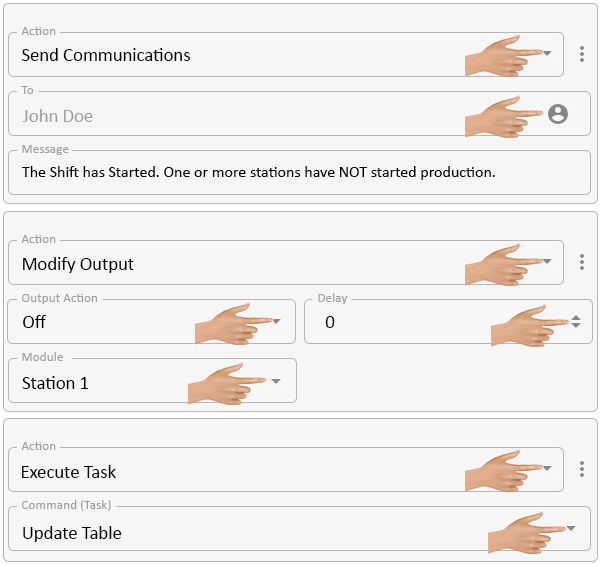
There are 3 different types of Actions that can be selected/setup.
Send Communications - selecting this option will allow the user to enter a message and send that message to specific contacts.
Execute Task - selecting this option will allow the user to select a Task Command to run.
Modify Output - selecting this option will allow the user to select an output on an IO modules.
Send Communication Setup
In the To field click on the Contact icon.
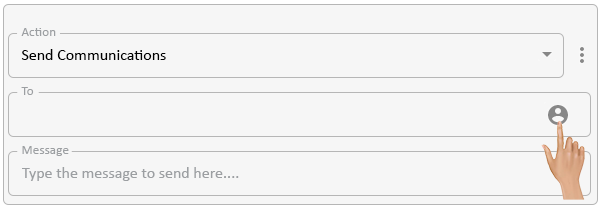
On the Contact setup menu there will be an Included column and an Available column. Contacts on the Included column will receive the message when the condition is met.
Add a Contact to the Included column by dragging and dropping it from the Available column.
Once all Contacts have been added, click on the Close button in the bottom right corner of the menu.
The To field will show all of the contacts that were selected. Click in the Message field.
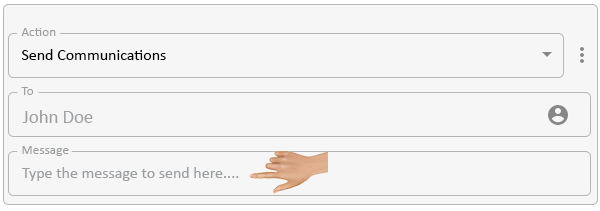
Enter the Message that needs to be sent out when the condition is met.
Additional Actions can be added to the Condition by selecting the Add Action button.

Execute Task Setup
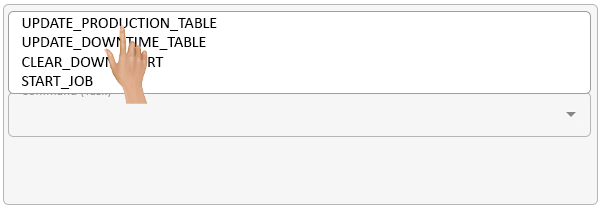
In the Command (Task) field click on the down arrow.
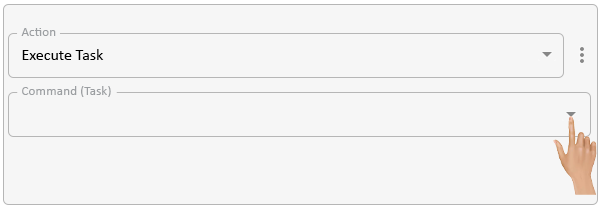
Select the Command that needs to be run from the list.
For information on Commands see the Commands page of this Wiki.
Additional Actions can be added to the Condition by selecting the Add Action button.

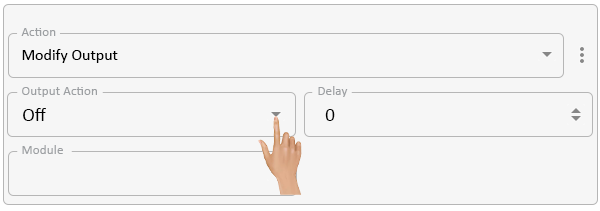
Modify Output Setup
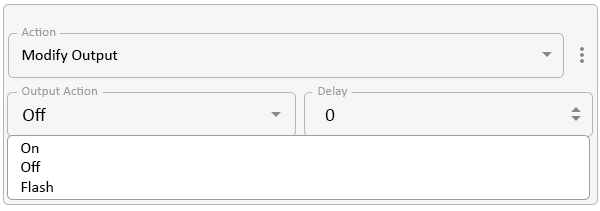
In the Output Action field, click on the down arrow to select what should happen to the output.
There will be 3 options available in the drop down menu, On, Off and Flash.
ON - the user will select this option when the output is to be turned ON.
OFF - the user will select this option when the output is to be turned OFF.
FLASH - the user will select this option when the output is to be Flashed/Blinked.
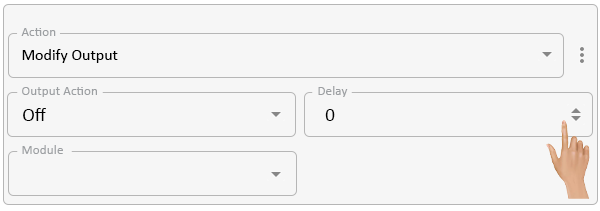
The Delay field is used to enter an amount of seconds to expire before the Output Action is run.
Click in the field to enter an amount or use the up and down arrows on the right side of the field to increase and decrease the number.
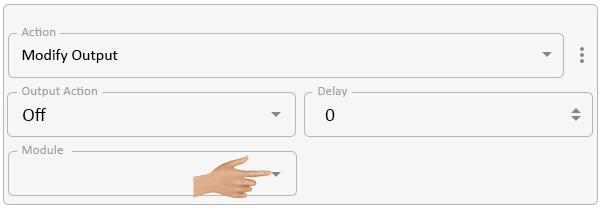
The Module field is where the user will select the IO Module to perform the Output Action on. Click on the down arrow in the field.
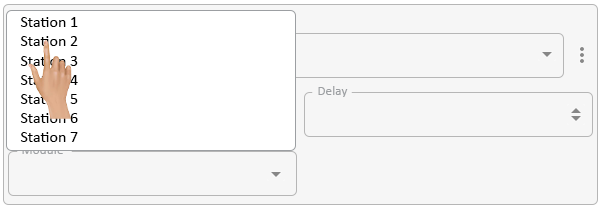
Select the Module that is to have the Output Action.
Additional Actions can be added to the Condition by selecting the Add Action button.
Below the IF Condition setup menu is the Else/Default Condition setup menu. Click on the Add Action button to setup an action.
This is where the user can setup an action to occur either by default when there are no other conditions or when none of the IF conditions occur.

The Action setup is exactly the same as the setup in the IF condition.

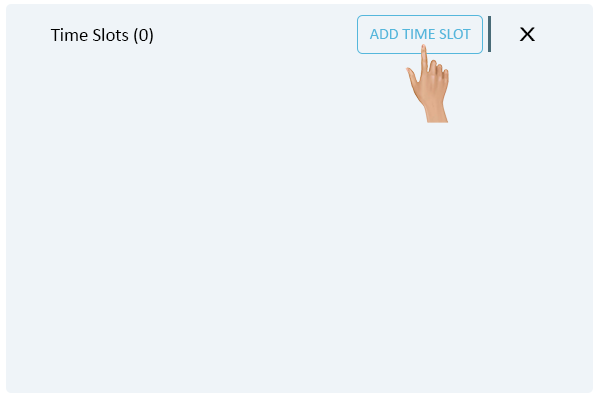
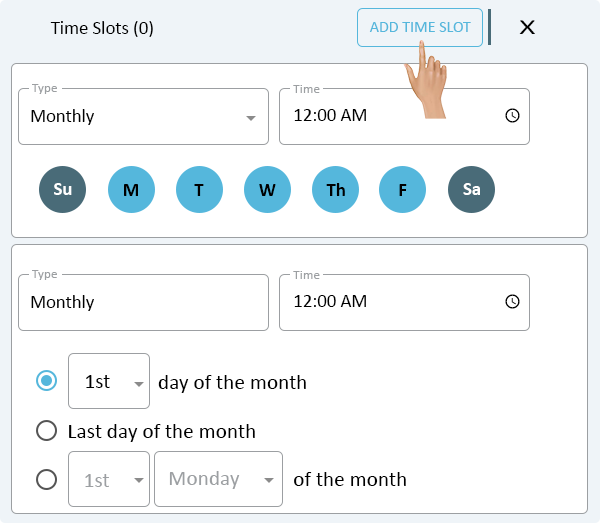
If the Trigger Type is set to Scheduled there will be a Time Slots button visible at the top of the page. Click on this button to access the Time Slot setup.

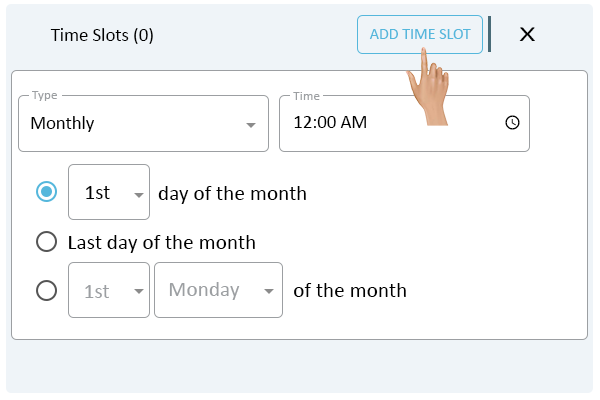
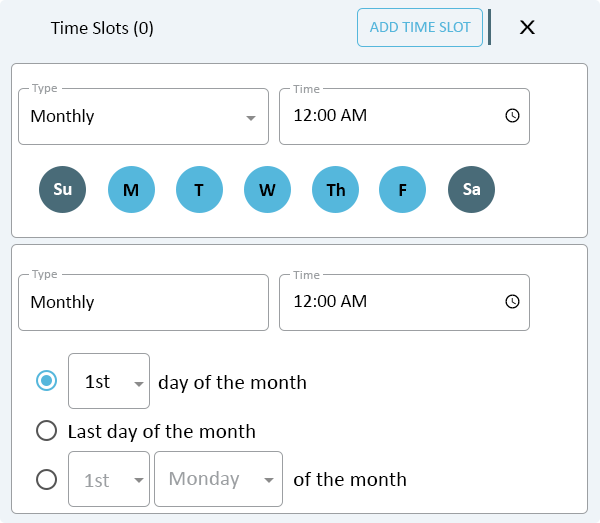
Click on the Add Time Slot button to add a time.
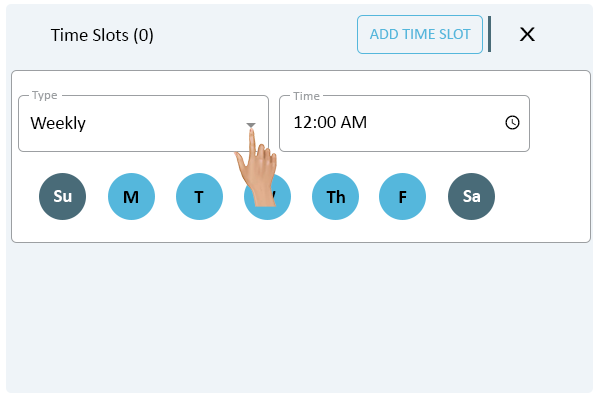
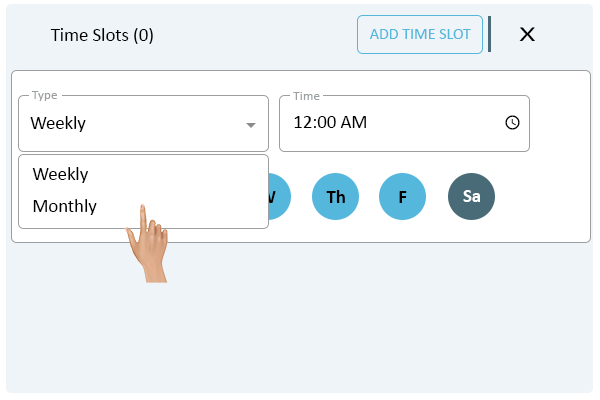
The Type field allows the user to define the frequency of the Trigger. Click on the down arrow.
There will be 2 options available Weekly & Monthly, select the appropriate option.
Weekly - selecting this option will mean that the trigger will run every week.
Monthly - selecting this option will mean that the trigger will run every month.
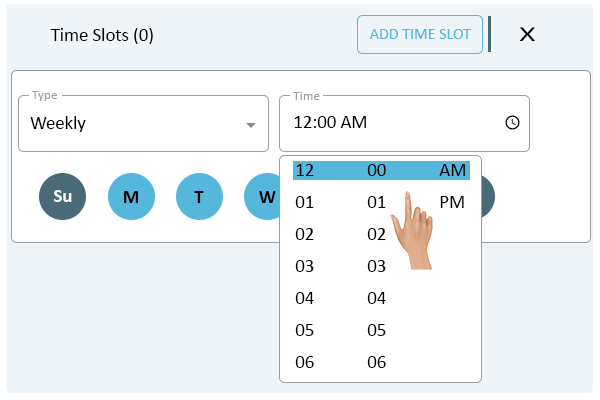
The Time field allows the user to enter the time of day the Trigger is to be run. Click on the clock icon on the right side of the field.
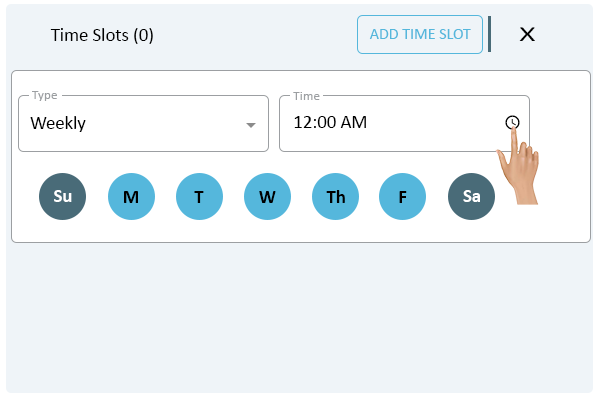
Select the Hour, Minute and AM/PM.
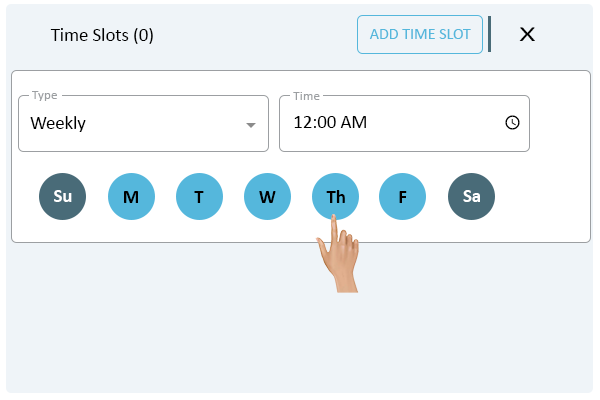
When Weekly is selected as the Type, the days of the week will be represented by icons below the Type and Time fields. Click on the days of the week that the Trigger should be run.
When Monthly is selected as the Type, there will be 3 options visible below the Type and Time fields.
Day of the Month - users will select a day of the month for the Trigger to run.
Last Day of the Month - users will select this option if the Trigger is only to be run on the last day of the month.
Specific Day of the Month - users will select this option if the Trigger is to run on the 1st, 2nd, 3rd, 4th or 5th specific day of the month.

Additional Time Slots can be added to the Trigger by clicking on the Add Time Slot button at the top of the menu.
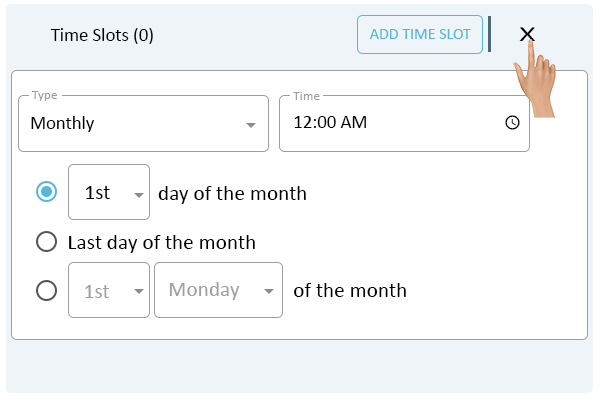
Once all Time Slots have been added, click on the "X" at the top right corner of the menu.
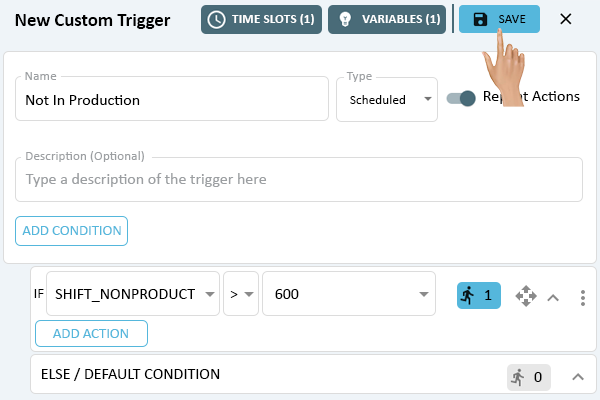
When all functions have been setup, click on the Save button at the top of the page.
Click on the "X" next to the Save button to return to the Triggers list page.
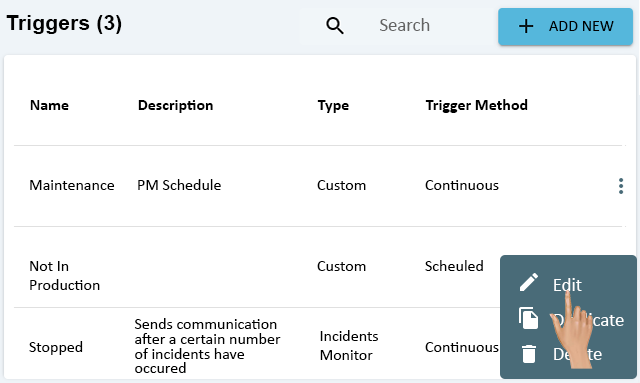
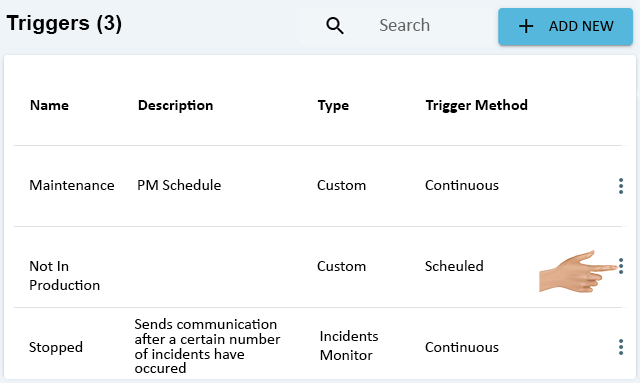
Click on the 3 dot menu in-line with the custom Trigger that needs to be edited.
All custom Triggers will have Custom in the Type column. All other Triggers will have a name in the Type column.
Select Edit from the pop-up menu.
All fields on the Trigger can be changed. On the monitor setup menu, click on the Name, Description, or Type fields to edit them. Repeat Actions can be enabled or disabled using the toggle switch.
Add new or additional conditions by clicking on the Add Condition button.
On the condition setup menu, all fields can be changed by using the down arrow or typing in a new value.
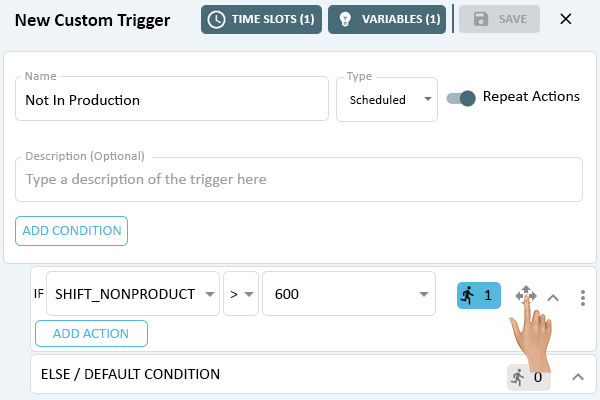
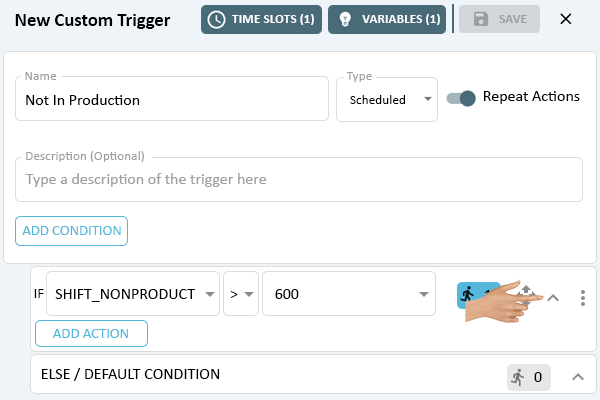
The order of Conditions can be changed by clicking on the move icon while holding down the mouse button.
Move the condition up or down in the order.
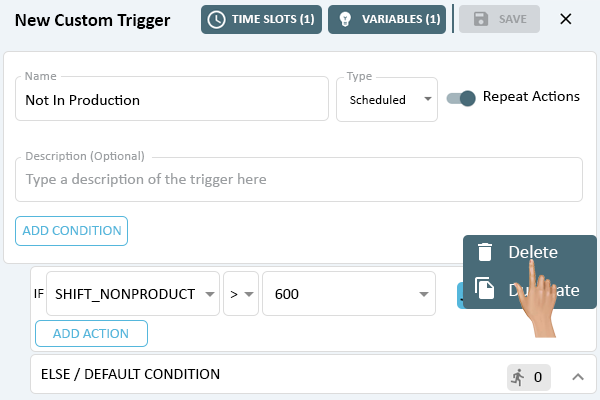
Conditions can be removed by clicking on the 3 dot menu on the right.

Select Delete from the pop-up menu.
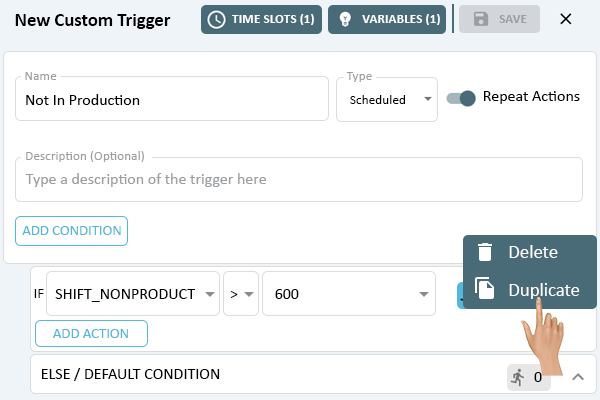
Conditions can be duplicated by clicking on the 3 dot menu on the right.
Select Duplicate from the pop-up menu.
The duplicated condition will load at the bottom of the conditions list.
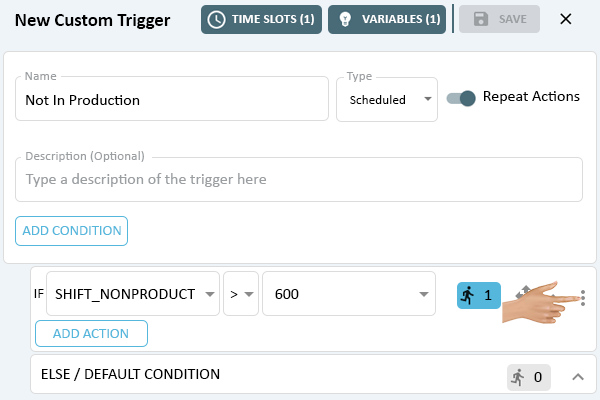
Conditions will show as a condensed cell. To view the actions associated with the condition, click on the expand icon.
All fields of the action can be edited by selecting the down arrow or clicking in the field and entering a value.
Additional actions can be added to a condition by clicking on the Add Action button.
For a Scheduled Trigger, click on the Time Slots button to edit the times.
On the Time Slots menu, all fields associated with a Weekly or Monthly slot can be edited.
Additional Time Slots can be added by clicking on the Add Time Slot button.
Variables can be accessed by clicking on the Variables button.
Adding and Editing Variables is not discussed on this page. Please see the Variables page for information.
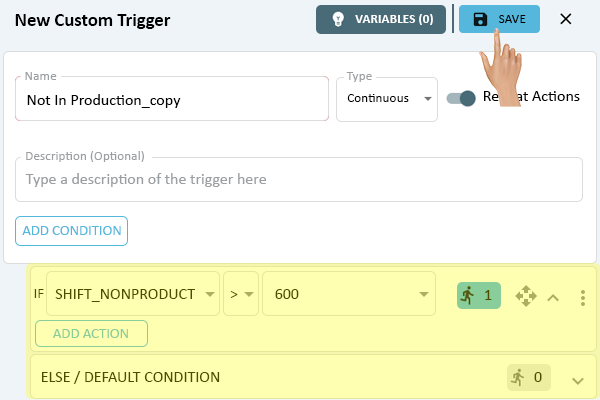
One all the changes have been made, click on the Save button at the top of the page.
Click on the "X" next to the Save button to return to the Triggers list.

Click on the 3 dot menu in-line with the custom Trigger that needs to be duplicated.

Select Duplicate from the pop-up menu.
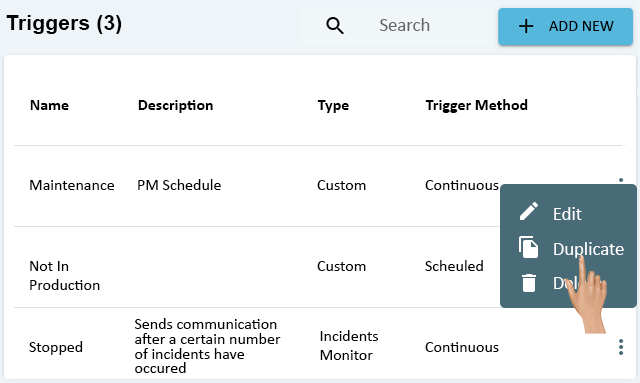
The New Trigger window will load. The Name must be changed before the Trigger can be saved, click in the Name field and enter a name.
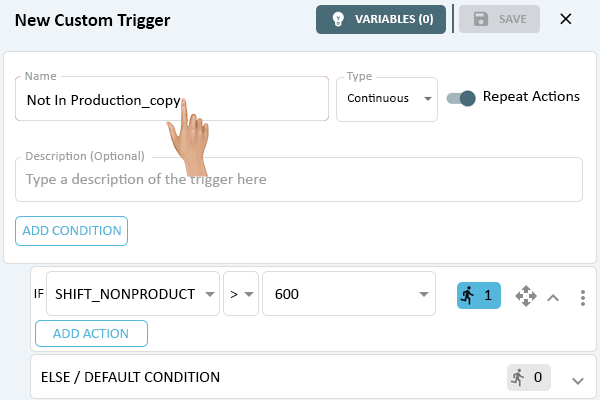
Edit any Condition or Action needed then click on the Save button at the top of the page.
Click on the "X" next to the Save button to return to the Triggers list.
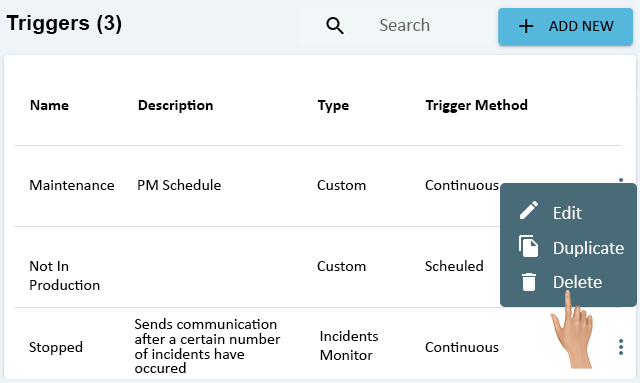
Click on the 3 dot menu in-line with the Trigger that needs to be removed.
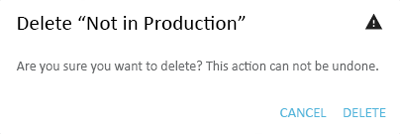
Select Delete from the pop-up menu.
A warning message will load. Select Delete to remove the Trigger or Cancel to keep the Trigger.
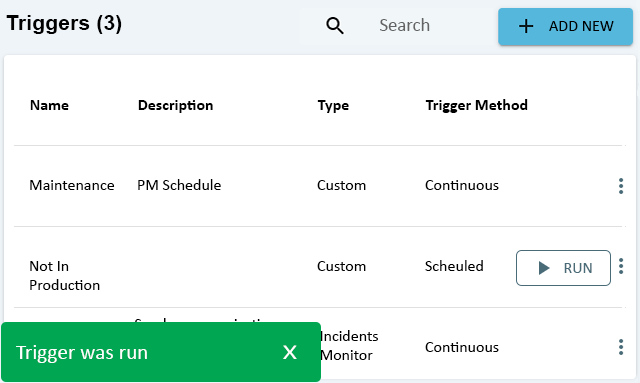
Scheduled Triggers can be manually run without having to wait for the time slot. Click on the Run button in-line with the Trigger that needs to be run.

A message will show on the screen stating the Trigger has been run.

|