Difference between revisions of "Commands"
From VersaVision Support
(Created page with "<div style="text-align: center;"><span style="color:#0054a6; font-size:150%;"><u>'''OVERVIEW'''</u></span></div> <BR> Commands are where customized items can be added that add functionality to the system. <BR> <BR> Commands will differ by system. The command can be as simple as adding a value to a table to calculating OEE. <BR> <BR> This page will concentrate on Viewing, Editing, Adding, Duplicating and Deleting a Command. '''NOTE:''' No coding will be discussed/explaine...") |
|||
| (3 intermediate revisions by one other user not shown) | |||
| Line 15: | Line 15: | ||
<BR> | <BR> | ||
<gallery widths=600px heights=198px> | <gallery widths=600px heights=198px> | ||
File:Commands-Home.png | File:Commands-Home.png|link=Commands | ||
</gallery> | </gallery> | ||
---- | ---- | ||
| Line 24: | Line 24: | ||
<span id="EDIT"></span> | <span id="EDIT"></span> | ||
<div style="text-align: center;"><span style="color:#0054a6; font-size:150%;"><u>'''EDIT A COMMAND'''</u></span></div> | <div style="text-align: center;"><span style="color:#0054a6; font-size:150%;"><u>'''EDIT A COMMAND'''</u></span></div> | ||
<BR> | <BR> | ||
On the Commands page there will be a list of all the Commands setup in the system. Click on the 3 dot menu in-line with the Command that needs to be Edited. | On the Commands page there will be a list of all the Commands setup in the system. Click on the 3 dot menu in-line with the Command that needs to be Edited. | ||
<BR> | <BR> | ||
<gallery widths=600px heights=186px> | <gallery widths=600px heights=186px> | ||
File:Commands-1.png | File:Commands-1.png|link=Commands | ||
</gallery> | </gallery> | ||
---- | ---- | ||
<BR> | <BR> | ||
Select Edit from the pop-up menu. | Select Edit from the pop-up menu. | ||
<BR> | <BR> | ||
<gallery widths=600px heights=186px> | <gallery widths=600px heights=186px> | ||
File:Commands-2.png | File:Commands-2.png|link=Commands | ||
</gallery> | </gallery> | ||
---- | ---- | ||
<BR> | <BR> | ||
The Edit (SQL or JavaScript) Command window will load. | |||
The Edit (SQL or | |||
<BR> | <BR> | ||
The Command (SQL or | The Command (SQL or JavaScript) will show in the black screen. | ||
<BR> | <BR> | ||
<gallery widths=600px heights=165px> | <gallery widths=600px heights=165px> | ||
File:Commands-3.png | File:Commands-3.png|link=Commands | ||
</gallery> | </gallery> | ||
<BR> | <BR> | ||
<gallery widths=600px heights=165px> | <gallery widths=600px heights=165px> | ||
File:Commands-4.png | File:Commands-4.png|link=Commands | ||
</gallery> | </gallery> | ||
---- | ---- | ||
<BR> | <BR> | ||
Select the Properties button to change the Name, Type and Description. | Select the Properties button to change the Name, Type and Description. | ||
<BR> | <BR> | ||
<gallery widths=600px heights=165px> | <gallery widths=600px heights=165px> | ||
File:Commands-5.png | File:Commands-5.png|link=Commands | ||
</gallery> | </gallery> | ||
---- | ---- | ||
<BR> | <BR> | ||
A Table Command will have a Timeout section in addition to the Name, Type and Description. | A Table Command will have a Timeout section in addition to the Name, Type and Description. | ||
<BR> | <BR> | ||
A | A JavaScript Command will only have the Name, Type and Description. | ||
<BR> | <BR> | ||
<gallery widths=600px heights=250px> | <gallery widths=600px heights=250px> | ||
File:Commands-6.png | File:Commands-6.png|link=Commands | ||
</gallery> | </gallery> | ||
<BR> | <BR> | ||
<gallery widths=600px heights=250px> | <gallery widths=600px heights=250px> | ||
File:Commands-7.png | File:Commands-7.png|link=Commands | ||
</gallery> | </gallery> | ||
---- | ---- | ||
<BR> | <BR> | ||
Close the Properties window by clicking on the "X" in the top right corner of the window. | Close the Properties window by clicking on the "X" in the top right corner of the window. | ||
<BR> | <BR> | ||
<gallery widths=600px heights=250px> | <gallery widths=600px heights=250px> | ||
File:Commands-8.png | File:Commands-8.png|link=Commands | ||
</gallery> | </gallery> | ||
---- | ---- | ||
<BR> | <BR> | ||
Select the Parameters button to change the Name, Type and Description. | Select the Parameters button to change the Name, Type and Description. | ||
<BR> | <BR> | ||
<gallery widths=600px heights=165px> | <gallery widths=600px heights=165px> | ||
File:Commands-9.png | File:Commands-9.png|link=Commands | ||
</gallery> | </gallery> | ||
---- | ---- | ||
<BR> | <BR> | ||
Parameter Properties will be the same for a Table Command or JavaScript Command. | |||
Parameter Properties will be the same for a Table Command or | |||
<BR> | <BR> | ||
Click in the Name or Description fields to edit. | Click in the Name or Description fields to edit. | ||
| Line 108: | Line 93: | ||
<BR> | <BR> | ||
<gallery widths=600px heights=266px> | <gallery widths=600px heights=266px> | ||
File:Commands-10.png | File:Commands-10.png|link=Commands | ||
</gallery> | </gallery> | ||
---- | ---- | ||
<BR> | <BR> | ||
To remove a Parameter, click on the 3 dot menu. | To remove a Parameter, click on the 3 dot menu. | ||
| Line 119: | Line 102: | ||
<BR> | <BR> | ||
<gallery widths=600px heights=266px> | <gallery widths=600px heights=266px> | ||
File:Commands-11.png | File:Commands-11.png|link=Commands | ||
</gallery> | </gallery> | ||
<gallery widths=600px heights=266px> | <gallery widths=600px heights=266px> | ||
File:Commands-12.png | File:Commands-12.png|link=Commands | ||
</gallery> | </gallery> | ||
---- | ---- | ||
<BR> | <BR> | ||
Click on the Add Parameter button to add a Parameter to the command. | Click on the Add Parameter button to add a Parameter to the command. | ||
<BR> | <BR> | ||
<gallery widths=600px heights=266px> | <gallery widths=600px heights=266px> | ||
File:Commands-13.png | File:Commands-13.png|link=Commands | ||
</gallery> | </gallery> | ||
---- | ---- | ||
<BR> | <BR> | ||
Close the Parameters window by clicking on the "X" in the top right corner of the window. | Close the Parameters window by clicking on the "X" in the top right corner of the window. | ||
<BR> | <BR> | ||
<gallery widths=600px heights=266px> | <gallery widths=600px heights=266px> | ||
File:Commands-14.png | File:Commands-14.png|link=Commands | ||
</gallery> | </gallery> | ||
---- | ---- | ||
<BR> | <BR> | ||
To edit the code for a Command, click in any line or highlight a line. Change, Add or Remove code from the Command. Please ensure important Commands that are operating correctly are not edited as it can cause issues. | To edit the code for a Command, click in any line or highlight a line. Change, Add or Remove code from the Command. Please ensure important Commands that are operating correctly are not edited as it can cause issues. | ||
<BR> | <BR> | ||
<gallery widths=600px heights=165px> | <gallery widths=600px heights=165px> | ||
File:Commands-15.png | File:Commands-15.png|link=Commands | ||
</gallery> | </gallery> | ||
---- | ---- | ||
<BR> | <BR> | ||
Once all of the Edits have been made click on the Save button in the top right corner of the window. | Once all of the Edits have been made click on the Save button in the top right corner of the window. | ||
<BR> | <BR> | ||
<gallery widths=600px heights=165px> | <gallery widths=600px heights=165px> | ||
File:Commands-16.png | File:Commands-16.png|link=Commands | ||
</gallery> | </gallery> | ||
---- | ---- | ||
<BR> | <BR> | ||
To Close the Edit Command window click on the "X" next to the Save button. | To Close the Edit Command window click on the "X" next to the Save button. | ||
<BR> | <BR> | ||
<gallery widths=600px heights=165px> | <gallery widths=600px heights=165px> | ||
File:Commands-17.png | File:Commands-17.png|link=Commands | ||
</gallery> | </gallery> | ||
---- | ---- | ||
<BR> | <BR> | ||
If the Name, Command Type or Description was changed, the changes will be reflected in the Command List. | If the Name, Command Type or Description was changed, the changes will be reflected in the Command List. | ||
<BR> | <BR> | ||
<gallery widths=600px heights=186px> | <gallery widths=600px heights=186px> | ||
File:Commands-18.png | File:Commands-18.png|link=Commands | ||
</gallery> | </gallery> | ||
---- | ---- | ||
| Line 185: | Line 156: | ||
<span id="DELETE"></span> | <span id="DELETE"></span> | ||
<div style="text-align: center;"><span style="color:#0054a6; font-size:150%;"><u>'''DELETE A COMMAND'''</u></span></div> | <div style="text-align: center;"><span style="color:#0054a6; font-size:150%;"><u>'''DELETE A COMMAND'''</u></span></div> | ||
<BR> | <BR> | ||
Click on the 3 dot menu in-line with the Command that needs to be removed. | Click on the 3 dot menu in-line with the Command that needs to be removed. | ||
<BR> | <BR> | ||
<gallery widths=600px heights=186px> | <gallery widths=600px heights=186px> | ||
File:Commands-1.png | File:Commands-1.png|link=Commands | ||
</gallery> | </gallery> | ||
---- | ---- | ||
<BR> | <BR> | ||
Select Delete from the pop-up menu. | Select Delete from the pop-up menu. | ||
<BR> | <BR> | ||
<gallery widths=600px heights=186px> | <gallery widths=600px heights=186px> | ||
File:Commands-19.png | File:Commands-19.png|link=Commands | ||
</gallery> | </gallery> | ||
---- | ---- | ||
<BR> | <BR> | ||
The Command will be removed from the system, there will not be any warning. | The Command will be removed from the system, there will not be any warning. | ||
<BR> | <BR> | ||
<gallery widths=600px heights=186px> | <gallery widths=600px heights=186px> | ||
File:Commands-20.png | File:Commands-20.png|link=Commands | ||
</gallery> | </gallery> | ||
---- | ---- | ||
| Line 218: | Line 183: | ||
<span id="DUPLICATE"></span> | <span id="DUPLICATE"></span> | ||
<div style="text-align: center;"><span style="color:#0054a6; font-size:150%;"><u>'''DUPLICATE A COMMAND'''</u></span></div> | <div style="text-align: center;"><span style="color:#0054a6; font-size:150%;"><u>'''DUPLICATE A COMMAND'''</u></span></div> | ||
<BR> | <BR> | ||
Click on the 3 dot menu in-line with the Command that needs to be copied. | Click on the 3 dot menu in-line with the Command that needs to be copied. | ||
<BR> | <BR> | ||
<gallery widths=600px heights=186px> | <gallery widths=600px heights=186px> | ||
File:Commands-1.png | File:Commands-1.png|link=Commands | ||
</gallery> | </gallery> | ||
---- | ---- | ||
<BR> | <BR> | ||
Select Duplicate from the pop-up menu. | Select Duplicate from the pop-up menu. | ||
<BR> | <BR> | ||
<gallery widths=600px heights=186px> | <gallery widths=600px heights=186px> | ||
File:Commands-21.png | File:Commands-21.png|link=Commands | ||
</gallery> | </gallery> | ||
---- | ---- | ||
<BR> | <BR> | ||
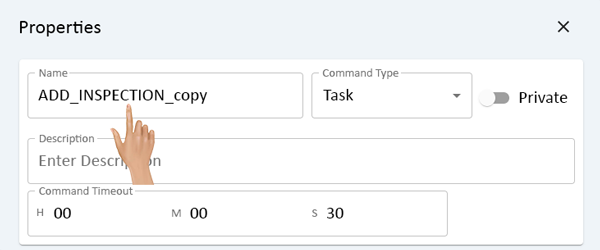
The Properties window will load. Change the Name of the Command. | The Properties window will load. Change the Name of the Command. | ||
<BR> | <BR> | ||
<gallery widths=600px heights=250px> | <gallery widths=600px heights=250px> | ||
File:Commands-22.png | File:Commands-22.png|link=Commands | ||
</gallery> | </gallery> | ||
---- | ---- | ||
<BR> | <BR> | ||
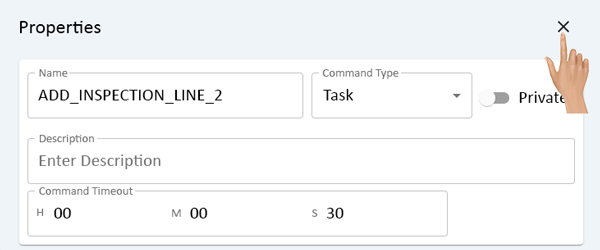
Click on the "X" in the right corner of the Properties window. | Click on the "X" in the right corner of the Properties window. | ||
<BR> | <BR> | ||
<gallery widths=600px heights=250px> | <gallery widths=600px heights=250px> | ||
File:Commands-23.png | File:Commands-23.png|link=Commands | ||
</gallery> | </gallery> | ||
---- | ---- | ||
<BR> | <BR> | ||
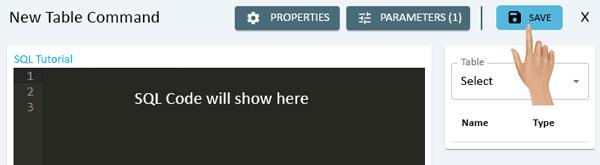
Make any changes any other components of the Command. When all changes have been made, click on the Save button. | Make any changes any other components of the Command. When all changes have been made, click on the Save button. | ||
<BR> | <BR> | ||
<gallery widths=600px heights=165px> | <gallery widths=600px heights=165px> | ||
File:Commands-24.png | File:Commands-24.png|link=Commands | ||
</gallery> | </gallery> | ||
---- | ---- | ||
<BR> | <BR> | ||
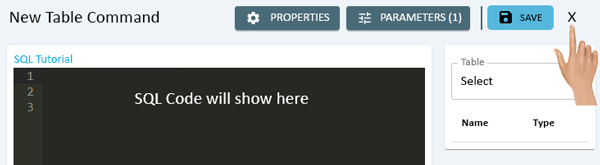
Click on the "X" next to the Save button to close the New Command window. | Click on the "X" next to the Save button to close the New Command window. | ||
<BR> | <BR> | ||
<gallery widths=600px heights=165px> | <gallery widths=600px heights=165px> | ||
File:Commands-25.png | File:Commands-25.png|link=Commands | ||
</gallery> | </gallery> | ||
<BR> | <BR> | ||
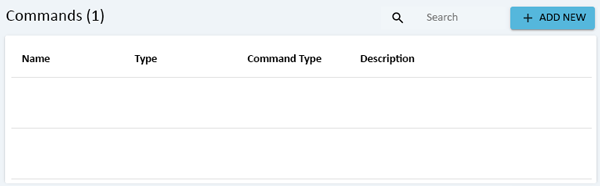
The duplicated Command will show in the Commands list. | The duplicated Command will show in the Commands list. | ||
<BR> | <BR> | ||
<gallery widths=600px heights=186px> | <gallery widths=600px heights=186px> | ||
File:Commands-26.png | File:Commands-26.png|link=Commands | ||
</gallery> | </gallery> | ||
---- | ---- | ||
| Line 286: | Line 237: | ||
<span id="RUN"></span> | <span id="RUN"></span> | ||
<div style="text-align: center;"><span style="color:#0054a6; font-size:150%;"><u>'''RUN A COMMAND'''</u></span></div> | <div style="text-align: center;"><span style="color:#0054a6; font-size:150%;"><u>'''RUN A COMMAND'''</u></span></div> | ||
<BR> | <BR> | ||
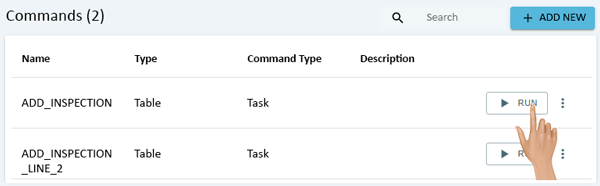
Click on the Run button in-line with the Command name. | Click on the Run button in-line with the Command name. | ||
<BR> | <BR> | ||
<gallery widths=600px heights=186px> | <gallery widths=600px heights=186px> | ||
File:Commands-27.png | File:Commands-27.png|link=Commands | ||
</gallery> | </gallery> | ||
---- | ---- | ||
<BR> | <BR> | ||
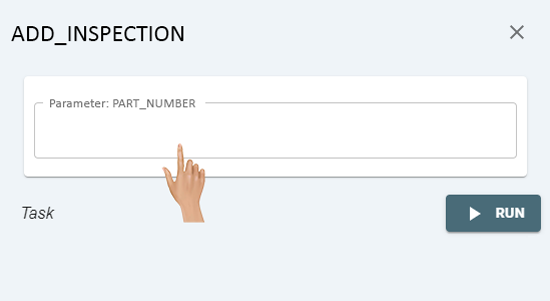
A Run window will load requesting any Parameters that were setup for the Command. Enter the appropriate information into the Parameter(s) field(s). | A Run window will load requesting any Parameters that were setup for the Command. Enter the appropriate information into the Parameter(s) field(s). | ||
<BR> | <BR> | ||
<gallery widths=550px heights=301px> | <gallery widths=550px heights=301px> | ||
File:Commands-28.png | File:Commands-28.png|link=Commands | ||
</gallery> | </gallery> | ||
---- | ---- | ||
<BR> | <BR> | ||
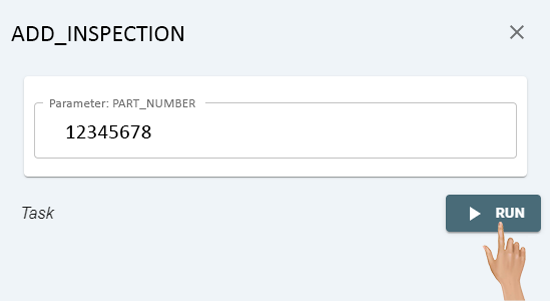
Once all Parameters have been addressed, click on the Run button in the bottom right corner of the window. | Once all Parameters have been addressed, click on the Run button in the bottom right corner of the window. | ||
<BR> | <BR> | ||
<gallery widths=550px heights=301px> | <gallery widths=550px heights=301px> | ||
File:Commands-29.png | File:Commands-29.png|link=Commands | ||
</gallery> | </gallery> | ||
---- | ---- | ||
<BR> | <BR> | ||
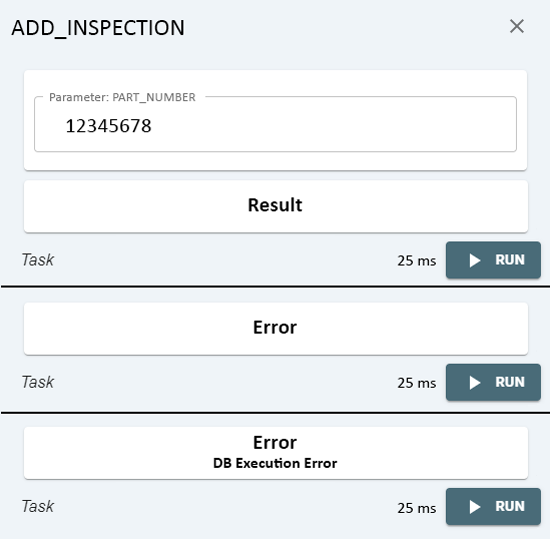
A Result field will show below the the Parameter field(s). Depending on the type of Command being run, there may not be any result. The total run time will show next to the Run button. | A Result field will show below the the Parameter field(s). Depending on the type of Command being run, there may not be any result. The total run time will show next to the Run button. | ||
<BR> | <BR> | ||
If there are errors in the SQL or | If there are errors in the SQL or JavaScript Code, an Error message will appear in the Result field. | ||
<BR> | <BR> | ||
<gallery widths=550px heights=539px> | <gallery widths=550px heights=539px> | ||
File:Commands-30.png | File:Commands-30.png|link=Commands | ||
</gallery> | </gallery> | ||
---- | ---- | ||
<BR> | <BR> | ||
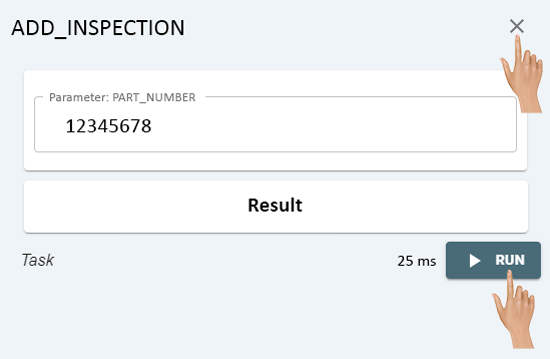
Re-Run the Command by clicking the the Run button a second time. To Close the window click on the "X" in the top right corner of the window. | Re-Run the Command by clicking the the Run button a second time. To Close the window click on the "X" in the top right corner of the window. | ||
<BR> | <BR> | ||
<gallery widths=550px heights=359px> | <gallery widths=550px heights=359px> | ||
File:Commands-31.png | File:Commands-31.png|link=Commands | ||
</gallery> | </gallery> | ||
---- | ---- | ||
| Line 339: | Line 280: | ||
|[[File:VC Footer.png|center]] | |[[File:VC Footer.png|center]] | ||
|} | |} | ||
<div class="logo_img" > | |||
{|style="background:transparent; color:black" border="0" height="200" align="center" valign="bottom" cellpadding=10px cellspacing=10px | {|style="background:transparent; color:black" border="0" height="200" align="center" valign="bottom" cellpadding=10px cellspacing=10px | ||
|+style="background:transparent| | |+style="background:transparent| | ||
|-align="center" | |-align="center" | ||
| | | | ||
|[[File:LinkedIn.png|Follow Us On LinkedIn|link=https://www.linkedin.com/company/versacall | |[[File:LinkedIn.png|Follow Us On LinkedIn|link=https://www.linkedin.com/company/versacall/]] | ||
| | | | ||
|[[File:BlogIcon.png|View our Blog|link=https://www.versacall.com/blog/]] | |[[File:BlogIcon.png|View our Blog|link=https://www.versacall.com/blog/]] | ||
|} | |} | ||
</div> | |||
Latest revision as of 14:15, 10 July 2023
Commands are where customized items can be added that add functionality to the system.
Commands will differ by system. The command can be as simple as adding a value to a table to calculating OEE.
This page will concentrate on Viewing, Editing, Adding, Duplicating and Deleting a Command. NOTE: No coding will be discussed/explained.
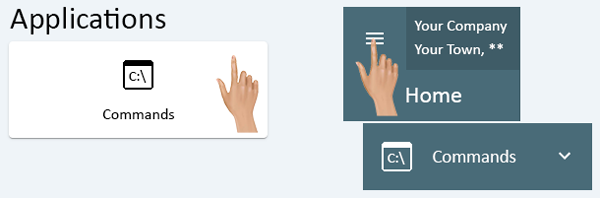
Commands can be accessed via the Home page menu or the Commands icon under Applications.
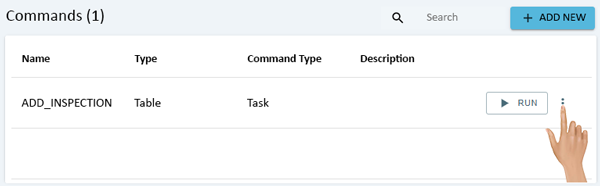
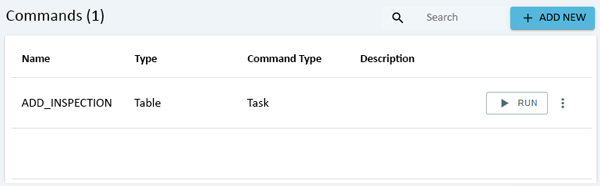
On the Commands page there will be a list of all the Commands setup in the system. Click on the 3 dot menu in-line with the Command that needs to be Edited.
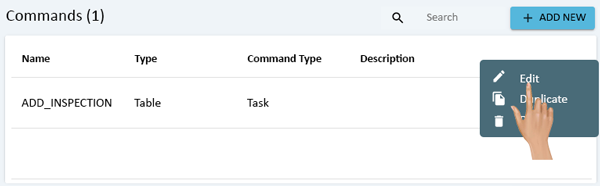
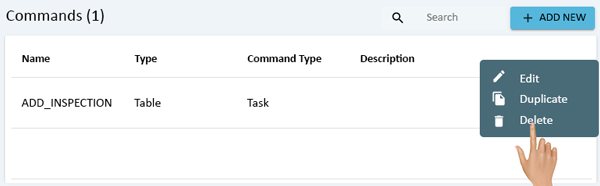
Select Edit from the pop-up menu.
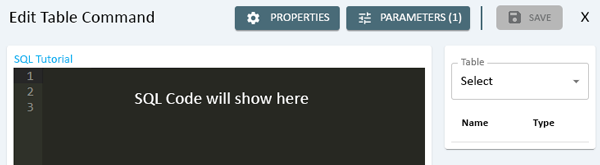
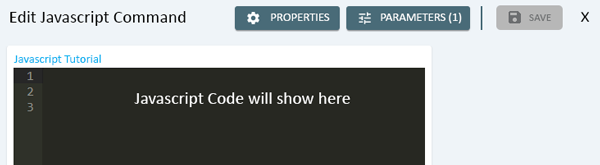
The Edit (SQL or JavaScript) Command window will load.
The Command (SQL or JavaScript) will show in the black screen.
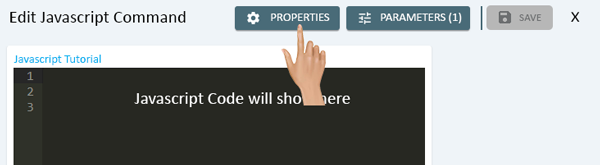
Select the Properties button to change the Name, Type and Description.
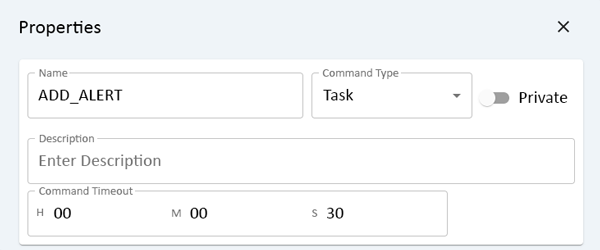
A Table Command will have a Timeout section in addition to the Name, Type and Description.
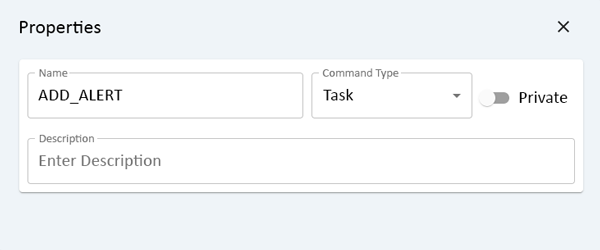
A JavaScript Command will only have the Name, Type and Description.
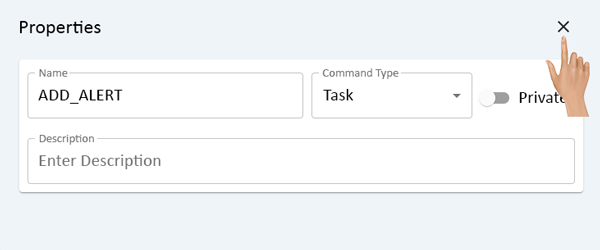
Close the Properties window by clicking on the "X" in the top right corner of the window.
Select the Parameters button to change the Name, Type and Description.

Parameter Properties will be the same for a Table Command or JavaScript Command.
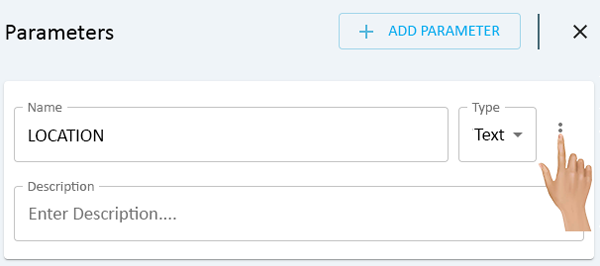
Click in the Name or Description fields to edit.
Click on the down arrow in the Type field to change.

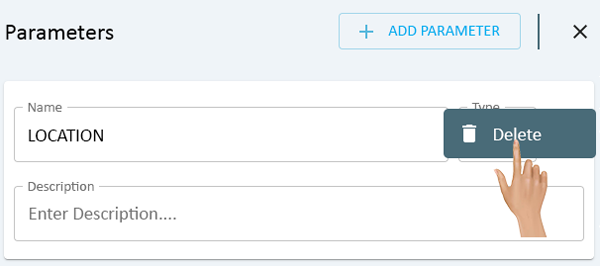
To remove a Parameter, click on the 3 dot menu.
Select Delete from the pop-up menu.
Click on the Add Parameter button to add a Parameter to the command.

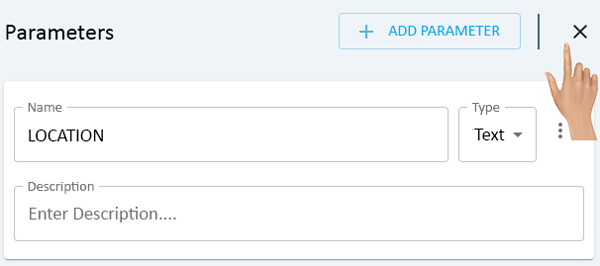
Close the Parameters window by clicking on the "X" in the top right corner of the window.
To edit the code for a Command, click in any line or highlight a line. Change, Add or Remove code from the Command. Please ensure important Commands that are operating correctly are not edited as it can cause issues.

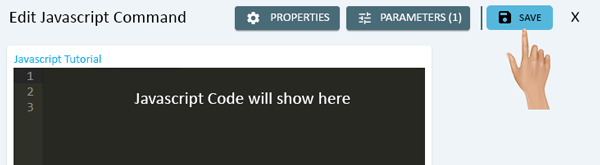
Once all of the Edits have been made click on the Save button in the top right corner of the window.
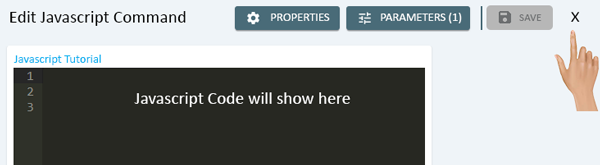
To Close the Edit Command window click on the "X" next to the Save button.
If the Name, Command Type or Description was changed, the changes will be reflected in the Command List.
Click on the 3 dot menu in-line with the Command that needs to be removed.
Select Delete from the pop-up menu.
The Command will be removed from the system, there will not be any warning.
Click on the 3 dot menu in-line with the Command that needs to be copied.
Select Duplicate from the pop-up menu.

The Properties window will load. Change the Name of the Command.
Click on the "X" in the right corner of the Properties window.
Make any changes any other components of the Command. When all changes have been made, click on the Save button.
Click on the "X" next to the Save button to close the New Command window.
The duplicated Command will show in the Commands list.
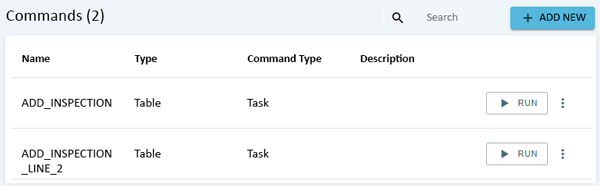
Click on the Run button in-line with the Command name.
A Run window will load requesting any Parameters that were setup for the Command. Enter the appropriate information into the Parameter(s) field(s).
Once all Parameters have been addressed, click on the Run button in the bottom right corner of the window.
A Result field will show below the the Parameter field(s). Depending on the type of Command being run, there may not be any result. The total run time will show next to the Run button.
If there are errors in the SQL or JavaScript Code, an Error message will appear in the Result field.
Re-Run the Command by clicking the the Run button a second time. To Close the window click on the "X" in the top right corner of the window.

|