Difference between revisions of "Red Hat Install - Docker and Core Installation"
From VersaVision Support
(Created page with "Under Construction") |
|||
| Line 1: | Line 1: | ||
<BR> | |||
<span style="box-shadow:2px 2px 15px #90A4AE; border-radius:5px; padding:20px">[[File:Red-Dock-Main.png|250px|link=Red Hat Install - Docker and Core Installation]]</span> | |||
<div style="text-align: center;"><span style="color:#0054a6; font-size:150%;"><u>'''OVERVIEW'''</u></span></div> | |||
<BR> | |||
<div style="box-shadow:2px 2px 15px #90A4AE; border-radius:5px; padding:10px"> | |||
: | |||
:The VersaVision software runs inside of a Docker environment. | |||
:Each Application runs inside of a specific Container on Docker. | |||
:In order to get the system running, we will need to install Docker and the Core Package on the Red Hat Computer/Server/VM | |||
:The user will need the IP Address of the Computer/Server/VM. | |||
:Verify with your IT Department that the IP Address assigned is either a Static IP or DHCP Reserved Address. | |||
:The guide below will explain how to install Docker and the Core Software Package. | |||
</div> | |||
<BR> | |||
<div style="text-align: center;"><span style="color:#0054a6; font-size:150%;"><u>'''REQUIREMENTS'''</u></span></div> | |||
<BR> | |||
<div style="box-shadow:2px 2px 15px #90A4AE; border-radius:5px; padding:10px"> | |||
:: | |||
::Computer/Server/VM must be loaded with Red Hat 8 or 9. | |||
::IT must assign an Administrator level user name and password for VersaCall Installation/User. | |||
::Internet Access Required for the Installation process. Access can be removed after installation. | |||
::SSH Client is required if the User/Installer does not have physical access to the server. | |||
::Server/Computer/VM must have a Static IP Address or a DHCP Reserved IP Address. | |||
::The Core and Docker files must already be downloaded and uploaded to the Red Hat Computer/Server/VM. | |||
</div> | |||
<BR> | |||
<div style="text-align: center;"><span style="color:#0054a6; font-size:150%;"><u>'''TOOL TIP'''</u></span></div> | |||
<BR> | |||
<div style="box-shadow:2px 2px 15px #90A4AE; border-radius:5px; padding:10px"> | |||
:: | |||
::There is specific Code that needs to be entered in on the steps below. The Paste function in Terminal works differently from Windows. | |||
:::'''To Copy''' - select the Code/Text in the cell so that it is highlighted. Press the Control Key & C Key on your keyboard at the same time. Alternatively, you can right click on the highlighted text and select Copy from the pop-up menu. | |||
:::'''To Paste''' - Right Click on the Cursor next to the User Prompt. The copied text will fill in automatically. | |||
</div> | |||
<BR> | |||
---- | |||
<div class="logo_img" > | |||
{|style="background:transparent; color:black" border="0" height="230" align="right" valign="bottom" cellpadding=10px cellspacing=10px | |||
|+style="background:transparent| | |||
|-align="right" | |||
|- | |||
|[[File:Soft-Install-Btn.png|150px|Return to Software Installation Main Page|link=VersaVision Software Installation]] || [[File:Red-Step1.png|150px|Pre-Requisites Installation Guide|link=Redd Hat Install - Pre-Requisites]] || [[File:Red-Step3.png|150px|Initialize VersaVision Guide|link=Software Install - Initialization]] || [[File:Red-Step4.png|150px|Package Upload and Install Guide|link=Software Install - Package Upload]] | |||
|+style="background:transparent| | |||
|-align="right" | |||
|- | |||
| | |||
|} | |||
</div> | |||
---- | |||
<div style="text-align: center;"><span style="color:#0054a6; font-size:150%;"><u>'''INSTRUCTIONS'''</u></span></div> | |||
<BR> | |||
<div style="box-shadow:2px 2px 15px #90A4AE; border-radius:5px; padding:10px"> | |||
: | |||
:Return or Re-Open the Terminal for the Red Hat Computer/Server/VM. | |||
:[[File:Red-Dock1.png|link=Red Hat Install - Docker and Core Installation]] | |||
</div> | |||
<BR> | |||
<div style="box-shadow:2px 2px 15px #90A4AE; border-radius:5px; padding:10px"> | |||
: | |||
:Copy the Code/Text from the cell below. | |||
:<span style="color:#FFFFFF; background:#517398; border:thick solid #000000; padding:5px"><nowiki>cat /proc/sys/fs/inotify/max_user_instances</nowiki></span> | |||
</div> | |||
<BR> | |||
<div style="box-shadow:2px 2px 15px #90A4AE; border-radius:5px; padding:10px"> | |||
: | |||
:Paste the Code/Text into the Terminal. | |||
:Press the Enter key on your keyboard after the Code/Text is pasted in. | |||
:[[File:Red-Dock2.png|link=Red Hat Install - Docker and Core Installation]] | |||
</div> | |||
<BR> | |||
<div style="box-shadow:2px 2px 15px #90A4AE; border-radius:5px; padding:10px"> | |||
: | |||
:Copy the Code/Text from the cell below. | |||
:<span style="color:#FFFFFF; background:#517398; border:thick solid #000000; padding:5px"><nowiki>sudo sysctl fs.inotify.max_user_instances=524288</nowiki></span> | |||
</div> | |||
<BR> | |||
<div style="box-shadow:2px 2px 15px #90A4AE; border-radius:5px; padding:10px"> | |||
: | |||
:Paste the Code/Text into the Terminal. | |||
:Press the Enter key on your keyboard after the Code/Text is pasted in. | |||
:[[File:Red-Dock3.png|link=Red Hat Install - Docker and Core Installation]] | |||
</div> | |||
<BR> | |||
<div style="box-shadow:2px 2px 15px #90A4AE; border-radius:5px; padding:10px"> | |||
: | |||
:You maybe asked for your Red Hat password. | |||
:Type in the password on your keyboard, nothing will show on the Terminal. | |||
</div> | |||
<BR> | |||
<div style="box-shadow:2px 2px 15px #90A4AE; border-radius:5px; padding:10px"> | |||
: | |||
:Copy the Code/Text from the cell below. | |||
:<span style="color:#FFFFFF; background:#517398; border:thick solid #000000; padding:5px"><nowiki>sudo sysctl -p</nowiki></span> | |||
</div> | |||
<BR> | |||
<div style="box-shadow:2px 2px 15px #90A4AE; border-radius:5px; padding:10px"> | |||
: | |||
:Paste the Code/Text into the Terminal. | |||
:Press the Enter key on your keyboard after the Code/Text is pasted in. | |||
:[[File:Red-Dock4.png|link=Red Hat Install - Docker and Core Installation]] | |||
</div> | |||
<BR> | |||
<div style="box-shadow:2px 2px 15px #90A4AE; border-radius:5px; padding:10px"> | |||
: | |||
:Copy the Code/Text from the cell below. | |||
:<span style="color:#FFFFFF; background:#517398; border:thick solid #000000; padding:5px"><nowiki>echo fs.inotify.max_user_instances=524288 | sudo tee -a /etc/sysctl.conf</nowiki></span> | |||
</div> | |||
<BR> | |||
<div style="box-shadow:2px 2px 15px #90A4AE; border-radius:5px; padding:10px"> | |||
: | |||
:Paste the Code/Text into the Terminal. | |||
:Press the Enter key on your keyboard after the Code/Text is pasted in. | |||
:[[File:Red-Dock5.png|link=Red Hat Install - Docker and Core Installation]] | |||
</div> | |||
<BR> | |||
<div style="box-shadow:2px 2px 15px #90A4AE; border-radius:5px; padding:10px"> | |||
: | |||
:Copy the Code/Text from the cell below. | |||
:<span style="color:#FFFFFF; background:#517398; border:thick solid #000000; padding:5px"><nowiki>sudo sysctl -p</nowiki></span> | |||
</div> | |||
<BR> | |||
<div style="box-shadow:2px 2px 15px #90A4AE; border-radius:5px; padding:10px"> | |||
: | |||
:Paste the Code/Text into the Terminal. | |||
:Press the Enter key on your keyboard after the Code/Text is pasted in. | |||
:[[File:Red-Dock6.png|link=Red Hat Install - Docker and Core Installation]] | |||
</div> | |||
<BR> | |||
<div style="box-shadow:2px 2px 15px #90A4AE; border-radius:5px; padding:10px"> | |||
: | |||
:Copy the Code/Text from the cell below. | |||
:<span style="color:#FFFFFF; background:#517398; border:thick solid #000000; padding:5px"><nowiki>sudo yum update</nowiki></span> | |||
</div> | |||
<BR> | |||
<div style="box-shadow:2px 2px 15px #90A4AE; border-radius:5px; padding:10px"> | |||
: | |||
:Paste the Code/Text into the Terminal. | |||
:Press the Enter key on your keyboard after the Code/Text is pasted in. | |||
:[[File:Red-Dock7.png|link=Red Hat Install - Docker and Core Installation]] | |||
</div> | |||
<BR> | |||
<div style="box-shadow:2px 2px 15px #90A4AE; border-radius:5px; padding:10px"> | |||
: | |||
:Depending on how the system was setup/created, there can be many updates. | |||
:In our example we are showing a system that was not previously updated. | |||
:System will get a number of updates available and ask if it is ok to continue. | |||
:[[File:Red-Dock8.png|link=Red Hat Install - Docker and Core Installation]] | |||
</div> | |||
<BR> | |||
<div style="box-shadow:2px 2px 15px #90A4AE; border-radius:5px; padding:10px"> | |||
: | |||
:Press the Y key on your keyboard and select the Enter key. | |||
:[[File:Red-Dock9.png|link=Red Hat Install - Docker and Core Installation]] | |||
</div> | |||
<BR> | |||
<div style="box-shadow:2px 2px 15px #90A4AE; border-radius:5px; padding:10px"> | |||
: | |||
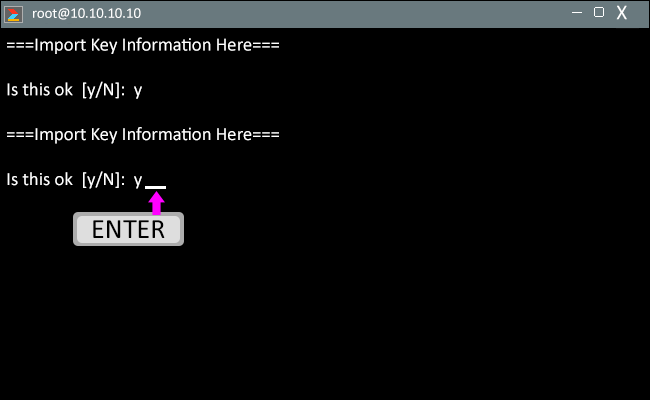
:You could possibly be asked to continue a total of 3 times. | |||
:Press the Y key on your keyboard and select the Enter key for each prompt. | |||
:[[File:Red-Dock10.png|link=Red Hat Install - Docker and Core Installation]] | |||
:[[File:Red-Dock11.png|link=Red Hat Install - Docker and Core Installation]] | |||
</div> | |||
<BR> | |||
<div style="box-shadow:2px 2px 15px #90A4AE; border-radius:5px; padding:10px"> | |||
: | |||
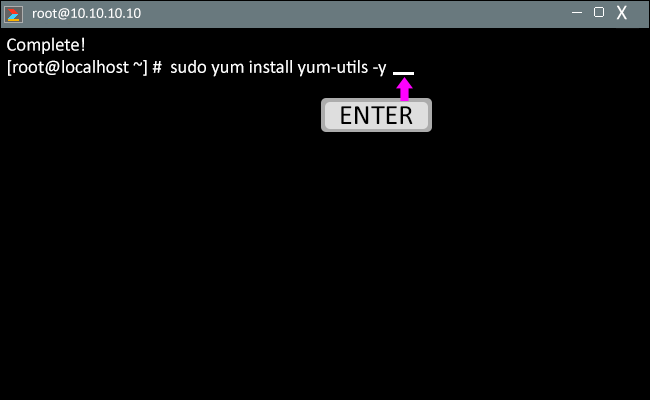
:Copy the Code/Text from the cell below. | |||
:<span style="color:#FFFFFF; background:#517398; border:thick solid #000000; padding:5px"><nowiki>sudo yum install yum-utils -y</nowiki></span> | |||
</div> | |||
<BR> | |||
<div style="box-shadow:2px 2px 15px #90A4AE; border-radius:5px; padding:10px"> | |||
: | |||
:Paste the Code/Text into the Terminal. | |||
:Press the Enter key on your keyboard after the Code/Text is pasted in. | |||
:[[File:Red-Dock12.png|link=Red Hat Install - Docker and Core Installation]] | |||
</div> | |||
<BR> | |||
<div style="box-shadow:2px 2px 15px #90A4AE; border-radius:5px; padding:10px"> | |||
: | |||
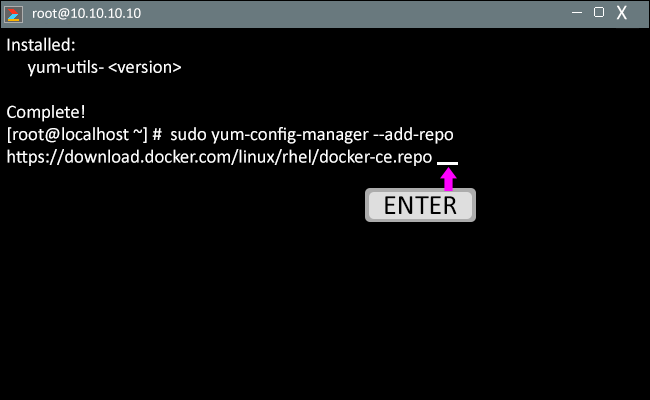
:Copy the Code/Text from the cell below. | |||
:<span style="color:#FFFFFF; background:#517398; border:thick solid #000000; padding:5px"><nowiki>sudo yum-config-manager --add-repo https://download.docker.com/linux/rhel/docker-ce.repo</nowiki></span> | |||
</div> | |||
<BR> | |||
<div style="box-shadow:2px 2px 15px #90A4AE; border-radius:5px; padding:10px"> | |||
: | |||
:Paste the Code/Text into the Terminal. | |||
:Press the Enter key on your keyboard after the Code/Text is pasted in. | |||
:[[File:Red-Dock13.png|link=Red Hat Install - Docker and Core Installation]] | |||
</div> | |||
<BR> | |||
<div style="box-shadow:2px 2px 15px #90A4AE; border-radius:5px; padding:10px"> | |||
: | |||
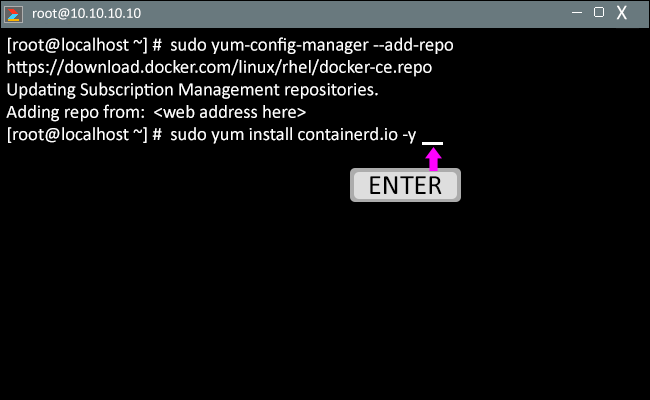
:Copy the Code/Text from the cell below. | |||
:<span style="color:#FFFFFF; background:#517398; border:thick solid #000000; padding:5px"><nowiki>sudo yum install containerd.io -y</nowiki></span> | |||
</div> | |||
<BR> | |||
<div style="box-shadow:2px 2px 15px #90A4AE; border-radius:5px; padding:10px"> | |||
: | |||
:Paste the Code/Text into the Terminal. | |||
:Press the Enter key on your keyboard after the Code/Text is pasted in. | |||
:[[File:Red-Dock14.png|link=Red Hat Install - Docker and Core Installation]] | |||
</div> | |||
<BR> | |||
<div style="box-shadow:2px 2px 15px #90A4AE; border-radius:5px; padding:10px"> | |||
: | |||
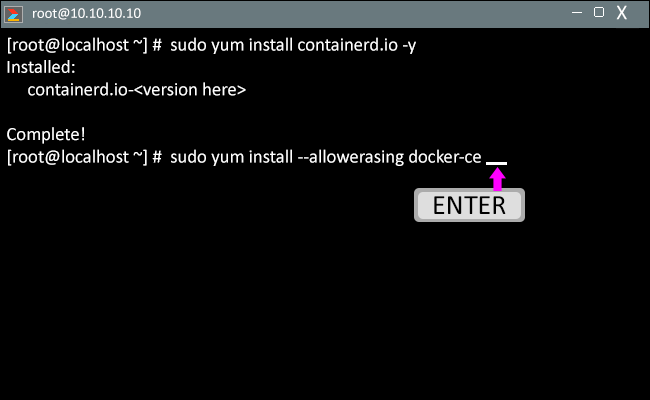
:Copy the Code/Text from the cell below. | |||
:<span style="color:#FFFFFF; background:#517398; border:thick solid #000000; padding:5px"><nowiki>sudo yum install --allowerasing docker-ce</nowiki></span> | |||
</div> | |||
<BR> | |||
<div style="box-shadow:2px 2px 15px #90A4AE; border-radius:5px; padding:10px"> | |||
: | |||
:Paste the Code/Text into the Terminal. | |||
:Press the Enter key on your keyboard after the Code/Text is pasted in. | |||
:[[File:Red-Dock15.png|link=Red Hat Install - Docker and Core Installation]] | |||
</div> | |||
<BR> | |||
<div style="box-shadow:2px 2px 15px #90A4AE; border-radius:5px; padding:10px"> | |||
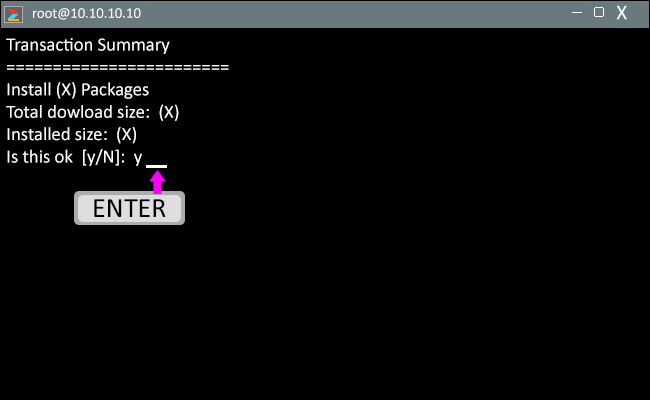
: | |||
:Sytem will ask if it is ok to continue. | |||
:Press the Y key on your keyboard and select the Enter key. | |||
:[[File:Red-Dock16.png|link=Red Hat Install - Docker and Core Installation]] | |||
</div> | |||
<BR> | |||
<div style="box-shadow:2px 2px 15px #90A4AE; border-radius:5px; padding:10px"> | |||
: | |||
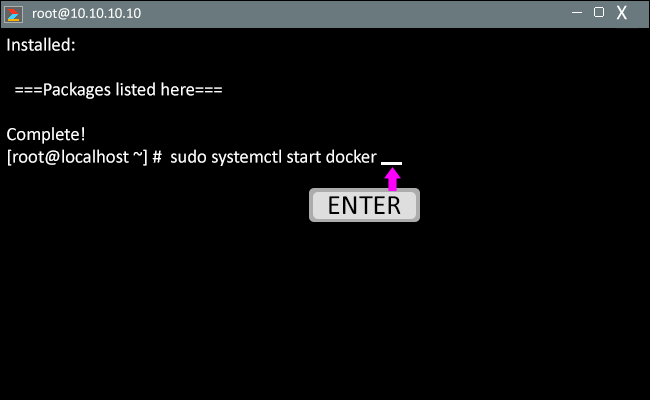
:Copy the Code/Text from the cell below. | |||
:<span style="color:#FFFFFF; background:#517398; border:thick solid #000000; padding:5px"><nowiki>sudo systemctl start docker</nowiki></span> | |||
</div> | |||
<BR> | |||
<div style="box-shadow:2px 2px 15px #90A4AE; border-radius:5px; padding:10px"> | |||
: | |||
:Paste the Code/Text into the Terminal. | |||
:Press the Enter key on your keyboard after the Code/Text is pasted in. | |||
:[[File:Red-Dock17.png|link=Red Hat Install - Docker and Core Installation]] | |||
</div> | |||
<BR> | |||
<div style="box-shadow:2px 2px 15px #90A4AE; border-radius:5px; padding:10px"> | |||
: | |||
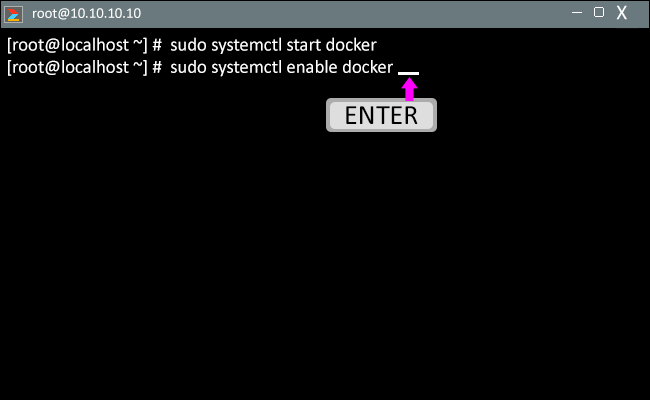
:Copy the Code/Text from the cell below. | |||
:<span style="color:#FFFFFF; background:#517398; border:thick solid #000000; padding:5px"><nowiki>sudo systemctl enable docker</nowiki></span> | |||
</div> | |||
<BR> | |||
<div style="box-shadow:2px 2px 15px #90A4AE; border-radius:5px; padding:10px"> | |||
: | |||
:Paste the Code/Text into the Terminal. | |||
:Press the Enter key on your keyboard after the Code/Text is pasted in. | |||
:[[File:Red-Dock18.png|link=Red Hat Install - Docker and Core Installation]] | |||
</div> | |||
<BR> | |||
<div style="box-shadow:2px 2px 15px #90A4AE; border-radius:5px; padding:10px"> | |||
: | |||
:Copy the Code/Text from the cell below. | |||
:<span style="color:#FFFFFF; background:#517398; border:thick solid #000000; padding:5px"><nowiki>sudo docker swarm init</nowiki></span> | |||
</div> | |||
<BR> | |||
<div style="box-shadow:2px 2px 15px #90A4AE; border-radius:5px; padding:10px"> | |||
: | |||
:Paste the Code/Text into the Terminal. | |||
:Press the Enter key on your keyboard after the Code/Text is pasted in. | |||
:[[File:Red-Dock19.png|link=Red Hat Install - Docker and Core Installation]] | |||
</div> | |||
<BR> | |||
<div style="box-shadow:2px 2px 15px #90A4AE; border-radius:5px; padding:10px"> | |||
: | |||
:Copy the Code/Text from the cell below. | |||
:<span style="color:#FFFFFF; background:#517398; border:thick solid #000000; padding:5px"><nowiki>sudo docker image load -i 'packages-api!1.1.2.tar'</nowiki></span> | |||
</div> | |||
<BR> | |||
<div style="box-shadow:2px 2px 15px #90A4AE; border-radius:5px; padding:10px"> | |||
: | |||
:Paste the Code/Text into the Terminal. | |||
:Press the Enter key on your keyboard after the Code/Text is pasted in. | |||
:[[File:Red-Dock20.png|link=Red Hat Install - Docker and Core Installation]] | |||
</div> | |||
<BR> | |||
<div style="box-shadow:2px 2px 15px #90A4AE; border-radius:5px; padding:10px"> | |||
: | |||
:Copy the Code/Text from the cell below. | |||
:<span style="color:#FFFFFF; background:#517398; border:thick solid #000000; padding:5px"><nowiki>sudo docker run -d --name initial-packages-api -p 9998:80 --mount type=bind,source=/var/run/docker.sock,destination=/var/run/docker.sock --mount type=volume,source=packages-api,destination=/var/lib/packages-api -e INITIAL_DEPLOYMENT_MODE=true packages-api:1.1.2</nowiki></span> | |||
</div> | |||
<BR> | |||
<div style="box-shadow:2px 2px 15px #90A4AE; border-radius:5px; padding:10px"> | |||
: | |||
:Paste the Code/Text into the Terminal. | |||
:Press the Enter key on your keyboard after the Code/Text is pasted in. | |||
:[[File:Red-Dock21.png|link=Red Hat Install - Docker and Core Installation]] | |||
</div> | |||
<BR> | |||
<div style="box-shadow:2px 2px 15px #90A4AE; border-radius:5px; padding:10px"> | |||
: | |||
:Copy the Code/Text from the cell below. | |||
:<span style="color:#FFFFFF; background:#517398; border:thick solid #000000; padding:5px"><nowiki>sudo curl -F 'file=@core-package!1.1.2.1.package' http://localhost:9998/api/packages/upload</nowiki></span> | |||
</div> | |||
<BR> | |||
<div style="box-shadow:2px 2px 15px #90A4AE; border-radius:5px; padding:10px"> | |||
: | |||
:Paste the Code/Text into the Terminal. | |||
:Press the Enter key on your keyboard after the Code/Text is pasted in. | |||
:[[File:Red-Dock22.png|link=Red Hat Install - Docker and Core Installation]] | |||
</div> | |||
<BR> | |||
<div style="box-shadow:2px 2px 15px #90A4AE; border-radius:5px; padding:10px"> | |||
: | |||
:This install will take 1 to 5 minutes to finish - do not enter any other commands until it is completed. | |||
:You will see the user prompt return to the screen once the install is done. | |||
:[[File:Red-Dock23.png|link=Red Hat Install - Docker and Core Installation]] | |||
</div> | |||
<BR> | |||
<div style="box-shadow:2px 2px 15px #90A4AE; border-radius:5px; padding:10px"> | |||
: | |||
:Copy the Code/Text from the cell below. | |||
:<span style="color:#FFFFFF; background:#517398; border:thick solid #000000; padding:5px"><nowiki>sudo docker container rm -f initial-packages-api</nowiki></span> | |||
</div> | |||
<BR> | |||
<div style="box-shadow:2px 2px 15px #90A4AE; border-radius:5px; padding:10px"> | |||
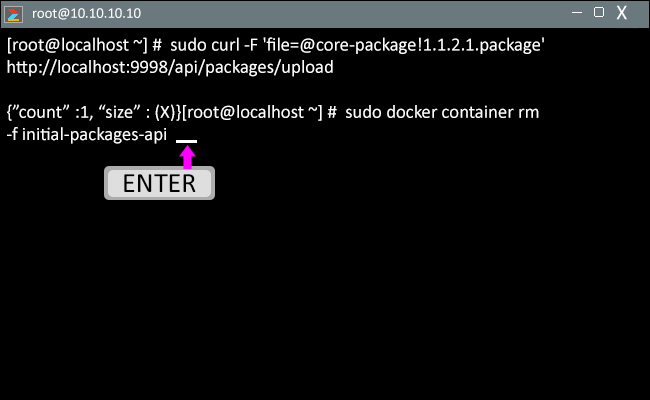
: | |||
:Paste the Code/Text into the Terminal. | |||
:Press the Enter key on your keyboard after the Code/Text is pasted in. | |||
:[[File:Red-Dock24.png|link=Red Hat Install - Docker and Core Installation]] | |||
</div> | |||
<BR> | |||
<div style="box-shadow:2px 2px 15px #90A4AE; border-radius:5px; padding:10px"> | |||
: | |||
:Return to the Software Install Main page and continue with the next Guide/Step. | |||
</div> | |||
<BR> | |||
---- | |||
<div class="logo_img" > | |||
{|style="background:transparent; color:black" border="0" height="230" align="right" valign="bottom" cellpadding=10px cellspacing=10px | |||
|+style="background:transparent| | |||
|-align="right" | |||
|- | |||
|[[File:Soft-Install-Btn.png|150px|Return to Software Installation Main Page|link=VersaVision Software Installation]] || [[File:Red-Step1.png|150px|Pre-Requisites Installation Guide|link=Redd Hat Install - Pre-Requisites]] || [[File:Red-Step3.png|150px|Initialize VersaVision Guide|link=Software Install - Initialization]] || [[File:Red-Step4.png|150px|Package Upload and Install Guide|link=Software Install - Package Upload]] | |||
|+style="background:transparent| | |||
|-align="right" | |||
|- | |||
| | |||
|} | |||
</div> | |||
---- | |||
{|style="background:transparent; color:black" border="0" height="200" align="center" valign="bottom" cellpadding=10px cellspacing=10px | |||
|+style="background:transparent| | |||
|-align="center" | |||
| | |||
|[[File:VC Footer.png|center]] | |||
|} | |||
<div class="logo_img" > | |||
{|style="background:transparent; color:black" border="0" height="200" align="center" valign="bottom" cellpadding=10px cellspacing=10px | |||
|+style="background:transparent| | |||
|-align="center" | |||
| | |||
|[[File:LinkedIn.png|Follow Us On LinkedIn|link=https://www.linkedin.com/company/versacall/]] | |||
| | |||
|[[File:BlogIcon.png|View our Blog|link=https://www.versacall.com/blog/]] | |||
|} | |||
</div> | |||
Latest revision as of 07:20, 11 April 2024

OVERVIEW
- The VersaVision software runs inside of a Docker environment.
- Each Application runs inside of a specific Container on Docker.
- In order to get the system running, we will need to install Docker and the Core Package on the Red Hat Computer/Server/VM
- The user will need the IP Address of the Computer/Server/VM.
- Verify with your IT Department that the IP Address assigned is either a Static IP or DHCP Reserved Address.
- The guide below will explain how to install Docker and the Core Software Package.
REQUIREMENTS
- Computer/Server/VM must be loaded with Red Hat 8 or 9.
- IT must assign an Administrator level user name and password for VersaCall Installation/User.
- Internet Access Required for the Installation process. Access can be removed after installation.
- SSH Client is required if the User/Installer does not have physical access to the server.
- Server/Computer/VM must have a Static IP Address or a DHCP Reserved IP Address.
- The Core and Docker files must already be downloaded and uploaded to the Red Hat Computer/Server/VM.
TOOL TIP
- There is specific Code that needs to be entered in on the steps below. The Paste function in Terminal works differently from Windows.
- To Copy - select the Code/Text in the cell so that it is highlighted. Press the Control Key & C Key on your keyboard at the same time. Alternatively, you can right click on the highlighted text and select Copy from the pop-up menu.
- To Paste - Right Click on the Cursor next to the User Prompt. The copied text will fill in automatically.
- There is specific Code that needs to be entered in on the steps below. The Paste function in Terminal works differently from Windows.
INSTRUCTIONS
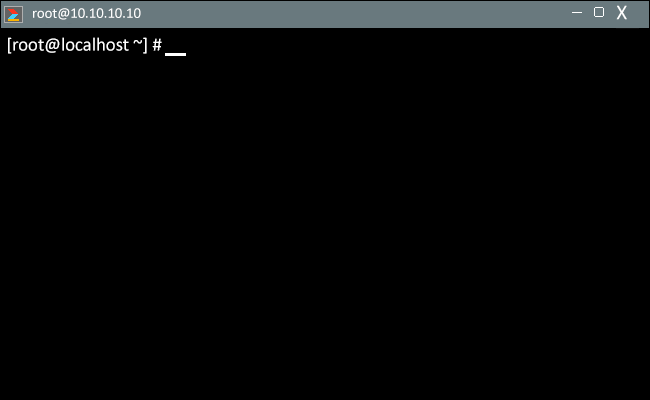
- Return or Re-Open the Terminal for the Red Hat Computer/Server/VM.
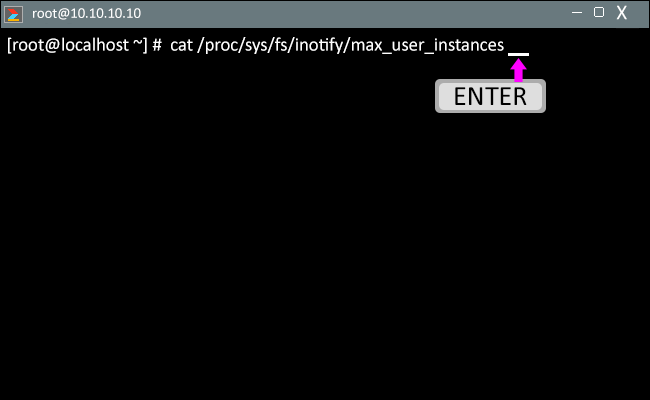
- Copy the Code/Text from the cell below.
- cat /proc/sys/fs/inotify/max_user_instances
- Paste the Code/Text into the Terminal.
- Press the Enter key on your keyboard after the Code/Text is pasted in.
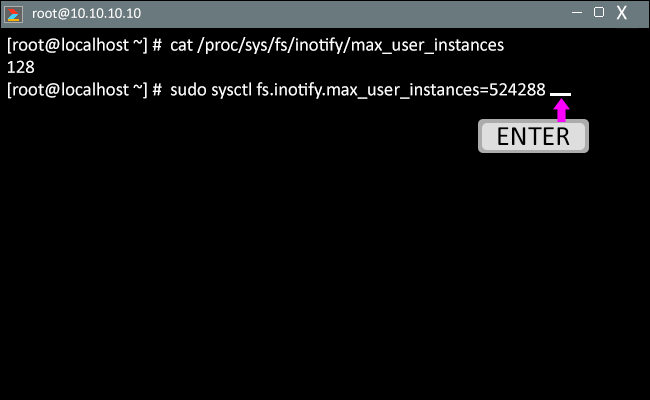
- Copy the Code/Text from the cell below.
- sudo sysctl fs.inotify.max_user_instances=524288
- Paste the Code/Text into the Terminal.
- Press the Enter key on your keyboard after the Code/Text is pasted in.
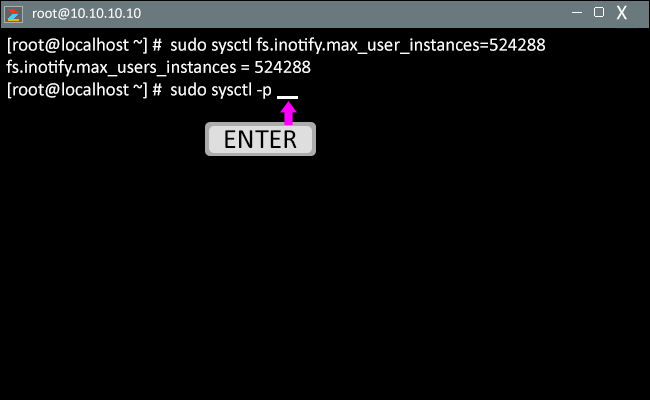
- You maybe asked for your Red Hat password.
- Type in the password on your keyboard, nothing will show on the Terminal.
- Copy the Code/Text from the cell below.
- sudo sysctl -p
- Paste the Code/Text into the Terminal.
- Press the Enter key on your keyboard after the Code/Text is pasted in.
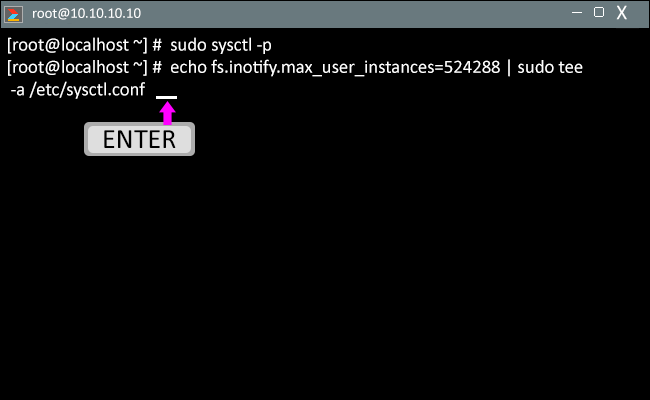
- Copy the Code/Text from the cell below.
- echo fs.inotify.max_user_instances=524288 | sudo tee -a /etc/sysctl.conf
- Paste the Code/Text into the Terminal.
- Press the Enter key on your keyboard after the Code/Text is pasted in.
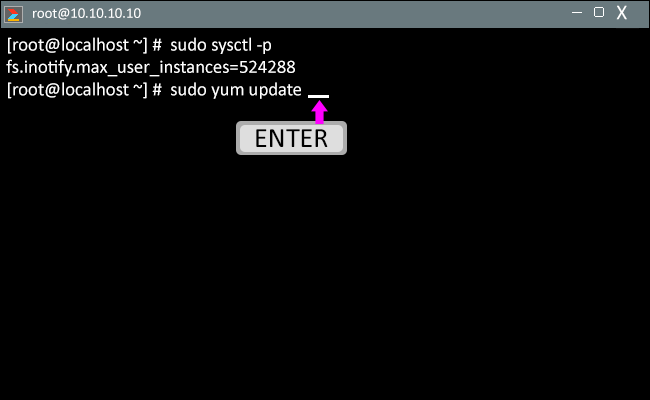
- Copy the Code/Text from the cell below.
- sudo sysctl -p
- Paste the Code/Text into the Terminal.
- Press the Enter key on your keyboard after the Code/Text is pasted in.

- Copy the Code/Text from the cell below.
- sudo yum update
- Paste the Code/Text into the Terminal.
- Press the Enter key on your keyboard after the Code/Text is pasted in.
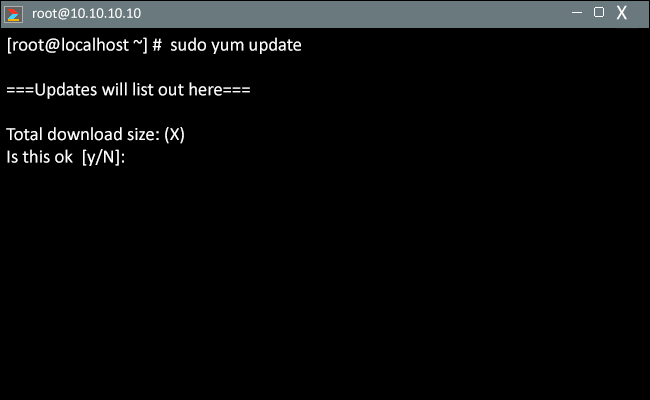
- Depending on how the system was setup/created, there can be many updates.
- In our example we are showing a system that was not previously updated.
- System will get a number of updates available and ask if it is ok to continue.
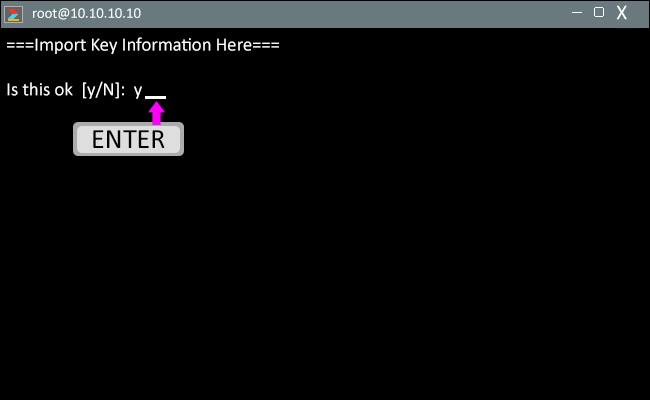
- Press the Y key on your keyboard and select the Enter key.

- You could possibly be asked to continue a total of 3 times.
- Press the Y key on your keyboard and select the Enter key for each prompt.
- Copy the Code/Text from the cell below.
- sudo yum install yum-utils -y
- Paste the Code/Text into the Terminal.
- Press the Enter key on your keyboard after the Code/Text is pasted in.
- Copy the Code/Text from the cell below.
- sudo yum-config-manager --add-repo https://download.docker.com/linux/rhel/docker-ce.repo
- Paste the Code/Text into the Terminal.
- Press the Enter key on your keyboard after the Code/Text is pasted in.
- Copy the Code/Text from the cell below.
- sudo yum install containerd.io -y
- Paste the Code/Text into the Terminal.
- Press the Enter key on your keyboard after the Code/Text is pasted in.
- Copy the Code/Text from the cell below.
- sudo yum install --allowerasing docker-ce
- Paste the Code/Text into the Terminal.
- Press the Enter key on your keyboard after the Code/Text is pasted in.
- Sytem will ask if it is ok to continue.
- Press the Y key on your keyboard and select the Enter key.
- Copy the Code/Text from the cell below.
- sudo systemctl start docker
- Paste the Code/Text into the Terminal.
- Press the Enter key on your keyboard after the Code/Text is pasted in.
- Copy the Code/Text from the cell below.
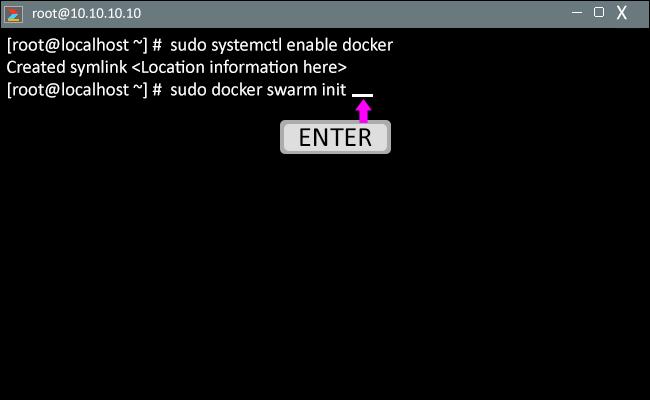
- sudo systemctl enable docker
- Paste the Code/Text into the Terminal.
- Press the Enter key on your keyboard after the Code/Text is pasted in.
- Copy the Code/Text from the cell below.
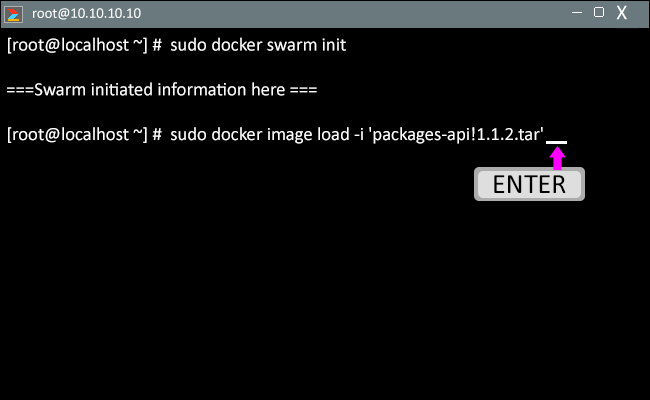
- sudo docker swarm init
- Paste the Code/Text into the Terminal.
- Press the Enter key on your keyboard after the Code/Text is pasted in.
- Copy the Code/Text from the cell below.
- sudo docker image load -i 'packages-api!1.1.2.tar'
- Paste the Code/Text into the Terminal.
- Press the Enter key on your keyboard after the Code/Text is pasted in.
- Copy the Code/Text from the cell below.
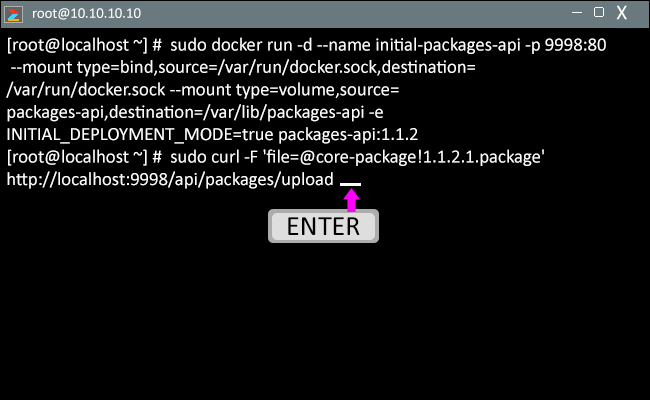
- sudo docker run -d --name initial-packages-api -p 9998:80 --mount type=bind,source=/var/run/docker.sock,destination=/var/run/docker.sock --mount type=volume,source=packages-api,destination=/var/lib/packages-api -e INITIAL_DEPLOYMENT_MODE=true packages-api:1.1.2
- Paste the Code/Text into the Terminal.
- Press the Enter key on your keyboard after the Code/Text is pasted in.

- Copy the Code/Text from the cell below.
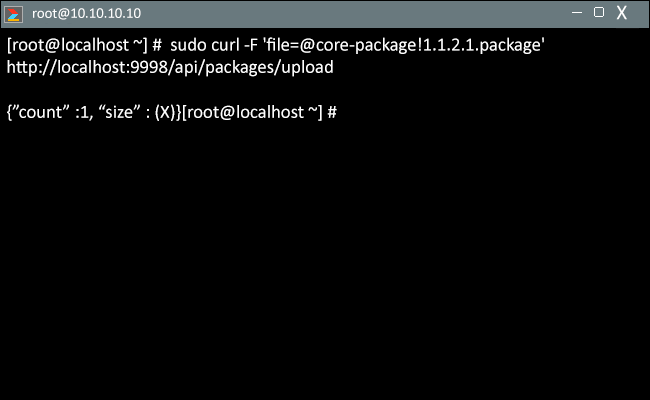
- sudo curl -F 'file=@core-package!1.1.2.1.package' http://localhost:9998/api/packages/upload
- Paste the Code/Text into the Terminal.
- Press the Enter key on your keyboard after the Code/Text is pasted in.
- This install will take 1 to 5 minutes to finish - do not enter any other commands until it is completed.
- You will see the user prompt return to the screen once the install is done.
- Copy the Code/Text from the cell below.
- sudo docker container rm -f initial-packages-api
- Paste the Code/Text into the Terminal.
- Press the Enter key on your keyboard after the Code/Text is pasted in.
- Return to the Software Install Main page and continue with the next Guide/Step.

|