Administration - Roles
From VersaVision Support
![]()
Administration is used to access important system components. There are multiple components inside Administration, this page is focused on the Roles component.
Roles are permissions for the VersaVision system. A Role is assigned to a User to define what they can and cannot do. These permissions can be broad or granular in their setup.
This page will concentrate on adding and managing Roles.
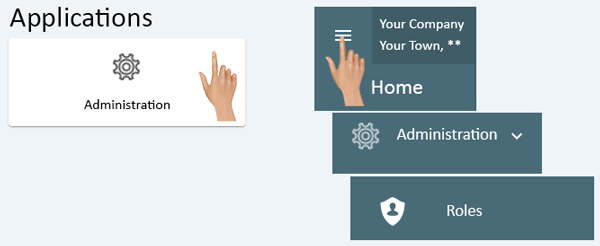
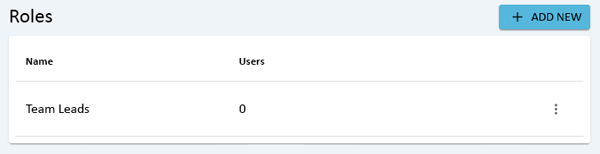
Administration can be accessed via the Home page menu or the Administration icon. Once Administration has been selected - select Roles from the menu.
|
|
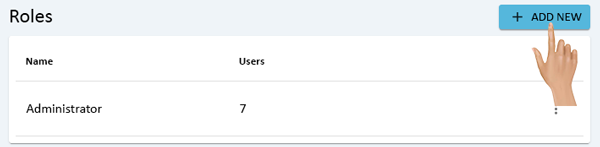
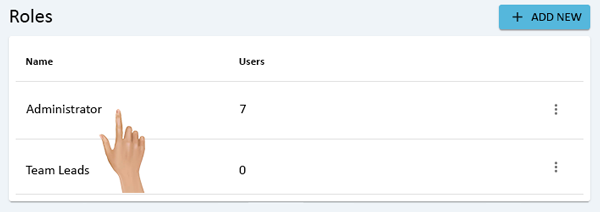
On the Roles page, click on the Add New button.
- NOTE: The Administrator Role is added by default to all systems. All permissions are enabled for this Role.
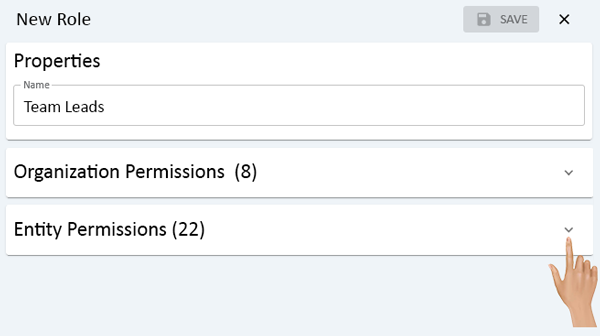
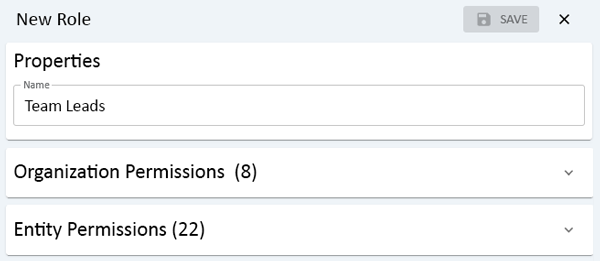
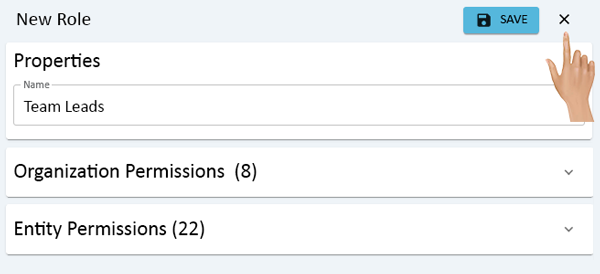
The New Role properties window will load to the right of the Roles list. Click in the Name field and enter a name for the Role.
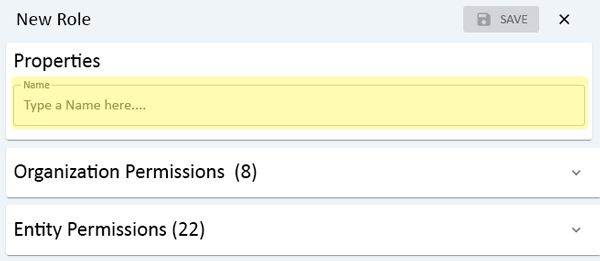
Below the Name there are 2 section, Organization Permissions & Entity Permissions.

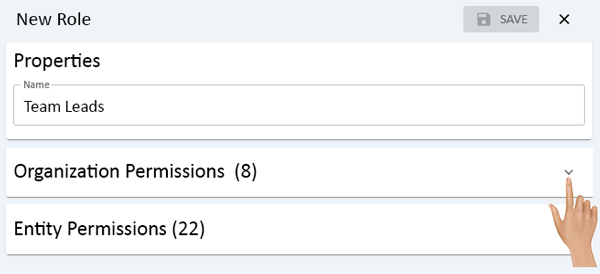
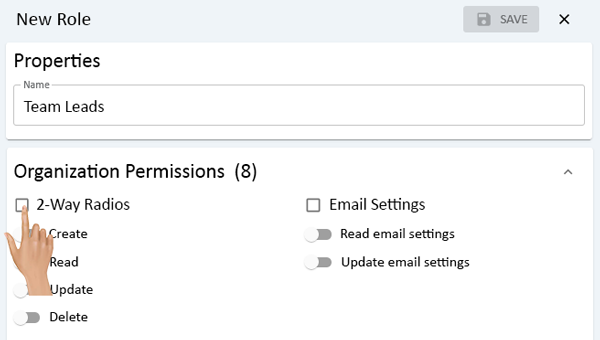
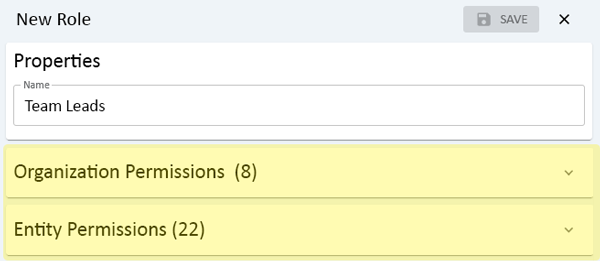
The Organization section contains 2-Way Radio, Email, Coordinator, Paging Transmitter, Twilio, User, Entity & Role Permissions. Expand the Organization section by clicking on the Collapse/Expand Arrow.
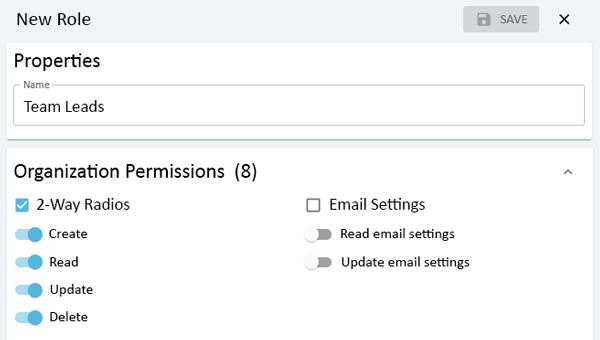
All the available Permissions that can be setup will show under the component headings. To permit everything in a component click on the box next to the heading.
A check mark will appear in the box next to the heading and all of the toggles beneath it will be enabled.
To select individual permissions in a component, click on the specific toggle.
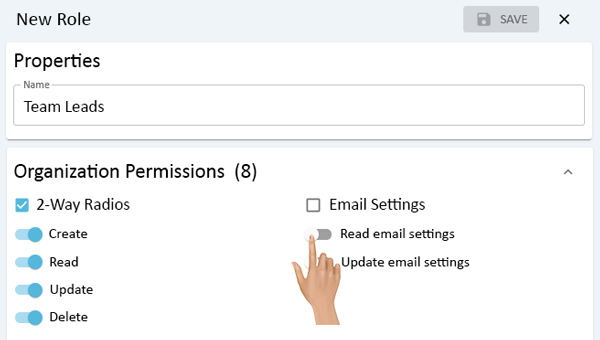
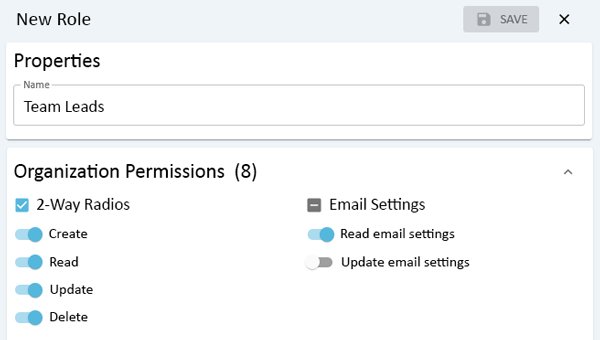
The toggle next to the permission selected will be enabled.
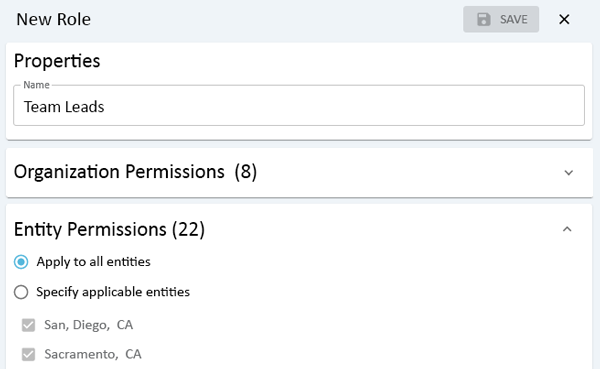
The next section available is Entity Permissions. This will set permissions for all of the other components in the system. Expand the Entity section by clicking on the Collapse/Expand Arrow.
The first item that should be addressed is what Entities/Locations the permissions set are to apply to. By default, the Apply to all Entities option will be selected.
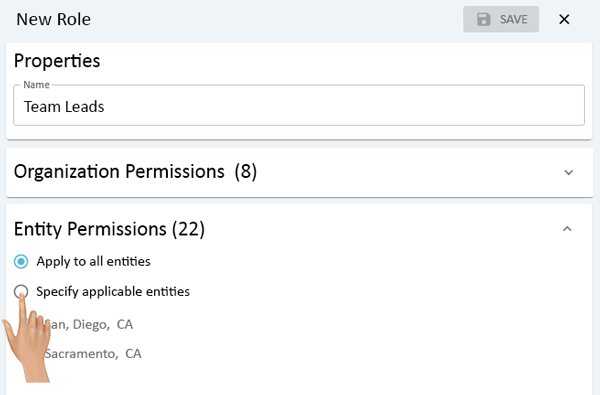
To apply permissions to individual Entities/Locations, select the Specify applicable Entities option.
Once that is selected, the ability to select individual locations will be available.
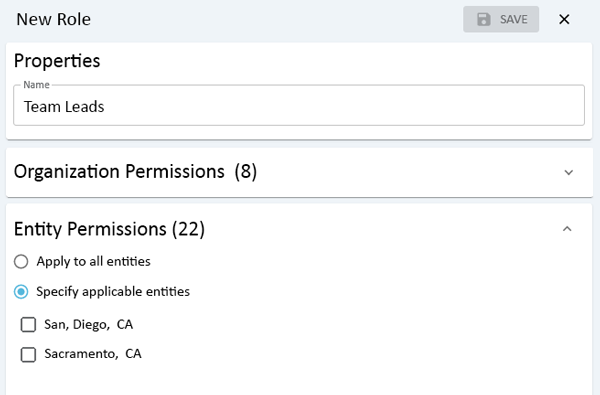
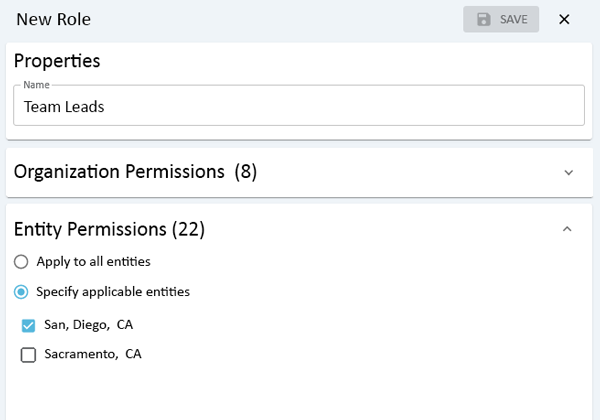
Click in the box next to the Entity/Location that should be included in the Role being created.
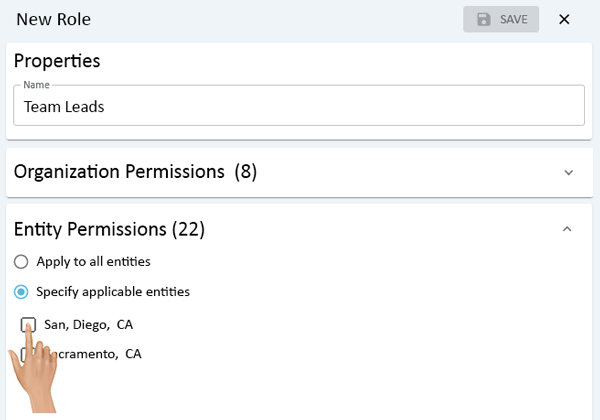
A check mark will show in the box next to the Entity that was selected. Setup the Permissions the same way as was done in the Organization Permissions using the toggles and checkbox.
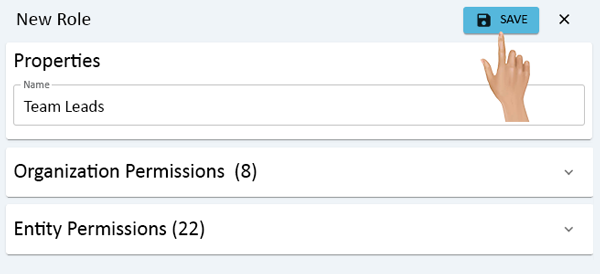
Once all of the permissions have been setup, click on the Save button.
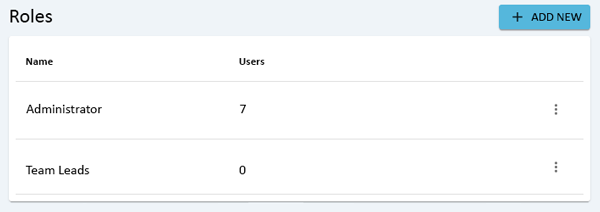
The new Role created will show in the Roles list.
Click on the "X" next to the Save button to close the Role properties window.

|
|
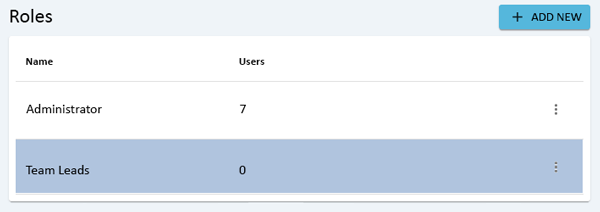
Click on the Role that needs to be edited.
The Role will be highlighted in the Role list.
The Role properties window will open on the right side of the Role list.
Edit the permissions by selecting either Organization Permissions or Entity Permissions. Use the toggles to turn permissions on or off.
Once the edits have been made, click on the Save button.

Click on the "X" next to the Save button to close the Role properties window.
|
|
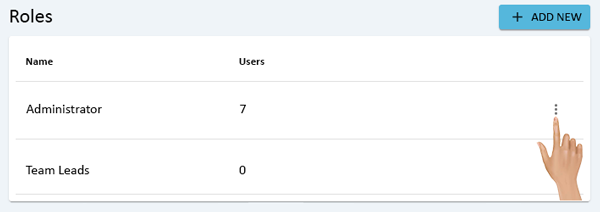
Click on the 3 dot menu for the Role that needs to be removed.
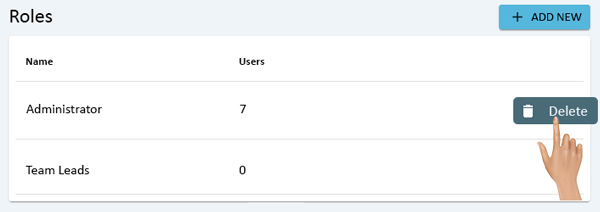
A pop-up window will load, click on the Delete option in the list.
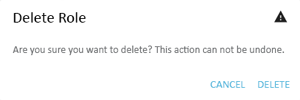
A warning message will appear. Select Delete to remove the Role or Cancel to keep the Role
A success message will appear on the screen.
The Role selected for deletion will no longer appear on the Roles list.
|
|

|