Administration - Teams (Webhook)
From VersaVision Support
![]()
Administration is used to access important system components. There are multiple components inside Administration, this page is focused on the Microsoft Teams Channel component.
VersaVision can post messages to Teams Channel(s). This is utilized by using a Webhook that is generated by the Teams application. Each Channel will have an individual Webhook (address).
This page will concentrate on Viewing, Editing, Adding, Duplicating and Deleting a Teams Channel.
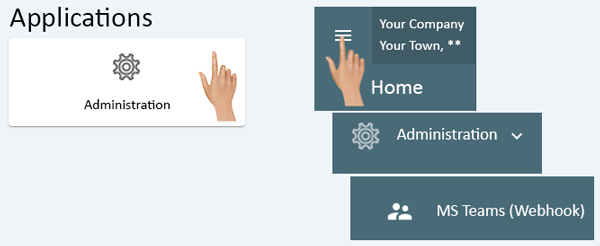
Administration can be accessed via the Home page menu or the Administration icon. Once Administration has been selected - select MS Teams (Webhook) from the menu.
|
|
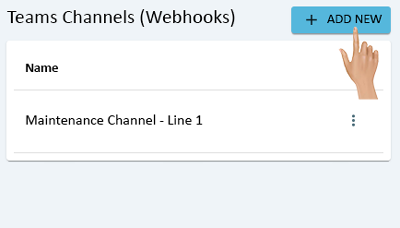
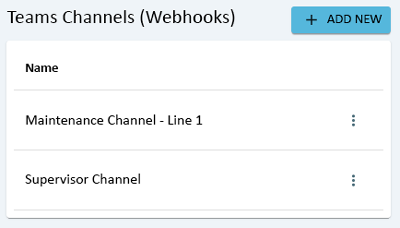
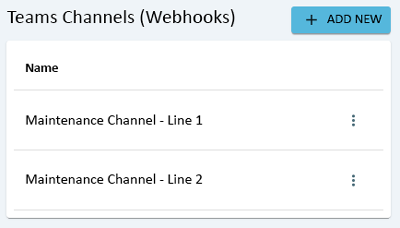
On the Channels page there will be a list of all the Channels that are setup in the system. Click anywhere on the row of a Channel to view the settings.
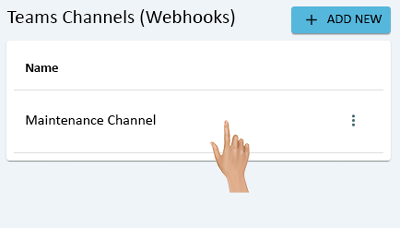
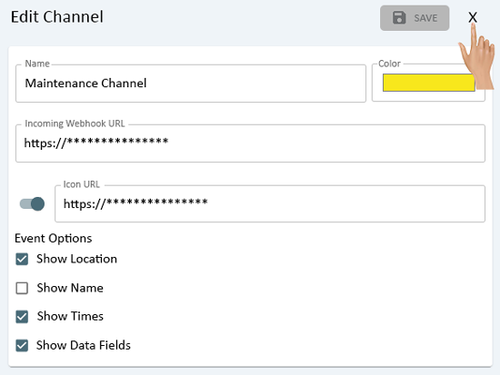
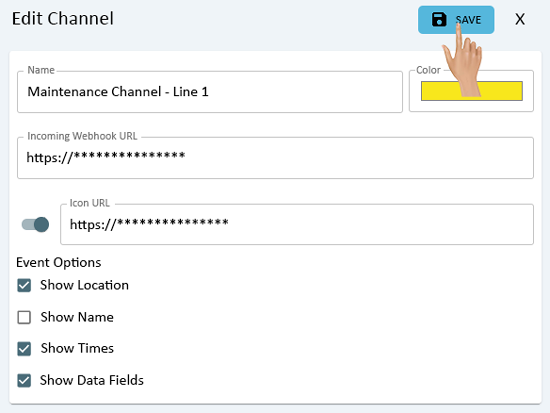
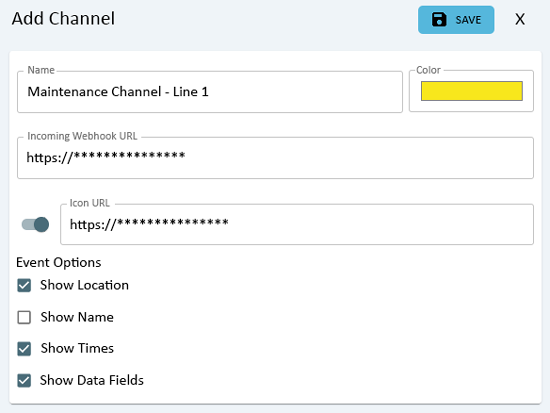
On the right side of the Channels list the Edit Channel window will load.
The Name, Color, Incoming Webhook, Icon URL and Event Options will be displayed.

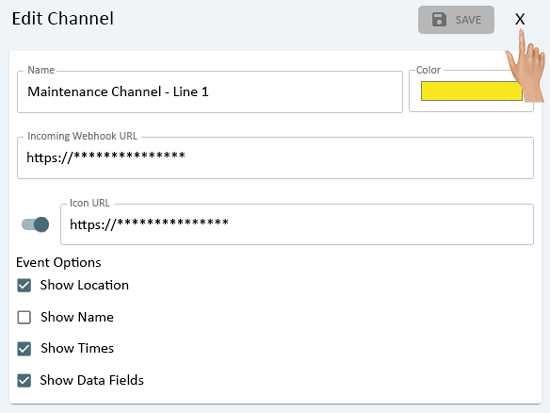
To close the Channel Properties window, click on the "X" in the right corner next to the Save button.
|
|
Click anywhere on the row of a Channel to edit the settings.
On the right side of the Channels list an Edit Channel window will load. Click in the Name field to edit the Channel Name.
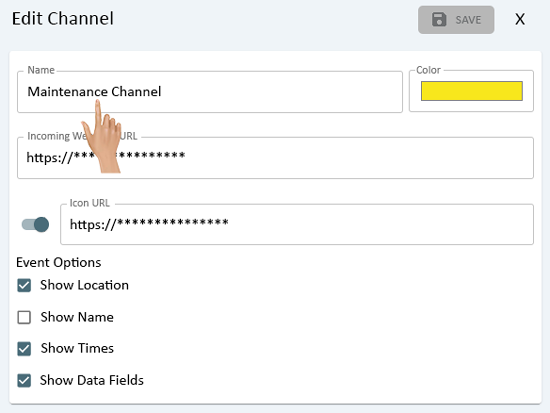
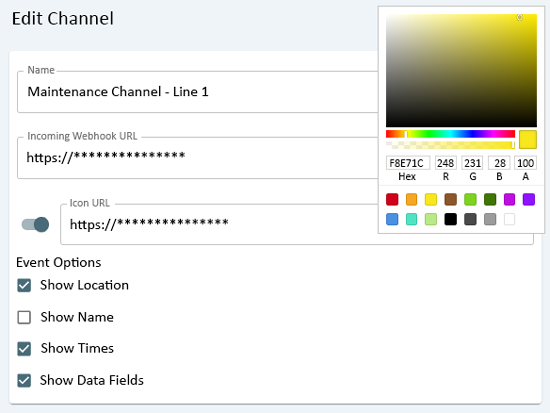
Click in the Color field to change the color of the notification highlight in Teams.
A Color Pallet will load. Use the picker or pre-made swatches to select the color.
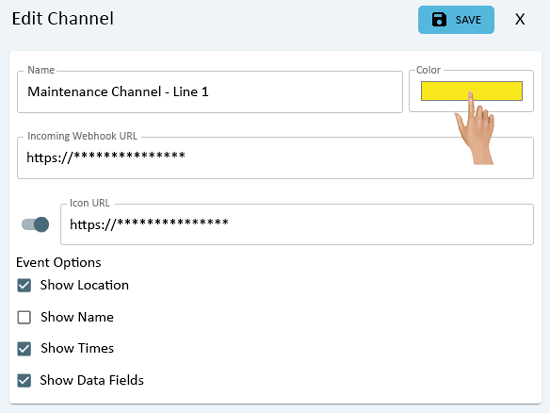
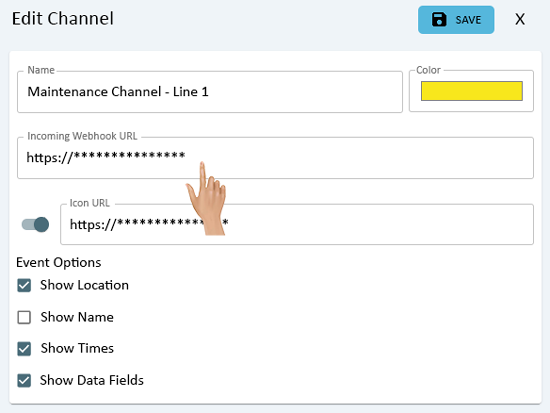
Click in the Incoming Webhook URL field to edit or replace the Webhook.
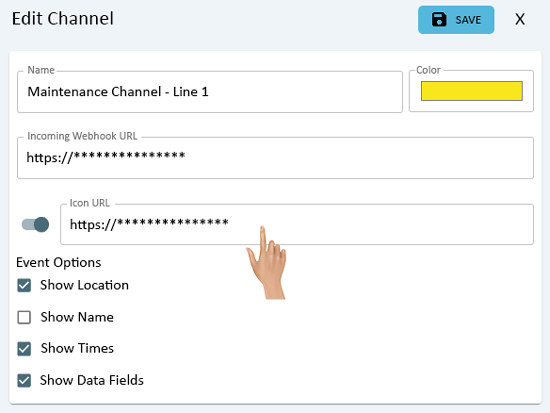
Click in the Icon URL field to edit or replace the Icon shown on the Teams notification.
Select or Deselect any of the options under the Event Options heading. Any option selected will show on the Teams notification.
- Location will show the location name of the device that initiated the Alert.
- Name will show the name of the Alert.
- Times will show the start time of the Alert.
- Data Fields will show the information in any data field associated with the Alert.

Once all changes have been made, click on the Save button at the top right side of the window.
To close the Edit Channel window, click on the "X" next to the Save button.
If a change was made to the Channel name, it will be seen in the Channels list.

|
|
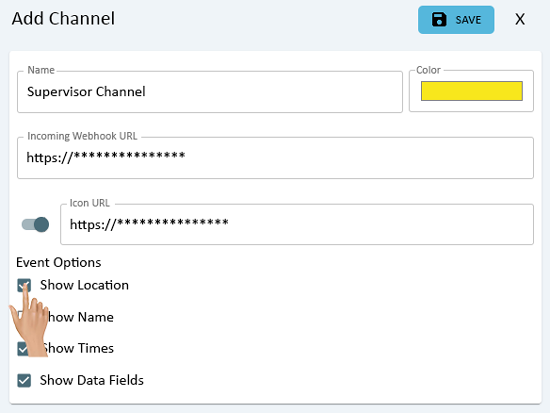
On the Channels page click on the Add New button.
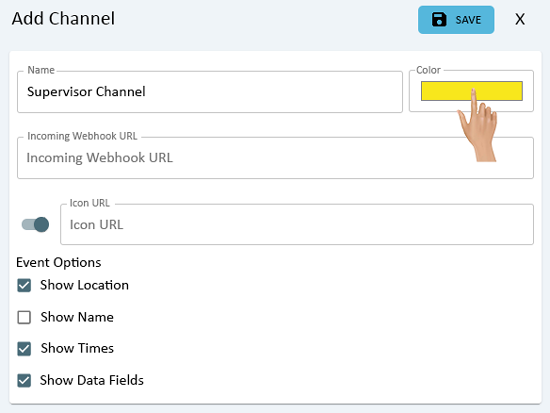
The Add Channel window will load on the right side of the Channels list. Click in the Name field to enter a name for the new Channel.
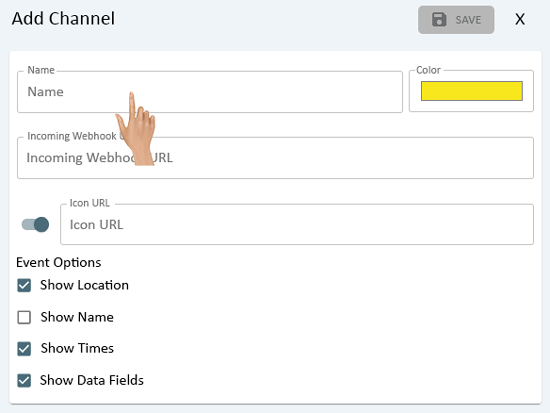
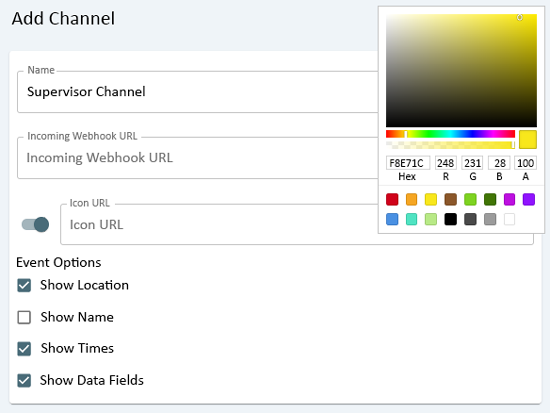
Click in the Color field to change the color of the notification highlight in Teams.
A Color Pallet will show. Use the picker or pre-made swatches to select the color.
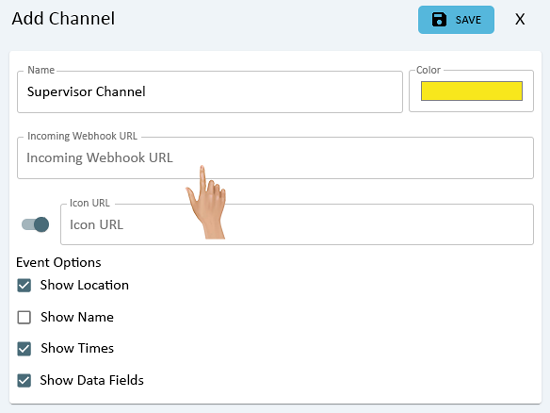
Click in the Incoming Webhook URL field to paste in the address from the Teams application.
- NOTE: The Webhook can only be obtained from the Teams application when a Channel is created. If this is an existing Channel, the Webhook can be generated in the Teams application.
For assistance with creating a Teams Channel and Webhook, consult the Office 365 Administrator.
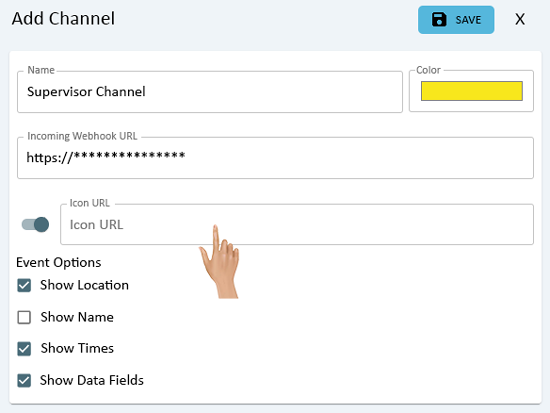
Click in the Icon URL field to paste the address of the icon to be used on the Channel. This is not required, the toggle can be switched off.
- NOTE: Icons used in a Teams Channel must be available online. Contact VersaCall Support for assistance or questions.
Select or Deselect any Event Option for the Channel. By default, the Location, Times and Data Fields options will be selected.
- Location will show the location name of the device that initiated the Alert.
- Name will show the name of the Alert.
- Times will show the start time of the Alert.
- Data Fields will show the information in any data field associated with the Alert.
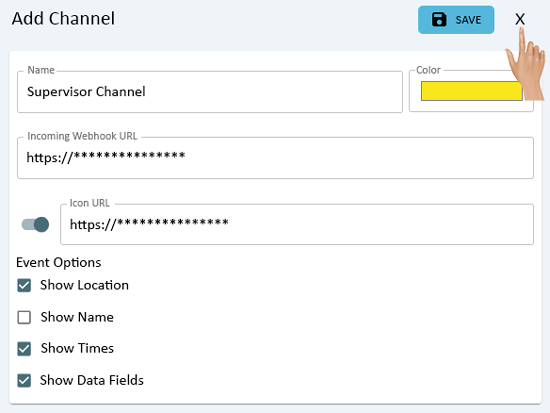
Once all Channel information has been entered, click on the Save button in the top right corner of the window.

Close the New Channel window by clicking on the "X" next to the Save button.
The new Channel name will show in the Channels List.
|
|
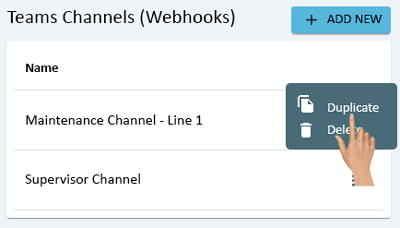
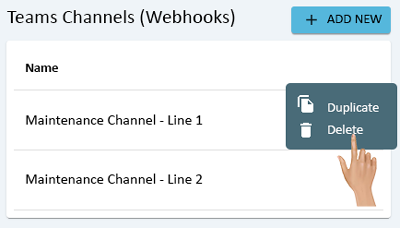
On the Channels page click on the 3 dot icon in-line with an existing Channel.
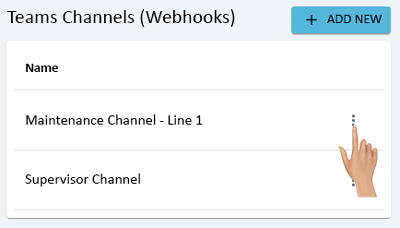
Select Duplicate from the pop-up menu.
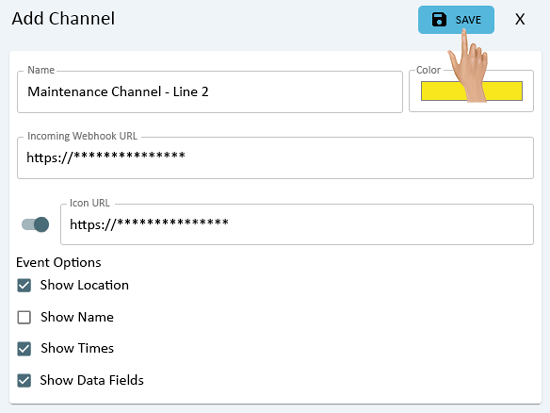
The Add Channel window will load on the right side of the Channels list. Make any necessary edits to the Name, Color, Incoming Webhook, Icon URL and Event Options.
Once all Channel information has been edited, click on the Save button in the top right corner of the window.
Close the Add Channel window by clicking on the "X" next to the Save button.
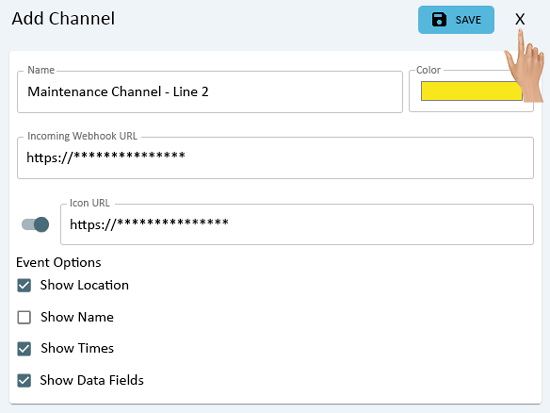
The new Channel name will show in the Channels List.
|
|
On the Channels page click on the 3 dot icon in-line with an existing Channel.
Select Delete from the pop-up menu.
A warning message will show on the screen. Select Delete to remove the Channel or Cancel to keep the Channel.
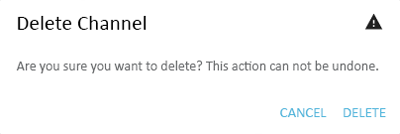
If Delete was selected, the Channel will no longer show on the Channels list.

|
|

|