Assets - Tables
From VersaVision Support
![]()
Tables is an area where users can create customized tables to store data. These tables can be used for a number of different options. Examples would be Part Numbers, Materials, Employee Names, etc.
The Advantages to this repository is to allow the user to easily update existing images in one place. Any updates made to the files here will automatically reflect in any application that is using/accessing the files.
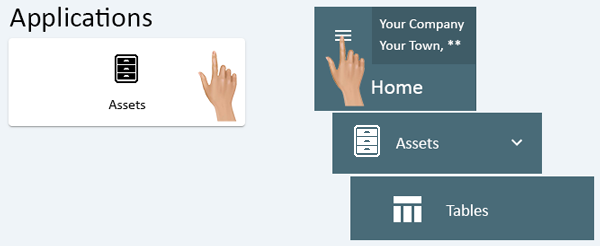
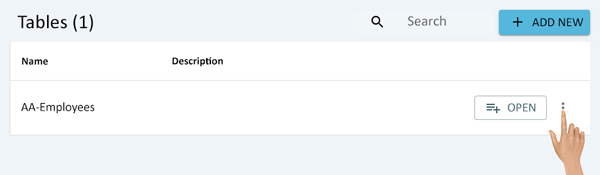
Access Tables by selecting the Assets icon from the Applications Quick Menu or by selecting the Menu icon from the Home Page. Once Assets is selected, click on the Tables option.
|
|
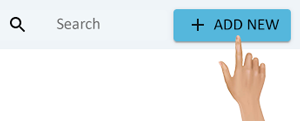
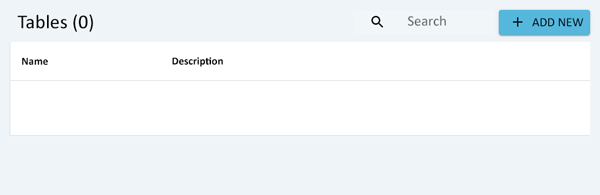
To Add a New Table select the Add New button at the top right of the page next to the Search field.
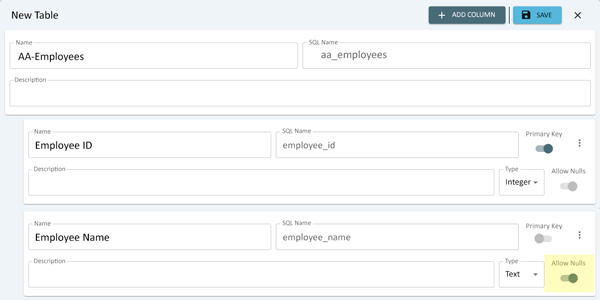
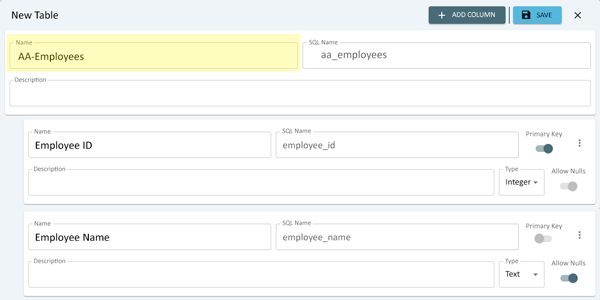
A New Table properties section will show on top of the Tables list.
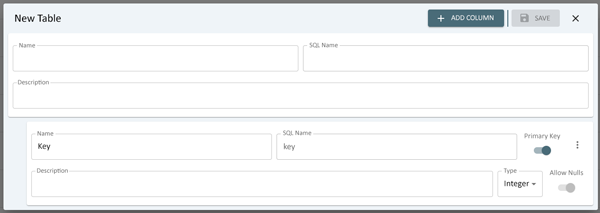
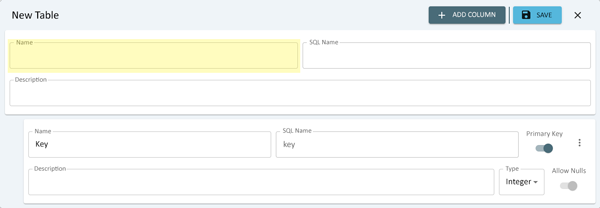
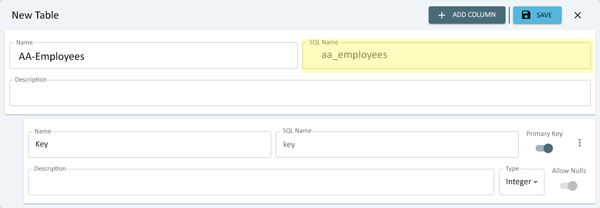
A Table Name will need to be setup first. Click in the Name field and enter a Name for the table.
The SQL Name field will automatically populate based on the Table Name entry.
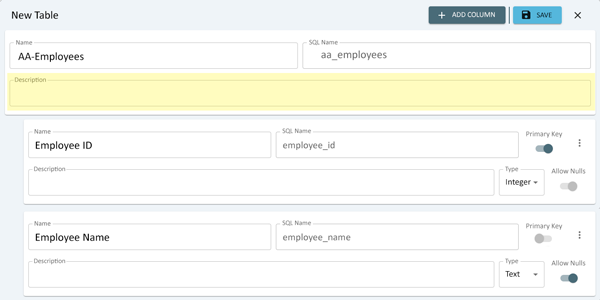
Click on the Description field and enter a description for the Table if needed. This description will show on the Tables List.

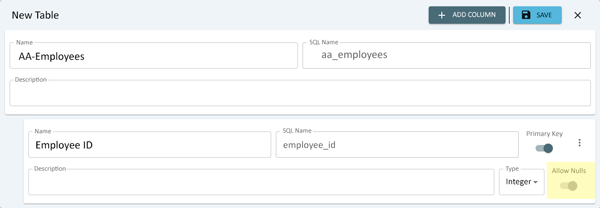
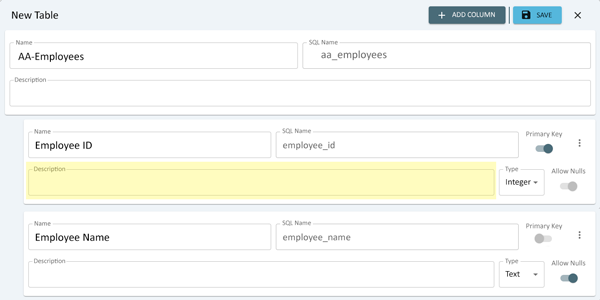
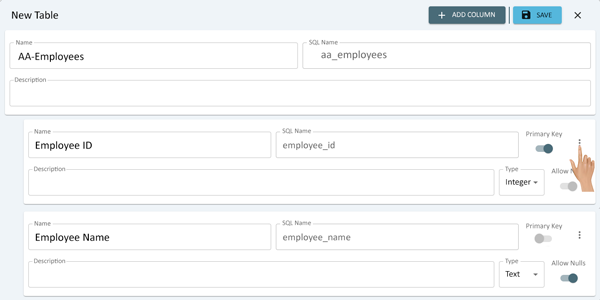
The Next step in the process is to setup the columns needed for the Table. By default, there is a Key field already added. The data in this cell is what will be used when a command is created to look up data from the table. This field is setup as a Primary Key.
An example of this would be Employee ID is the Key (Primary Key) the second column would be added for Employee Name. The system would look for the Employee ID then return the Employee Name.
The Primary Key cannot have the duplicate data, each one must be unique.
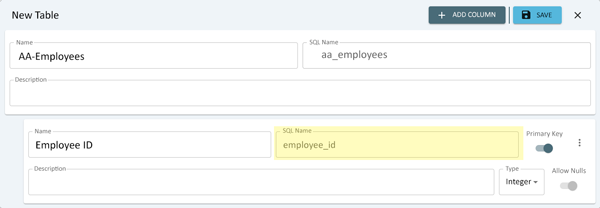
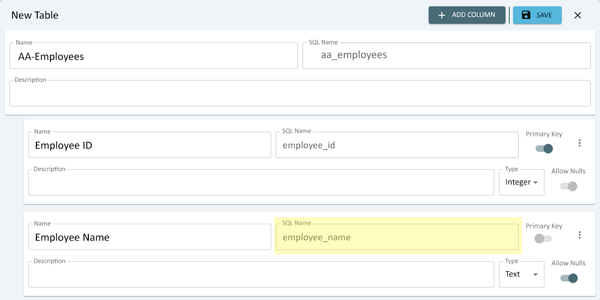
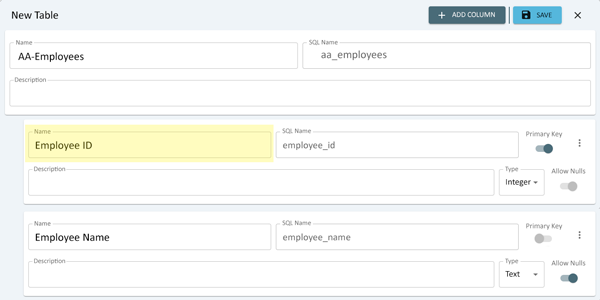
Click in the Column Name field and enter a Name for the column in the table. Leave the Primary Key switch toggled. Our example will show the Employee ID/Name table used above.
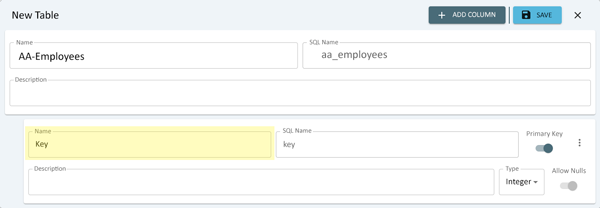
The SQL Name field will automatically populate based on the Column Name entry.
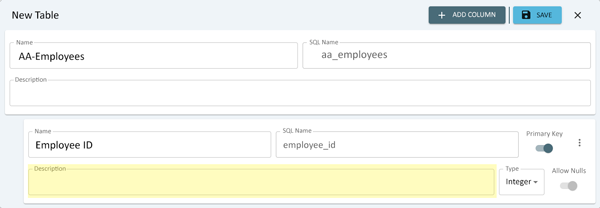
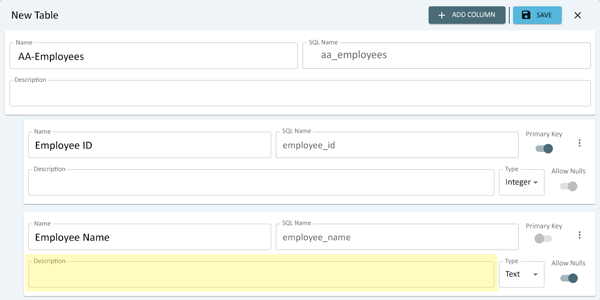
Click on the Description field and enter a description for the Column if needed. This description will show when editing the Setup/Definition of a Table.
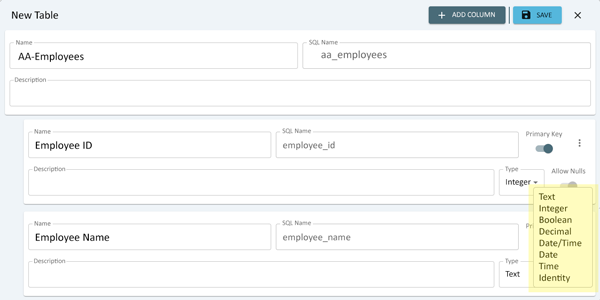
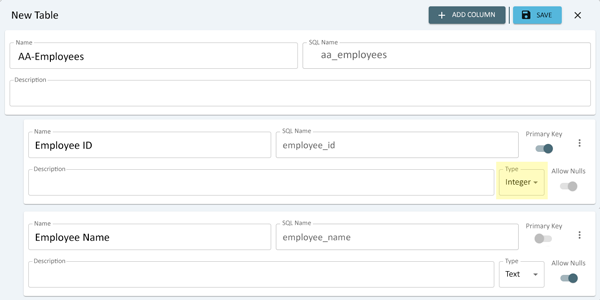
The Type field is used to define what type of data will be stored in the Column. There are multiple options available when the down arrow is selected. Select the appropriate Type - the example here will be Integer.
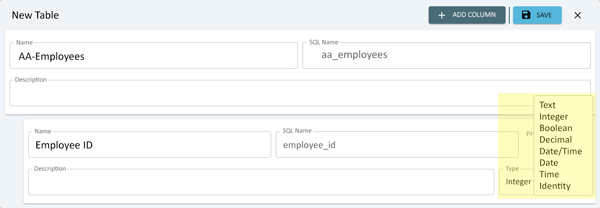
- Text - any combination of characters/text can be entered into this cell.
- Integer - only a number can be entered into this cell.
- Boolean - the cell can only be on or off.
- Decimal - the cell can accept a number with decimal places.
- Date/Time - only a date and time combination can be entered into this cell.
- Date - only a date can be entered into this cell.
- Time - only a time can be entered into this cell.
- Identity - this is a number that will be automatically entered when new data is added to the table.
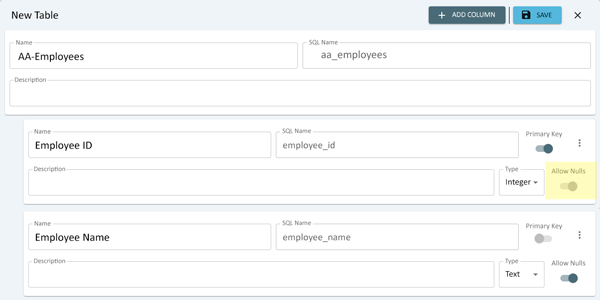
The Allow Nulls toggle will not be accessible on a Primary Key. A Primary Key must have a value.
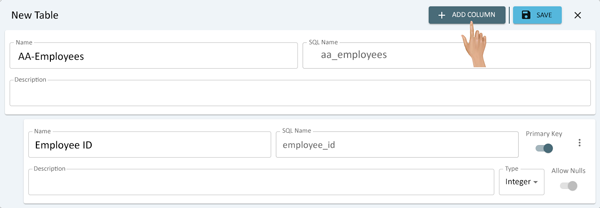
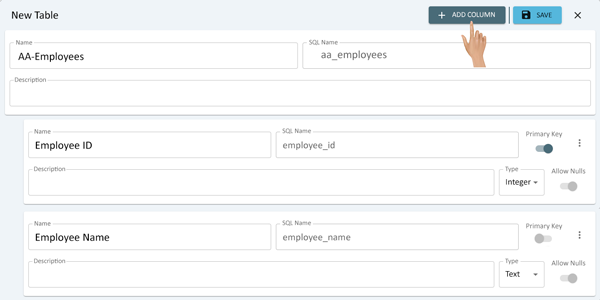
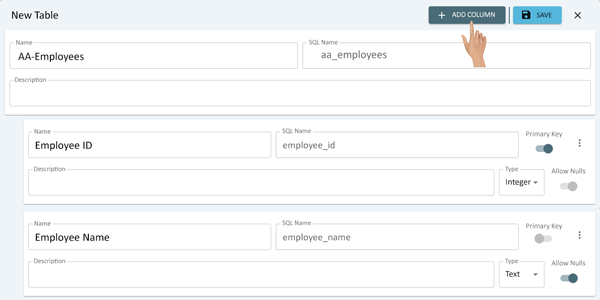
Click on the Add Column button at the top of the New Table window. Generally, a table will need more that 1 Column.
The New Column properties will appear below any other Columns. Click in the Name field and enter a name for the column.
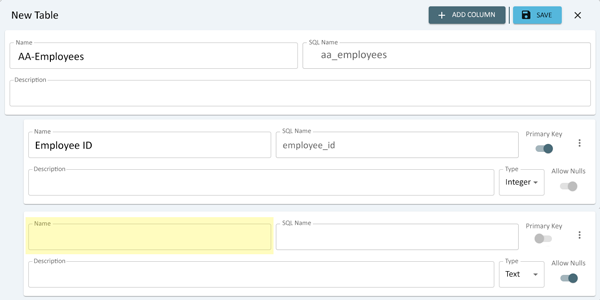
The SQL Name field will automatically populate based on the Column Name entry.
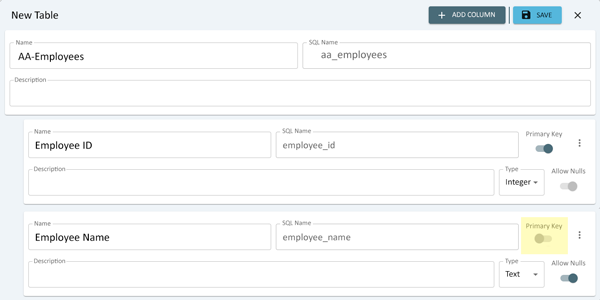
For this example, the Primary Key toggle is in the Off position. This table will use the Employee ID as the primary key.
Click on the Description field and enter a description for the Column if needed. This description will show when editing the Setup/Definition of a Table.
The Type field is used to define what type of data will be stored in the Column. There are multiple options available when the down arrow is selected. In this example the Text option is being used.
- Text - any combination of characters/text can be entered into this cell.
- Integer - only a number can be entered into this cell.
- Boolean - the cell can only be on or off.
- Decimal - the cell can accept a number with decimal places.
- Date/Time - only a date and time combination can be entered into this cell.
- Date - only a date can be entered into this cell.
- Time - only a time can be entered into this cell.
- Identity - this is a number that will be automatically entered when new data is added to the table.
Toggle the Allow Nulls switch to On (Allow) or Off (Not Allow). If there is a need for the cell to be blank, contain no data, turn the switch On. In this example, the switch is Off as there will always be a Employee Name associated with an Employee ID.
If additional Columns are required, click on the Add Column button.
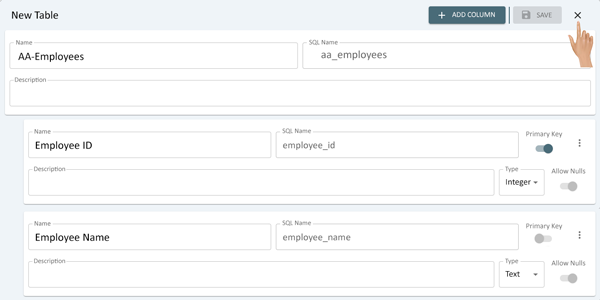
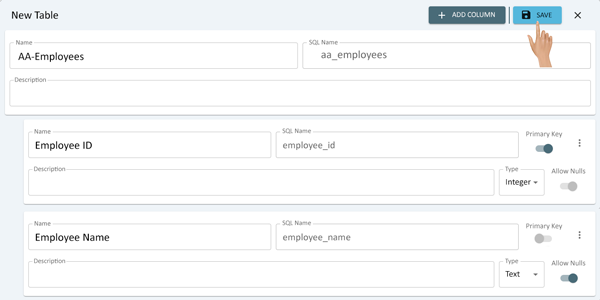
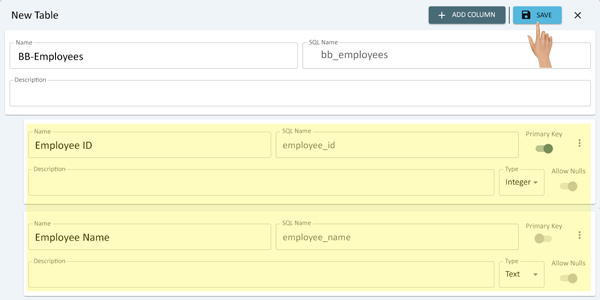
Once all of the Columns have been created, click on the Save button next to the Add Column button.

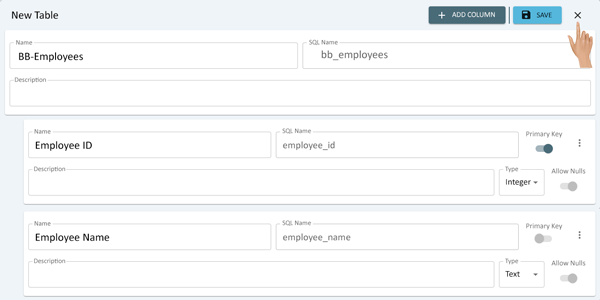
Select the "X" next to the Save button to close the Table properties window and return to the Tables list.
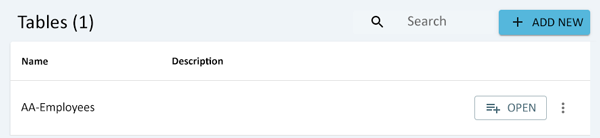
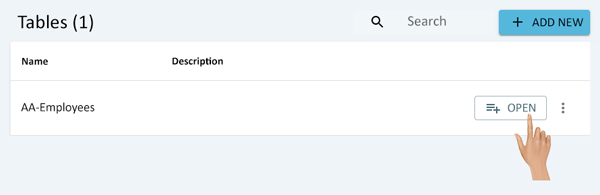
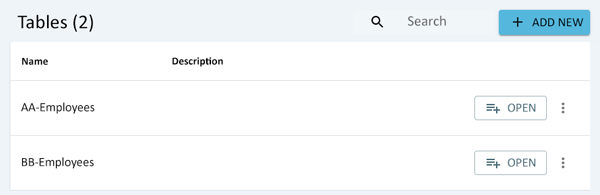
The Table that was setup will now show in the Tables List.
|
|
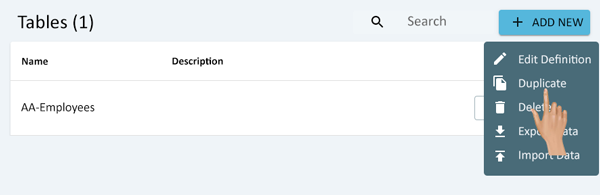
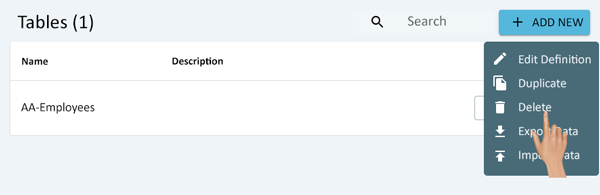
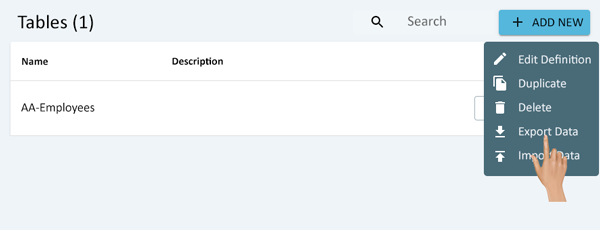
To Edit the setup of a Table (Name, Columns, Description, Type or Nulls) click on the 3 dot menu to the right side inline with the Table name.
On the pop-up menu select the Edit Definition option.

Click in the Table Name field to change the name.
Click in the Description field to change the description of the table.
Click on the Column Name to change the name.
Click in the Column Description to change the description of the column.
Click on the Type down arrow to change the column type.
Click on the Primary Key toggle to turn it On or Off. We suggest that you do not turn off an field that is already set as the primary if you have entered data into the table.

Click on the Allow Nulls toggle to turn it On or Off for columns that are not primary key's.
Click on the Add Column button to add additional Columns to the table.
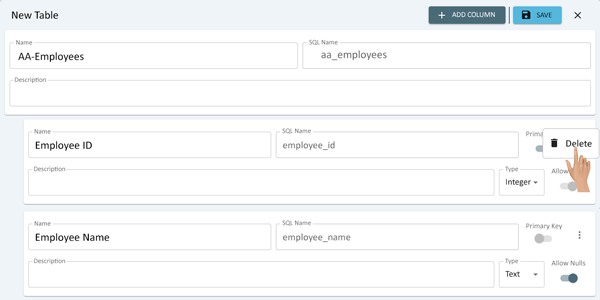
To Remove an existing Column from the table, click on the 3 dot icon on the right side of the Column cell.
Select the Delete option from the pop-up menu. Then will NOT be any warning message, the column will automatically be removed.
Once all changes have been made to the Table, click on the Save button next to the Add Column button.
Close the Edit Table window by clicking on the "X".

|
|
Click on the Open button found on the right side of the Table Name in the Table list.
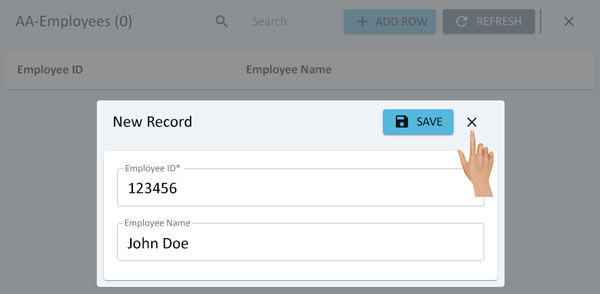
A new page will load showing the layout of the table. Click on the Add Row button in the top right corner of the page.
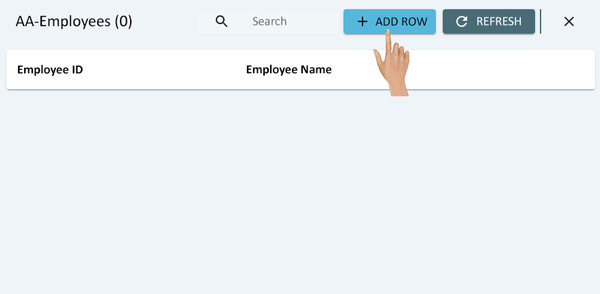
A New Record menu will pop-up. All Columns setup in the Table will show as fields. Click in the 1st field and enter the required information.
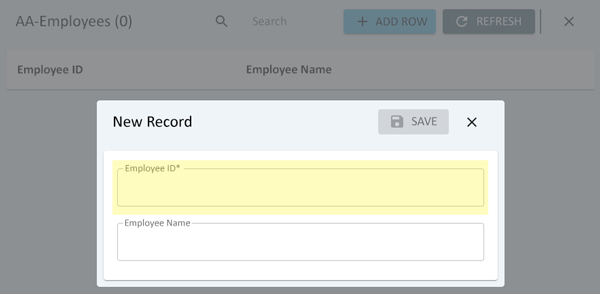
Select the next field and enter the required information.
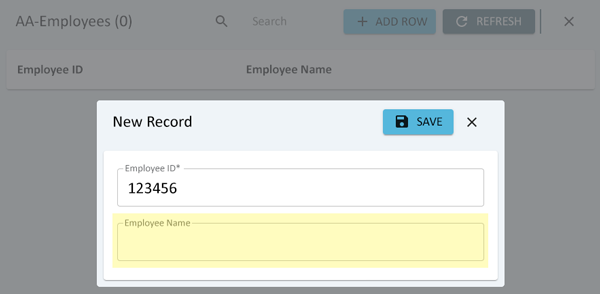
Repeat the process to enter information into all required fields. Once all required fields are filled out, click on the Save button to save the record/data to the Table.
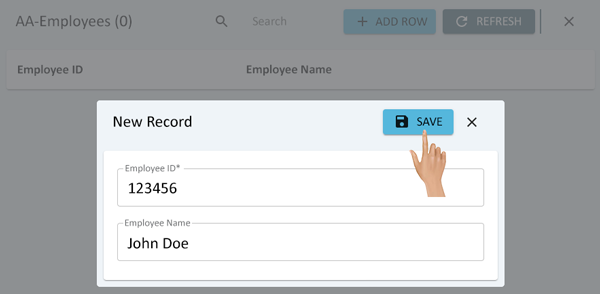
Close the New Record window by clicking on the "X".
The information that you entered will now appear in the Table.
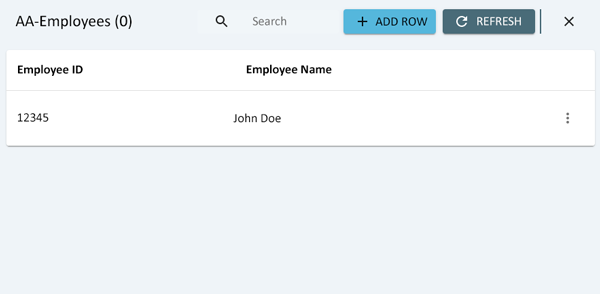
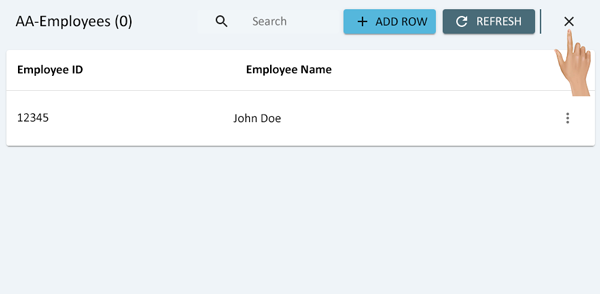
Repeat the process to add additional information to the table. Once all information has been entered and saved, click on the "X" at the top right of the page to close the window and return to the Table list page.
|
|
Click on the 3-Dot menu icon on any File. Found on the right side of the File Name in the Media Files list.

A pop-up menu will appear - select the Duplicate option.
A Copy Table window will pop-up. The Table Name will show the Table you copied plus COPY. We suggest you change the Name of the table.

Edit any of the Column fields required. Once all of the changes have been made, click on the Save button.
Close the Copy Table window by clicking on the "X".
Then Duplicated/New Table will show in your Tables List.
|
|
Click on the 3-Dot menu icon on any File. Found on the right side of the File Name in the Media Files list.

Select Delete from the menu.
A warning message will appear on the screen. Select Delete to remove the Table or select Cancel to keep the Table.
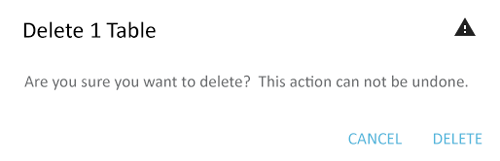
If you have selected to Delete the Table, it will no longer show on your Tables list.
|
|
Click on the 3-Dot menu icon on any File. Found on the right side of the File Name in the Media Files list.

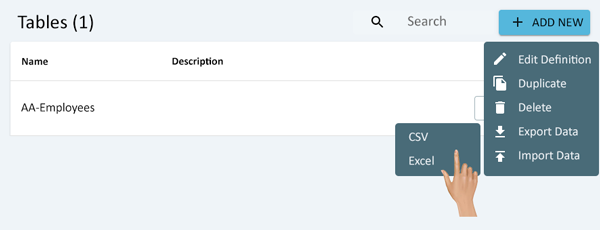
Select Export Data from the menu.
Select the format or document type required. Options are a "CSV" file or "Excel" file.
The file will download automatically to your default web browser download location. At the bottom left side of the page you will see a file status icon.
|
|
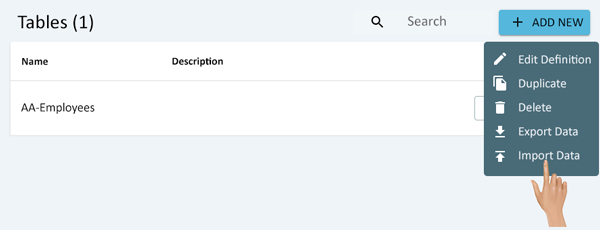
Click on the 3-Dot menu icon on any File. Found on the right side of the File Name in the Media Files list.

Select Import Data from the menu.
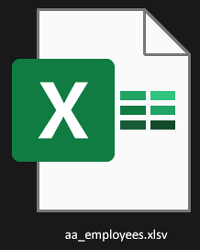
A File Explorer window will automatically open. Navigate to the CSV or Excel file containing the Table Data - double click on the file.
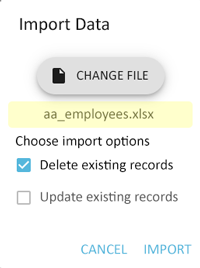
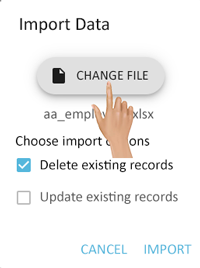
The Import Data window will show the file selected under the Change File button.
If the wrong file was selected, select the Change File button to reopen the File Explorer.
There are 2 Import Options available - "Delete Existing Records" or "Update Existing Records". Select the appropriate option.
- Delete Existing Records - selecting this option will remove all current data in the table and replace it with the data in the file selected.
- Update Existing Records - selecting this option will keep all current data and add the data in the file selected.
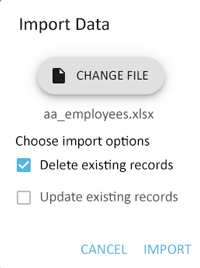
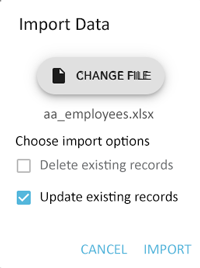
Select Import to Delete or Update the data in the table. Select Cancel to not make any changes to the Table data.
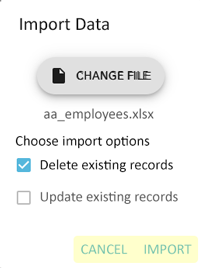
A green message window will appear on the screen when the data has been uploaded.
|
|

|