Communications - Defined Messages
From VersaVision Support
![]()
Communications is where everything connected to messaging in the system is setup. There are multiple components inside Communications, this page is focused on the Defined Messages component.
A Defined Message allows the user to create a message to be sent out to Contacts in one location. That Defined Message can then be used on multiple monitoring point and/or configurations.
The advantage to a Defined Message is that changes/edits can all be done in 1 area as opposed to having to edit mutiple monitoring points and/or configurations.
This page will concentrate on Viewing, Editing, Adding, Duplicating, Deleting and Setting a Default.
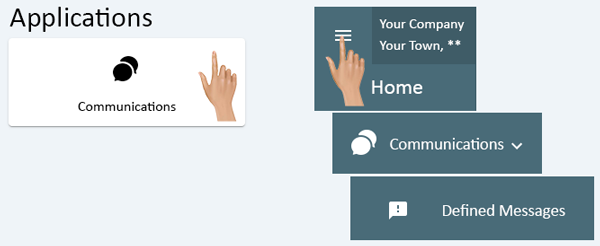
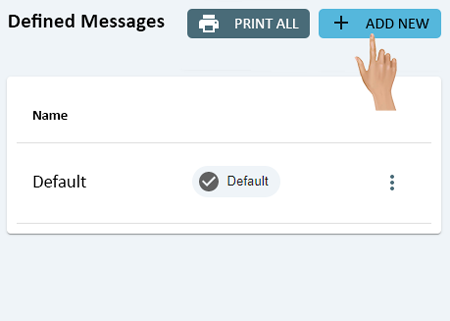
Communications can be accessed via the Home page menu or the Communications icon. Once Communications has been selected - select Defined Messages from the menu.
|
|
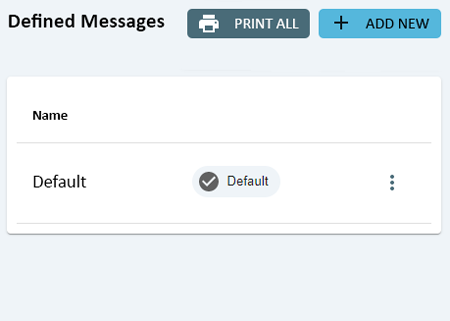
On the Defined Messages page there will be a list of all the Defined Messages setup in the system. Click anywhere on the row of a Message to view the properties.
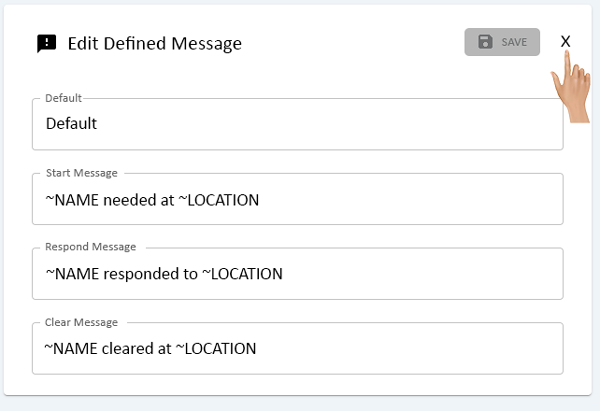
On the right side of the Defined Message list an Edit Message window will load.
The Name, Start Message, Acknowledge Message & Resolve Message will be shown.
To close the Edit Contact window, click on the "X" in the right corner next to the Save button.
|
|
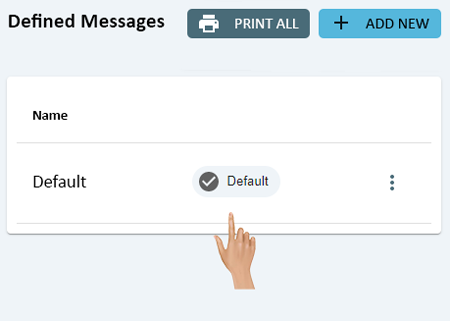
On the Defined Messages page there will be a list of all the Messages setup in the system. Click anywhere on the row of the Message that needs to be edited.
On the right side of the Defined Messages List an Edit Message window will load. Click in the Name field to edit the name of the Defined Message.
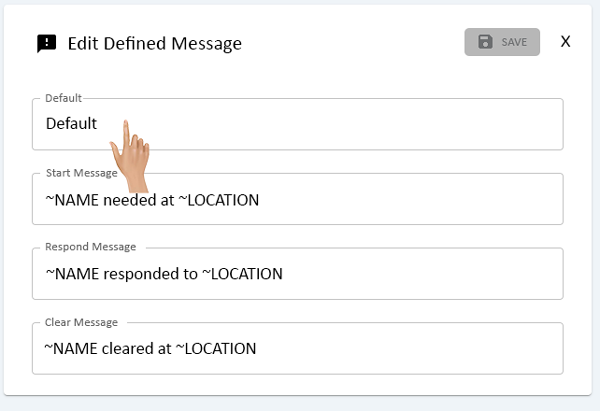
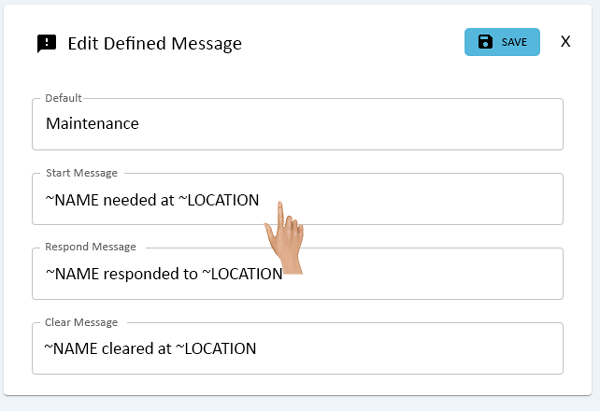
Below the Name will be the Start Message. This is the message that will go out when the Alert is initially set. Click in the Start Message field to change this message.
Below the Start Message field will be the Respond Message. This is the message that will go out when the Alert is Acknowledged. Click in the Respond Message field to change this message.

Below the Respond Message field will be the Resolve Message. This is the message that will go out when the Alert is Cleared. Click in the Resolve Message field to change this message.

Once all of the changes have been made, click on the Save button in the top right corner of the window.

To close the Edit Defined Message window, click on the "X" next to the Save button.
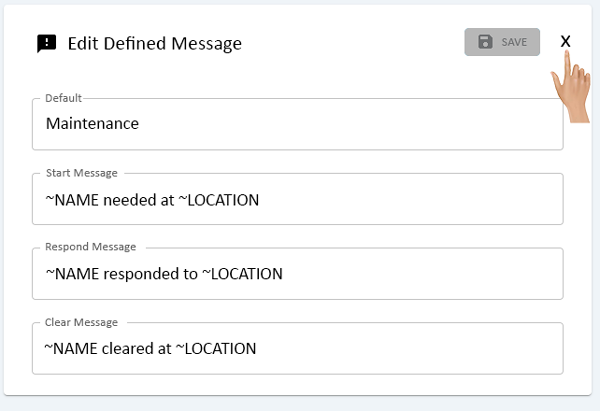
Any changes made to the Defined Message will be reflected in the Defined Messages List.
|
|
On the Defined Messages page click on the Add New button.
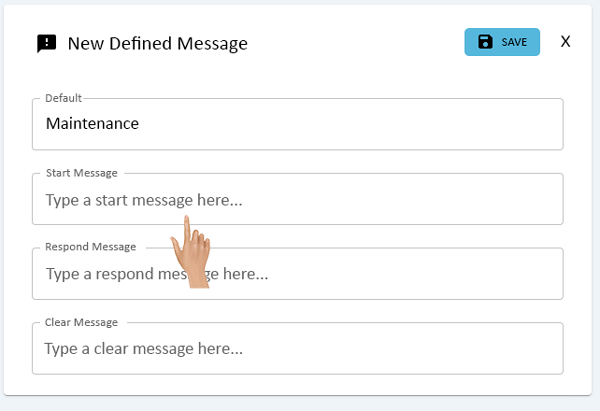
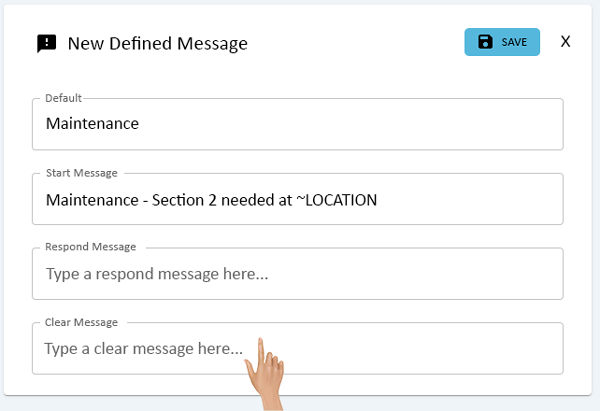
On the right side of the Defined Messages List a New Message window will load. Click in the Name field to enter the name for the Defined Message.
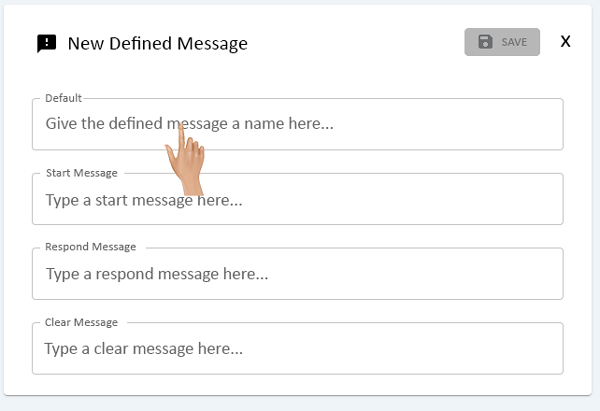
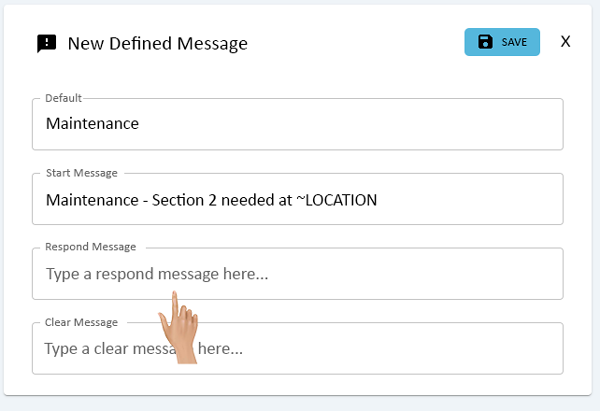
Below the Name will be the Start Message. This is the message that will go out when the Alert is initially set. Click in the Start Message field to add a message.
Below the Start Message field will be the Respond Message. This is the message that will go out when the Alert is Acknowledged. Click in the Respond Message field to add a message.
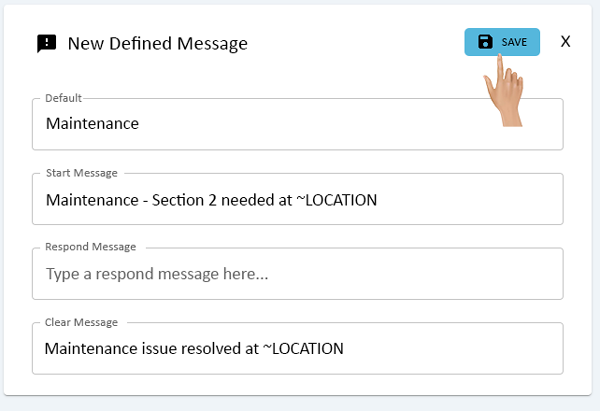
Below the Respond Message field will be the Resolve Message. This is the message that will go out when the Alert is Cleared. Click in the Resolve Message field to add a message.
Once all of the changes have been made, click on the Save button in the top right corner of the window.
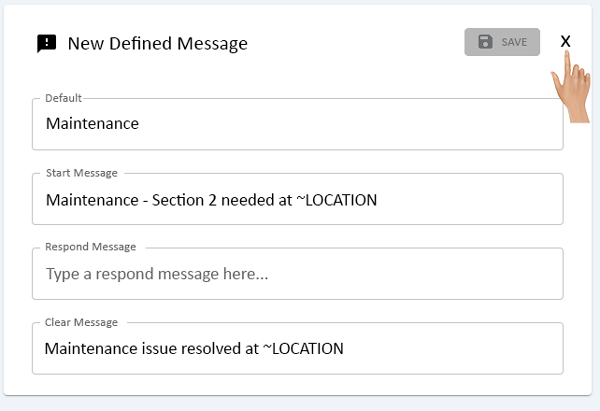
To close the New Defined Message window, click on the "X" next to the Save button.
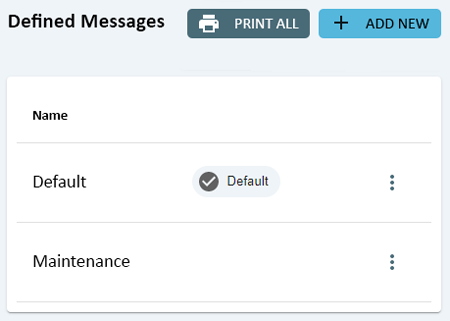
The new Defined Message will show in the Defined Messages List.
|
|
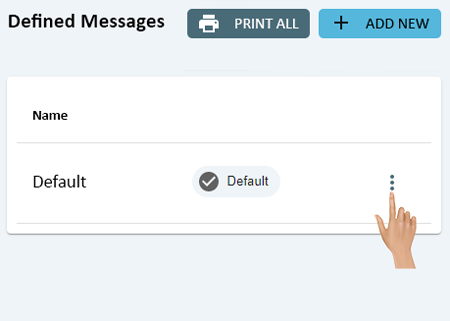
On the 3 dot menu in-line with the Defined Message that needs to be duplicated.
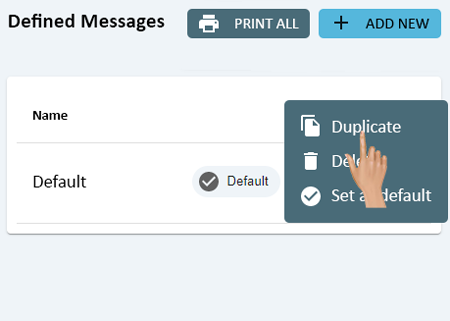
Select Duplicate from the pop-up menu.
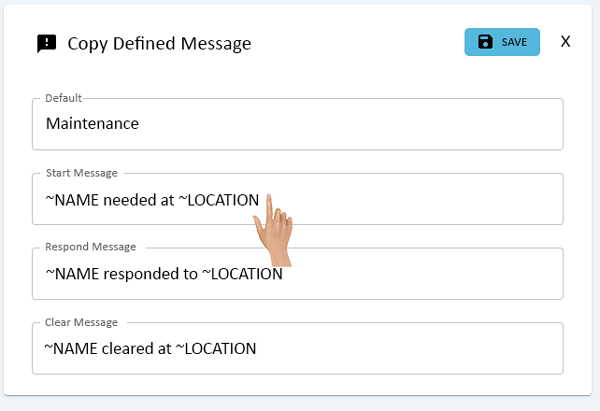
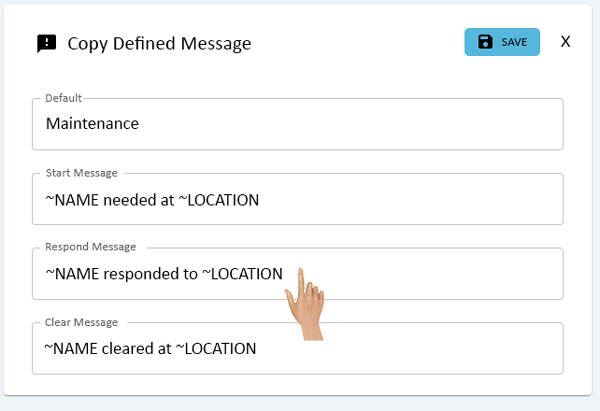
On the right side of the Defined Messages List a Copy Message window will load. Click in the Name field to enter the name for the Defined Message.
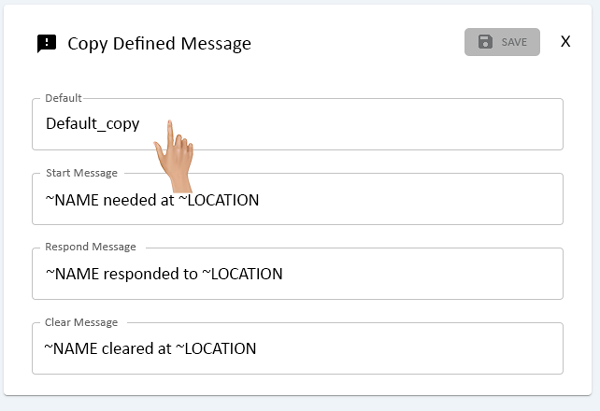
Below the Name will be the Start Message. This is the message that will go out when the Alert is initially set. Click in the Start Message field to add/edit the message.
Below the Start Message field will be the Respond Message. This is the message that will go out when the Alert is Acknowledged. Click in the Respond Message field to add/edit the message.
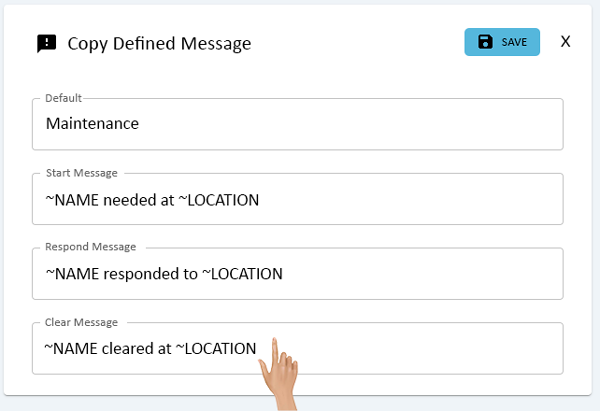
Below the Respond Message field will be the Resolve Message. This is the message that will go out when the Alert is Cleared. Click in the Resolve Message field to add/edit the message.
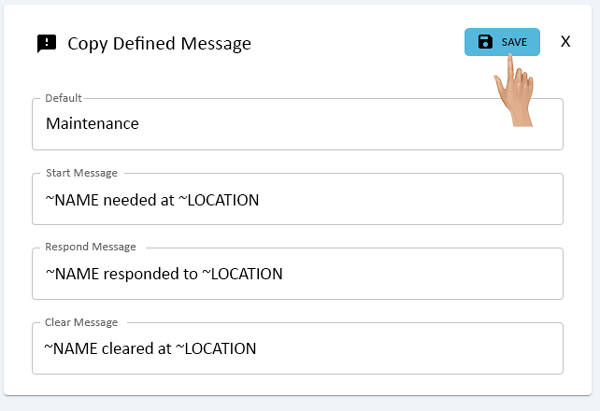
Once all of the changes have been made, click on the Save button in the top right corner of the window.
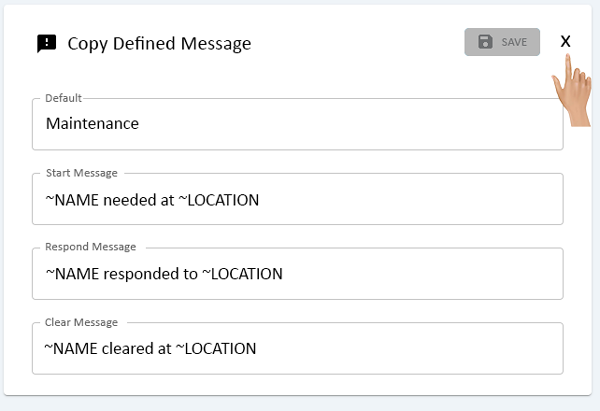
To close the Copy Defined Message window, click on the "X" next to the Save button.
The duplicated Defined Message will show in the Defined Messages List.

|
|
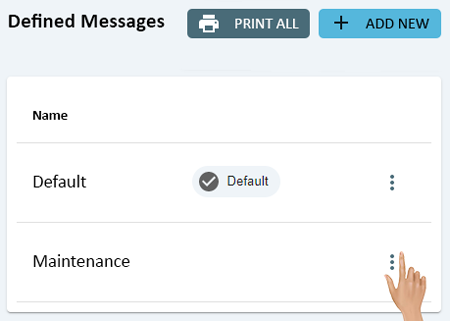
On the Defined Messages page click on the 3 dot icon in-line with the Message that needs to be removed.
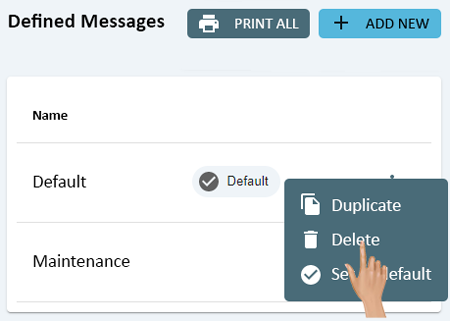
Select Delete from the pop-up menu.
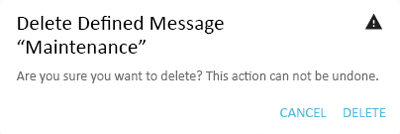
A confirmation window will show on the screen. Select Delete to remove the Defined Message. Select Cancel to keep the Message.
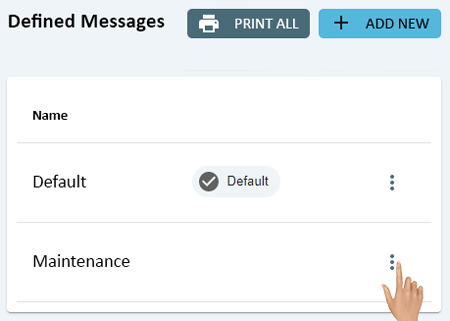
If Delete was selected, the Message will no longer show in the Defined Messages List.

|
|
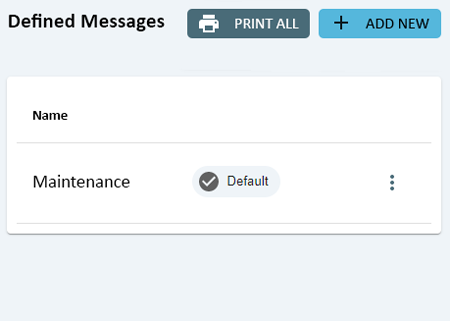
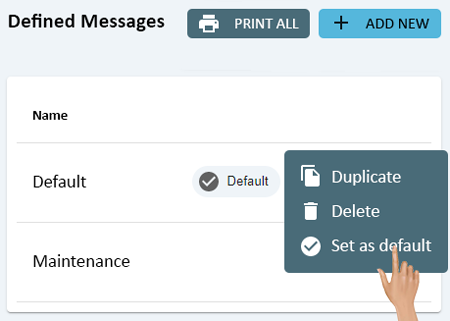
Setting a Defined Message as Default means, the selected message will be used on all Alerts by default.
On the Defined Messages page click on the 3 dot icon in-line with the Message that needs to be set to Default.
Select Set as Default from the pop-up menu.
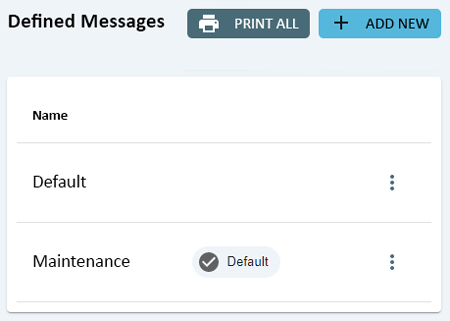
The Default will change to the newly selected Message. The Default indicator will now show for this message.
|
|

|