Communications - Escalations
From VersaVision Support
![]()
Communications is where everything connected to messaging in the system is setup. There are multiple components inside Communications, this page is focused on the Escalations component.
An Escalation is a series of levels that contain specific Contacts. These levels are divided by elapsed time. Using an Escalation on an alert will allow the system to contact specific Contacts at specific times.
Without an Escalation, there would be no communication sent out or a communication would only be sent out once. In most cases, a user will want to notify personnel of issues immediately and to continue to notify personnel until the issue is either Acknowledged or Resolved.
This page will concentrate on Viewing, Editing, Adding, and Deleting.
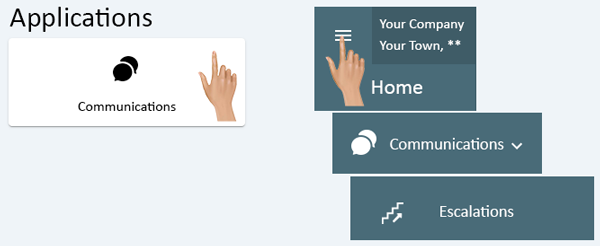
Communications can be accessed via the Home page menu or the Communications icon. Once Communications has been selected - select Escalations from the menu.
|
|
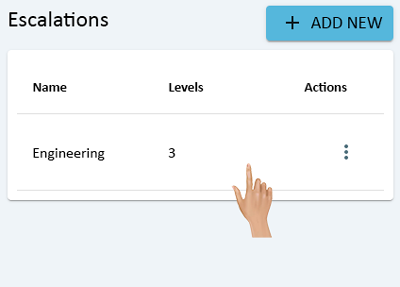
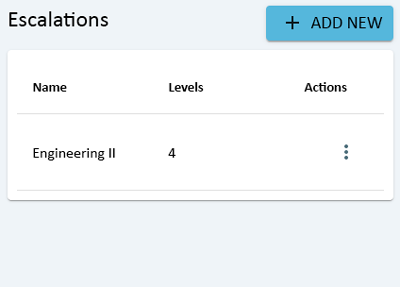
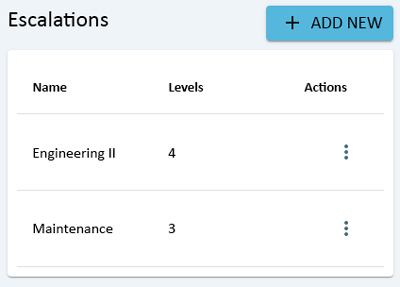
On the Escalations page there will be a list of all the Escalations setup in the system. Click anywhere on the row of an Escalation to view the properties.
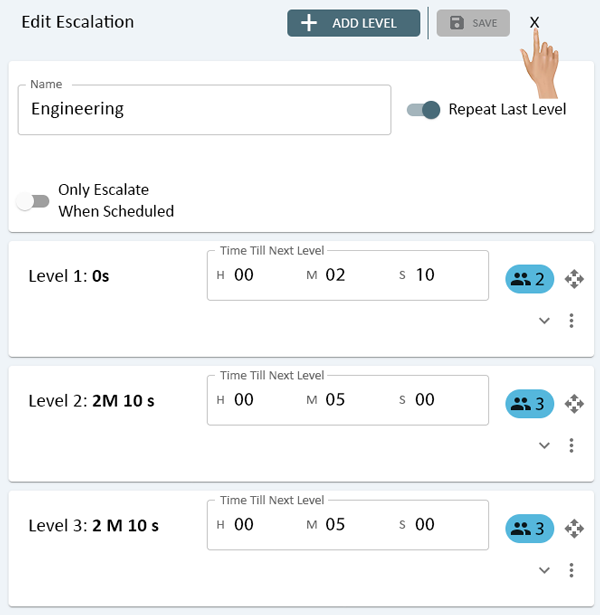
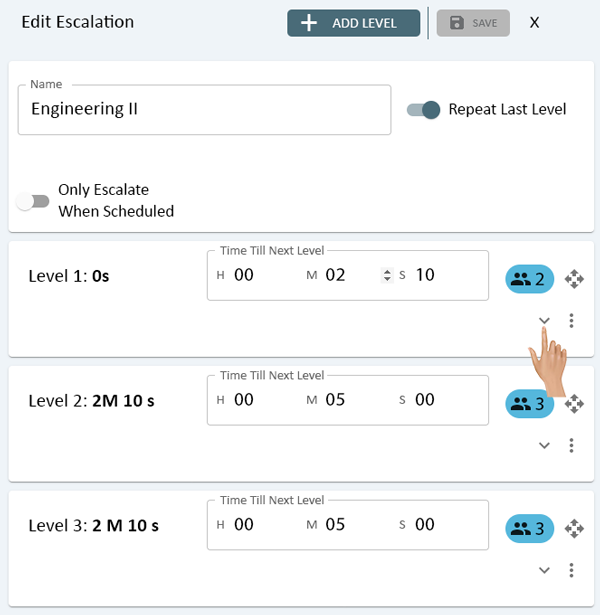
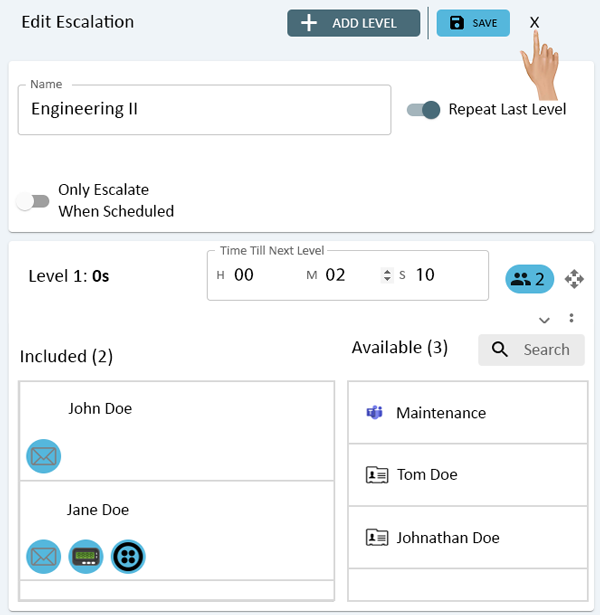
On the right side of the Escalations list an Edit Escalation window will load.
The Name, Levels, Level Times, Number of Contacts in a Level and Level Settings.
To view the Contacts included on a level, click on the Expand icon for the level.

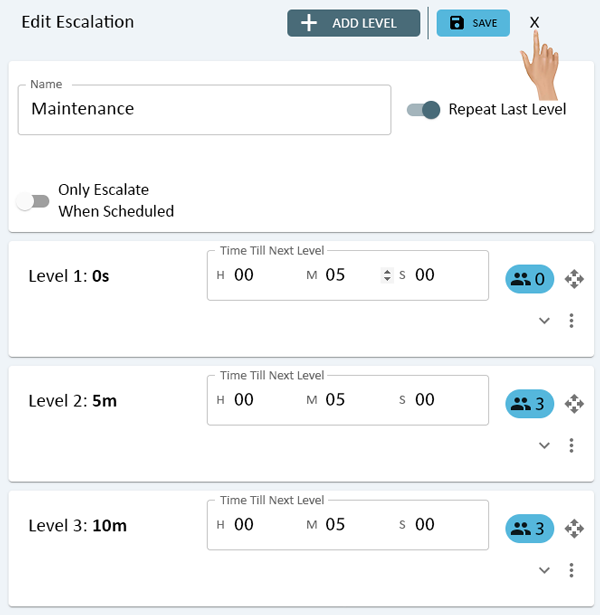
To close the Edit Escalation, click on the "X" in the right corner next to the Save button.
|
|
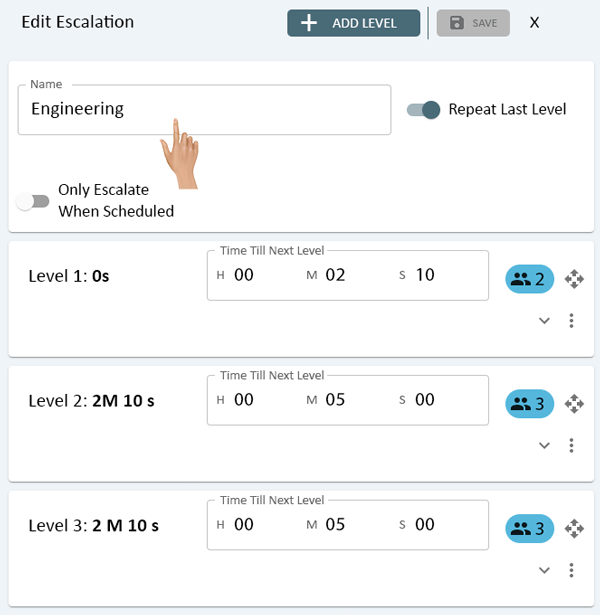
On the Escalations page there will be a list of all the Escalations setup in the system. Click anywhere on the row of an Escalation to edit the properties.

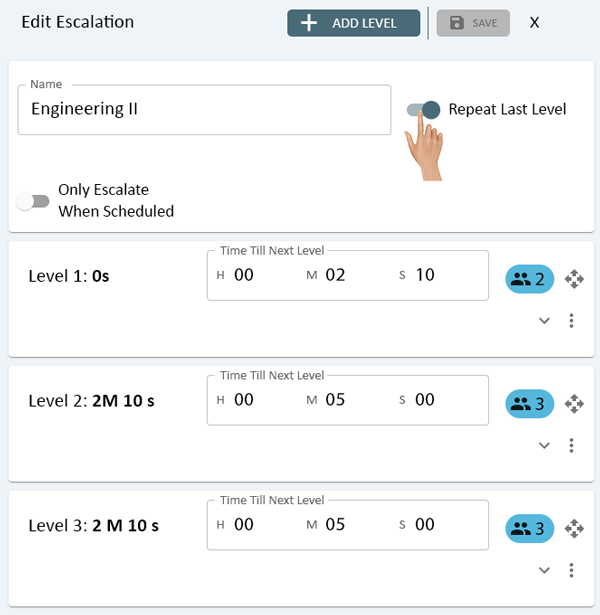
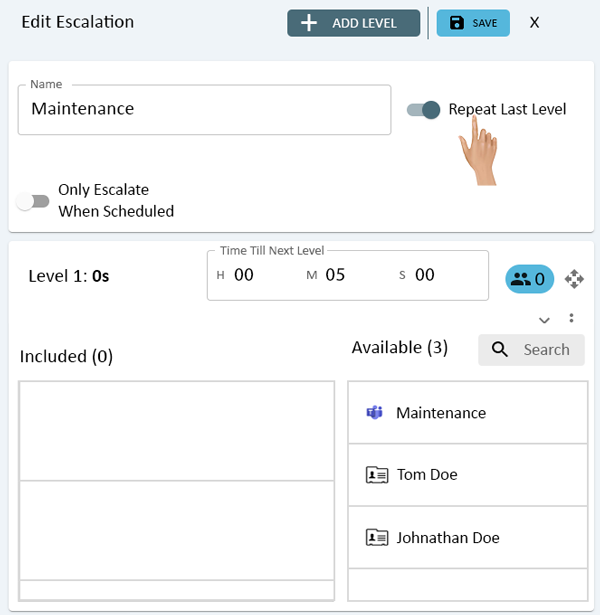
On the right side of the Escalations List an Edit Escalation window will load. Click in the Name field to edit the name of the Escalation.
To the right of the Name is the Repeat Last Level option. This setting allows the system to continue notifying contacts on the last level until it is acknowledged. Toggle the switch on or off to enable or disable this function.
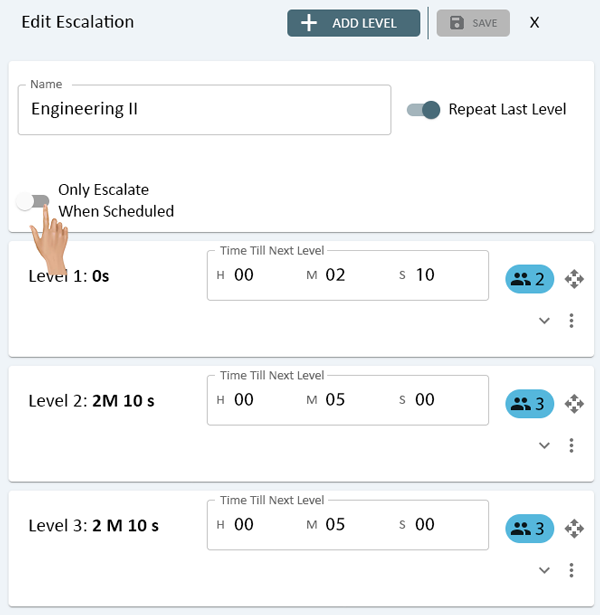
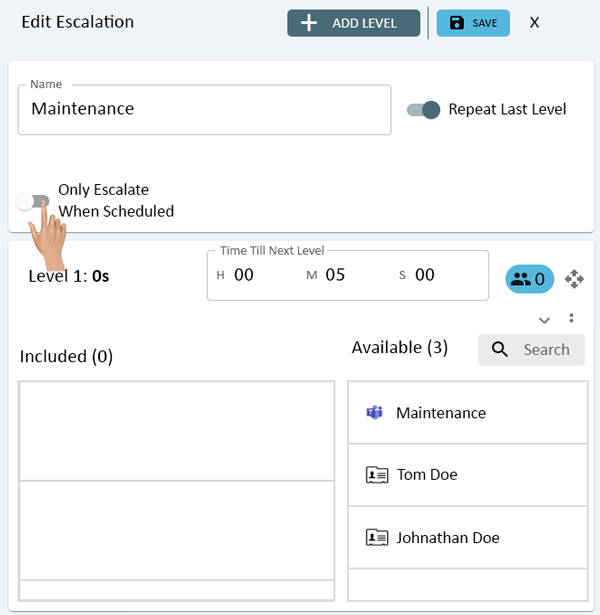
Below the Name field is the Only Escalate When Scheduled. This setting allows the system to suspend notifications for Breaks. Toggle the switch on or off to enable or disable this function.
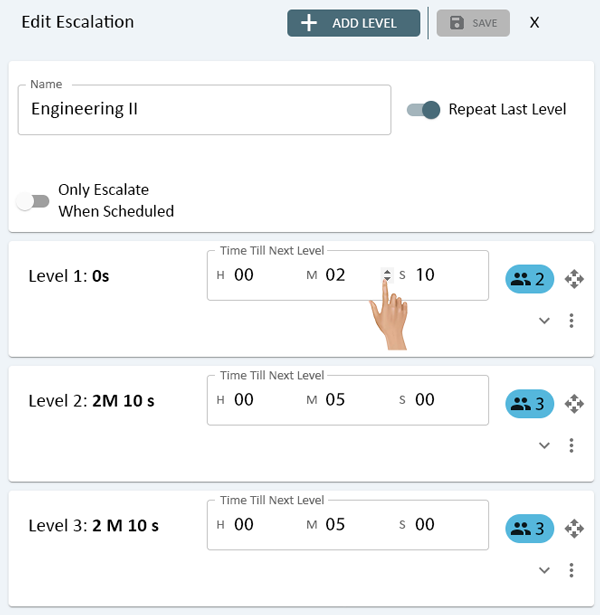
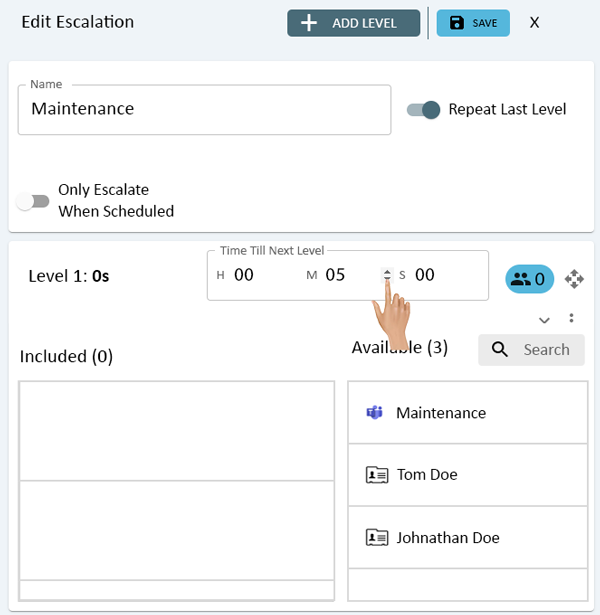
Below the Name section the Levels will be shown. To increase the Time Till Next Level, click on the up and down arrows for the Hours, Minutes or Seconds field.
To change the order of the Levels click on the Move icon and hold. Once selected the user can move the level up or down in the order by drag and drop.
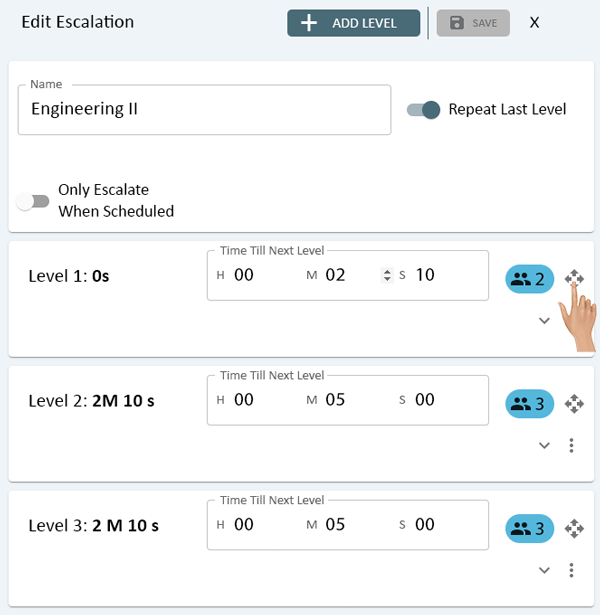
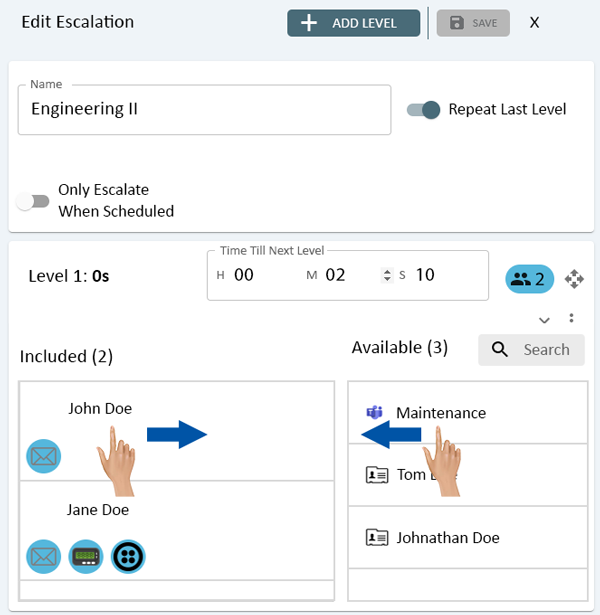
To change the Contacts, click on the expand icon for the Level.
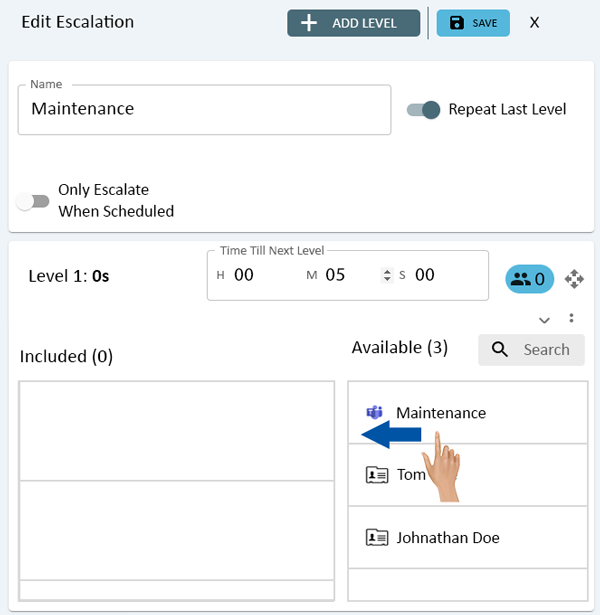
Once the level is expanded, Contacts can be removed or added to the level.
Click and hold on a contact in the Available list. Drag and drop it to the Included list to add the contact to the level.
Click and hold on a contact in the Included list. Drag and drop it to the Available list to remove the contact from the level.
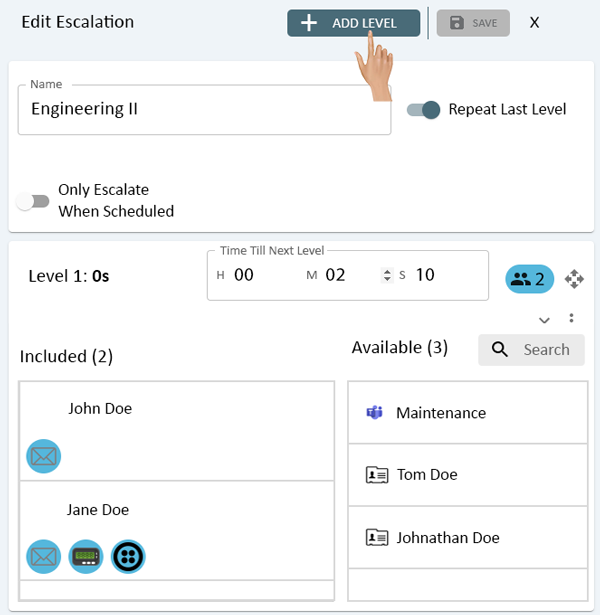
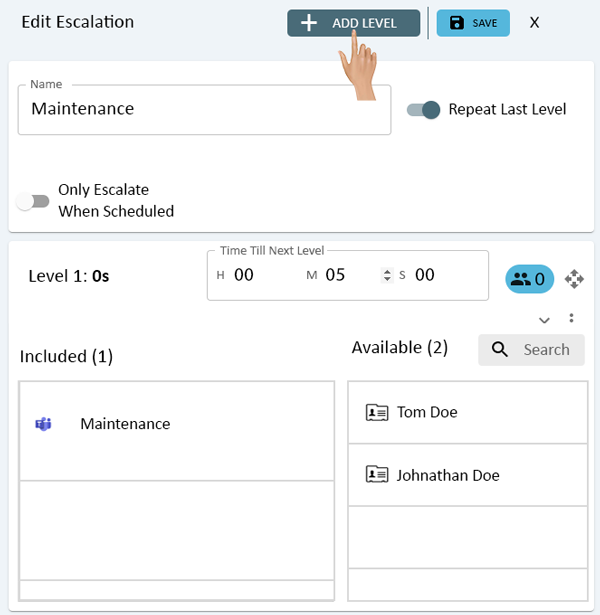
To add a level to the Escalation, click on the Add Level button at the top right of the window. Once the Level is added to the escalation, the user will need to add contacts and adjust the Time Till Next Level.
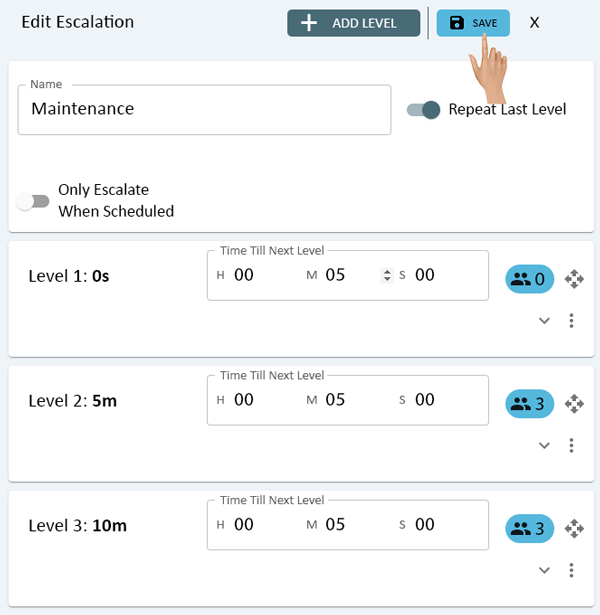
Once all of the changes have been made, click on the Save button in the top right corner of the window.
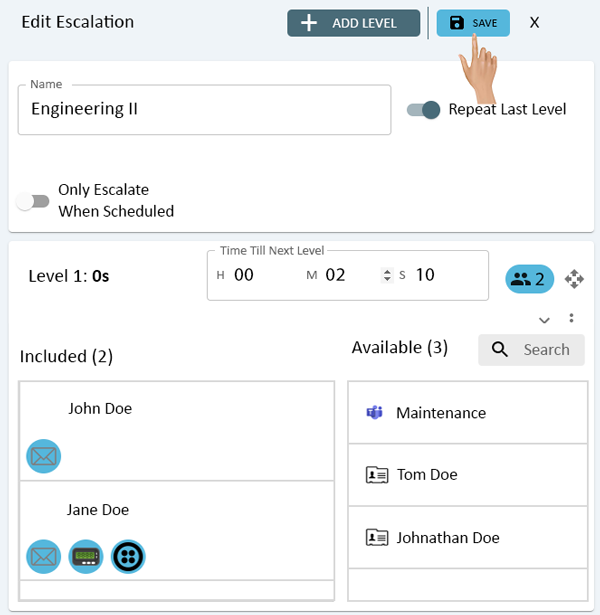
To close the Edit Escalation window, click on the "X" next to the Save button.
Any changes made to the Escalation Name or Number of Levels will be reflected on the Escalations list.
|
|
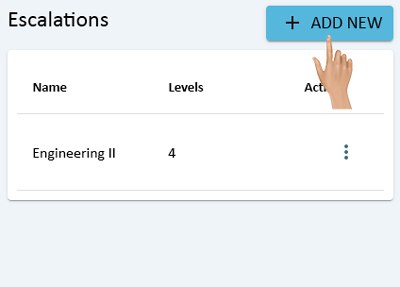
On the Escalations page click on the Add New button.
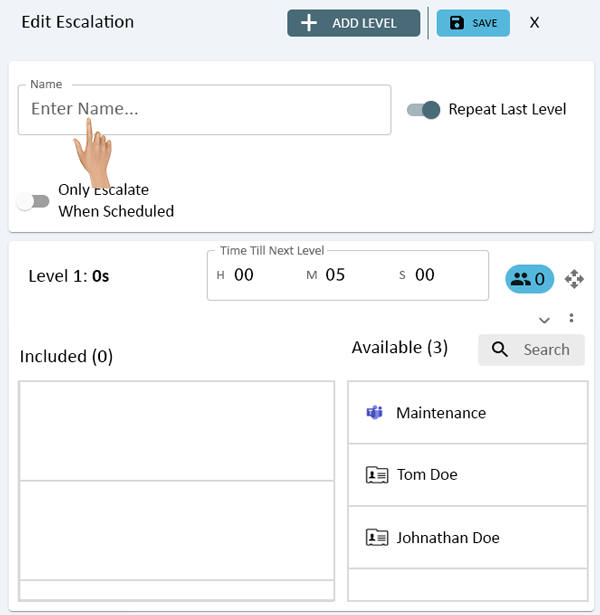
On the right side of the Escalations List a New Escalation window will load. Click in the Name field to enter a name for the Escalation.
To the right of the Name is the Repeat Last Level option. This setting allows the system to continue notifying contacts on the last level until it is acknowledged. Toggle the switch on or off to enable or disable this function.
Below the Name field is the Only Escalate When Scheduled. This setting allows the system to suspend notifications for Breaks. Toggle the switch on or off to enable or disable this function.
Below the Name section Level 1 will be expanded. This will be the initial communication for an Alert.
Adjust the Time Till Next Level by clicking on the up and down arrows for the Hours, Minutes or Seconds field.
This will be the amount of time that must expire before the system sends communications to the next level in the Escalation. By default, levels are set to 5 minutes.
After setting the time, the level will need to have Contacts added to it.
Click and hold on a contact in the Available list. Drag and drop it to the Included list to add the contact to the level.
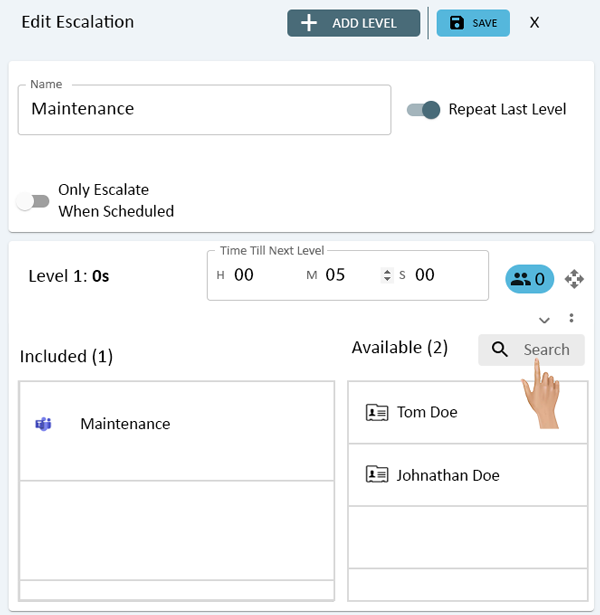
When there are numerous contacts in the Available list, the user can use the Search field to shorten the list.
Simply click in the Search field and start typing the name of the Contact. The list will automatically reduce/populate the results.
To add another level to the Escalation, click on the Add Level button at the top right of the window.
After adding the level, use the same steps mentioned above to adjust the Time and add Contacts.
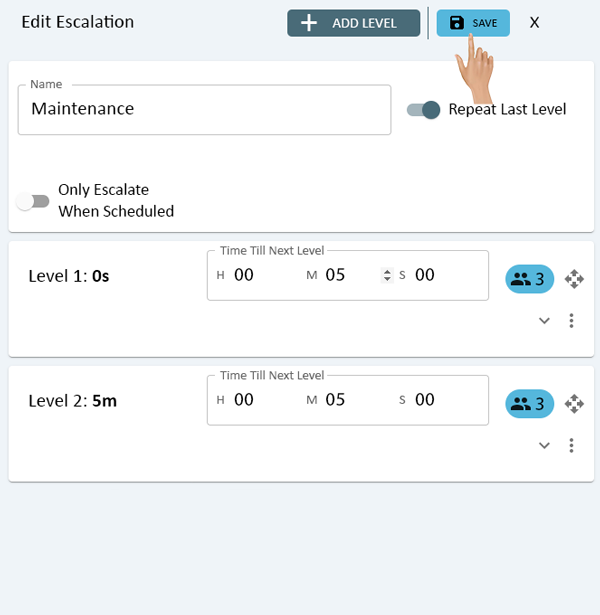
Once all of the changes have been made, click on the Save button in the top right corner of the window.
To close the Edit Escalation window, click on the "X" next to the Save button.
The New Escalation will show in the Escalations list.
|
|
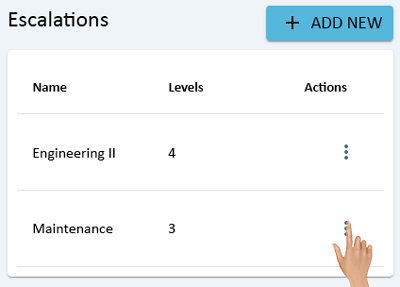
On the Escalations page, click on the 3 dot menu for the Escalation the needs to be removed.
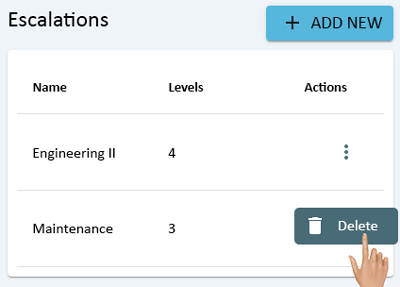
Select Delete from the pop-up menu.
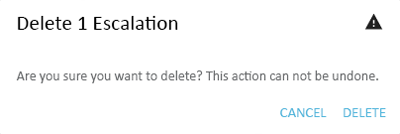
A confirmation window will show on the screen. Select Delete to remove the Escalation. Select Cancel to keep the Escalation.
If Delete was selected, the Escalation will no longer show in the Escalations List.

|
|
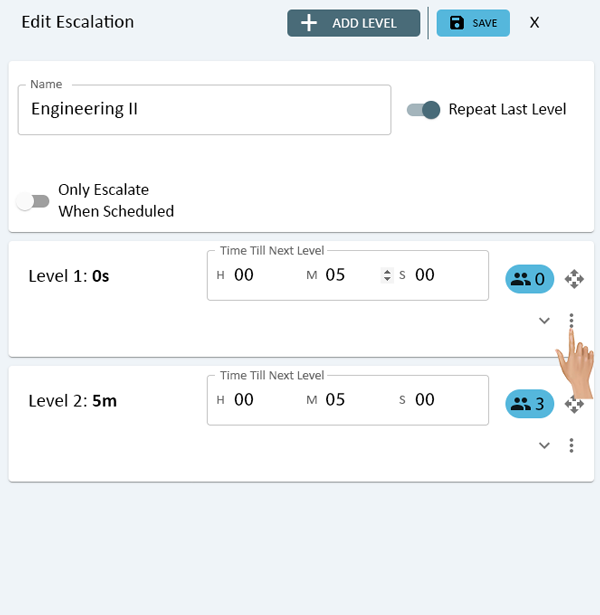
Click anywhere on the row of an Escalation that has a level that needs to be removed.

The Edit Escalation window will load. Click on the 3 dot menu for the Level that needs to be removed.
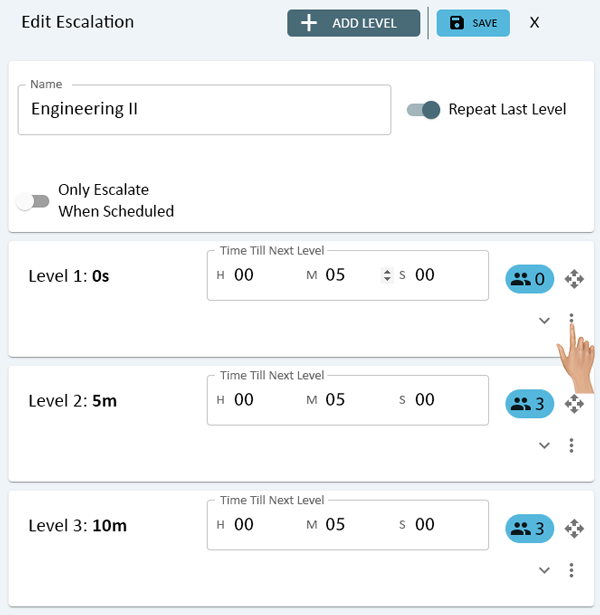
Select Delete from the pop-up menu.
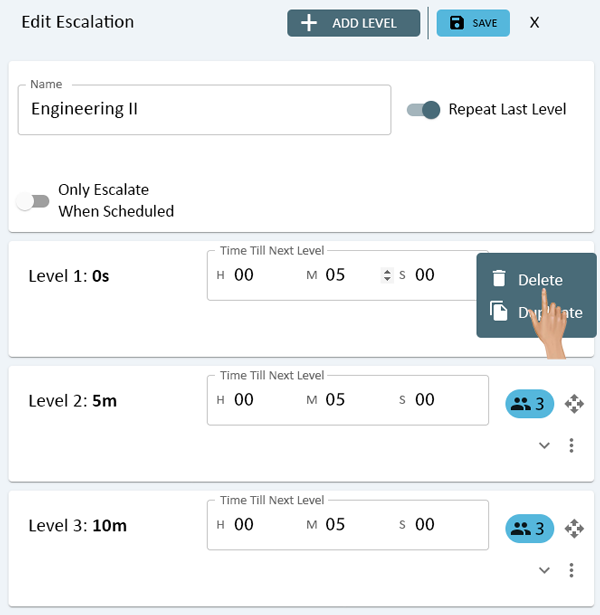
There will not be any warning message, the level will be automatically removed from the Escalation.
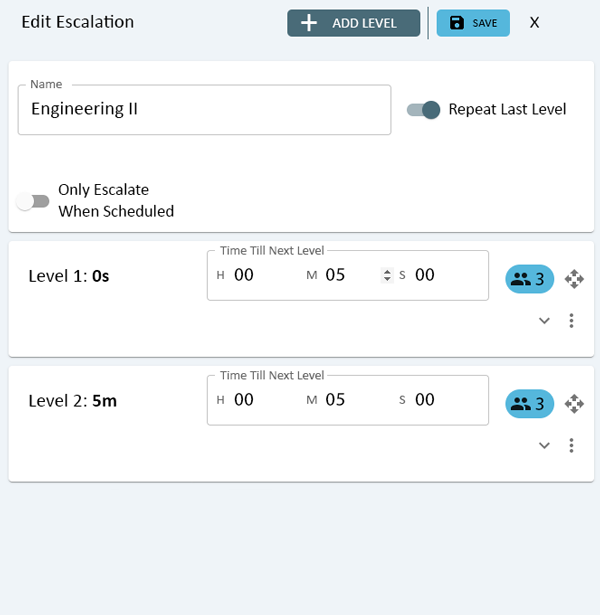
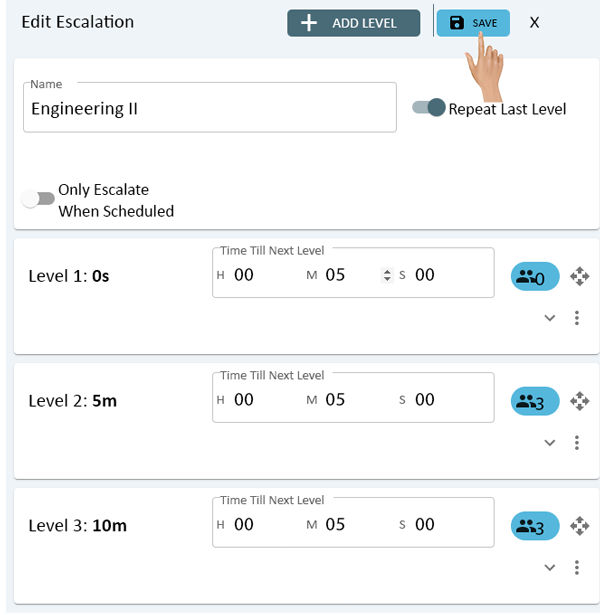
Select the Save button to save the changes to the Escalation.
|
|
Click anywhere on the row of an Escalation that has a level that needs to be duplicated.
The Edit Escalation window will load. Click on the 3 dot menu for the Level that needs to be duplicated.
Select Duplicate from the pop-up menu.
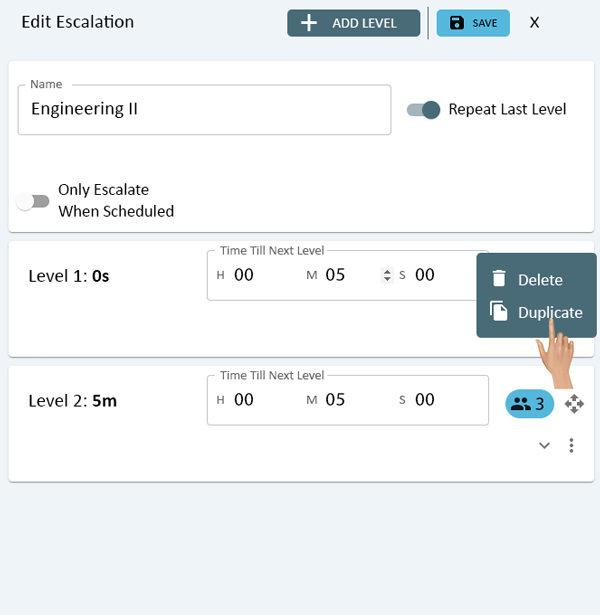
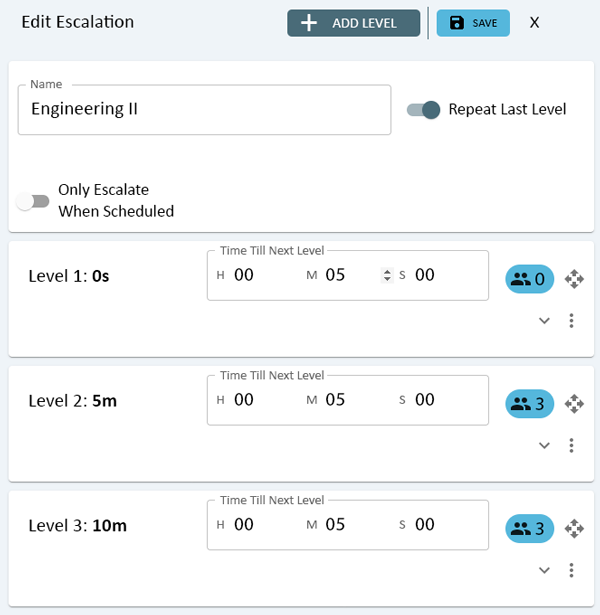
The duplicated level will load below the list of levels. The user will need to make edits to the Contacts or Time to Next level if needed.
Select the Save button to save the changes to the Escalation.
|
|

|