Communications - Groups
From VersaVision Support
![]()
Communications is where everything connected to messaging in the system is setup. There are multiple components inside Communications, this page is focused on the Groups component.
Groups allow the user to configure multiple contacts into a specific group. The Group can then be added to an escalation. This can make configuration of escalations easier when dealing with a larg number of contacts.
This page will concentrate on Viewing, Editing, Adding, Deleting and Testing.
Communications can be accessed via the Home page menu or the Communications icon. Once Communications has been selected - select Groups from the menu.

|
|
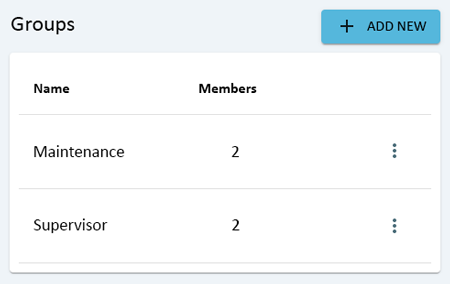
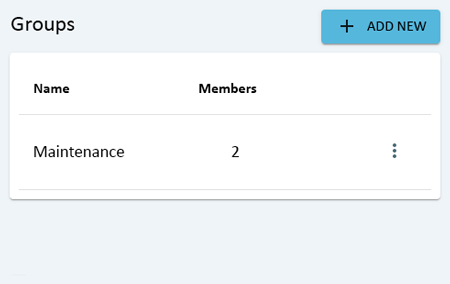
On the Groups page there will be a list of all the Groups setup in the system. Click anywhere on the row of a Group to view the properties.
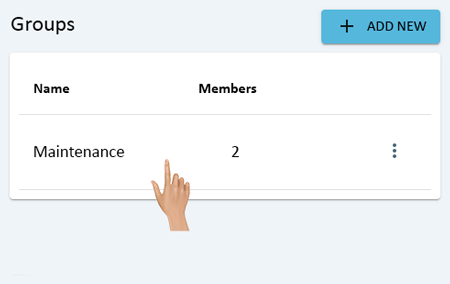
On the right side of the Groups list an Edit Group window will load.
The Name, Availability, Included Contact List & Available Contact List.
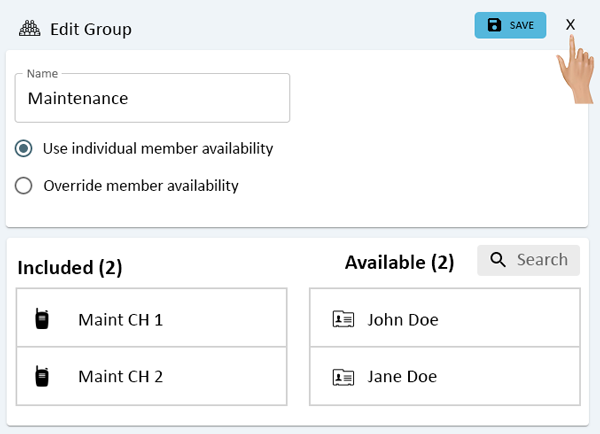
To close the Edit Group window, click on the "X" in the right corner next to the Save button.

|
|
On the Groups page there will be a list of all the Groups setup in the system. Click anywhere on the row of a Group to view the properties.

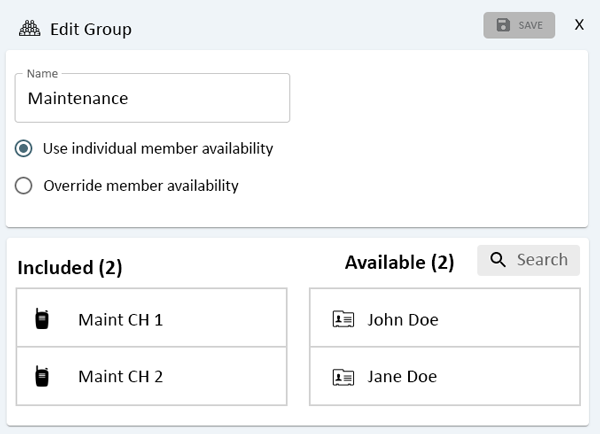
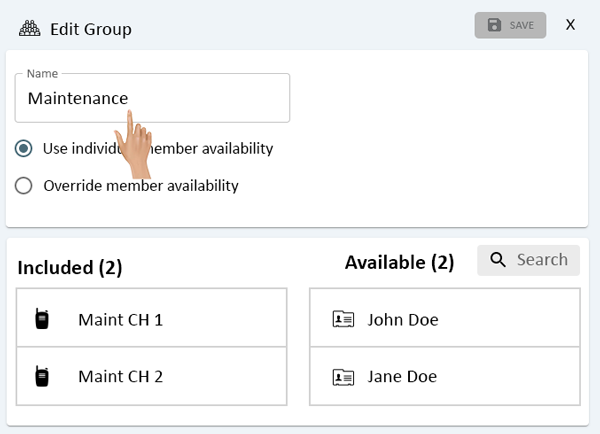
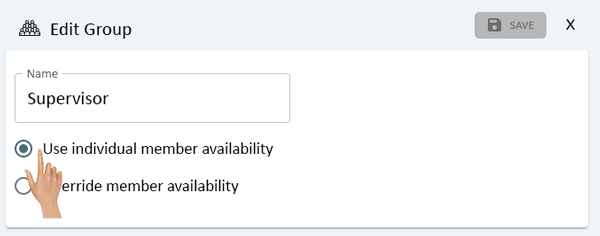
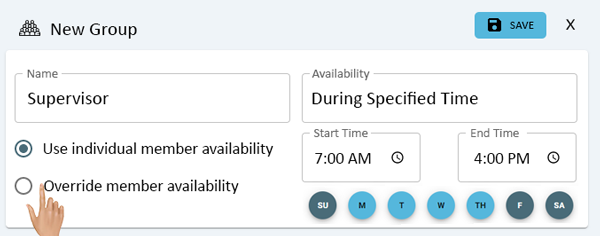
On the right side of the Groups list an Edit Group window will load. Click in the Name field to edit the name of the Group.
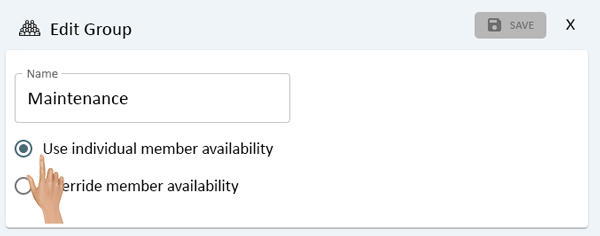
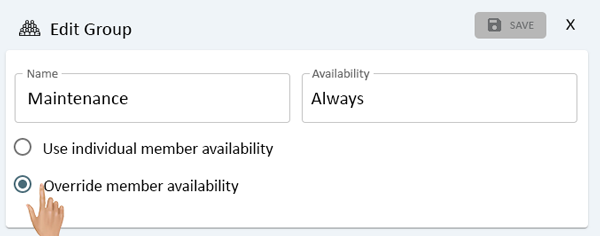
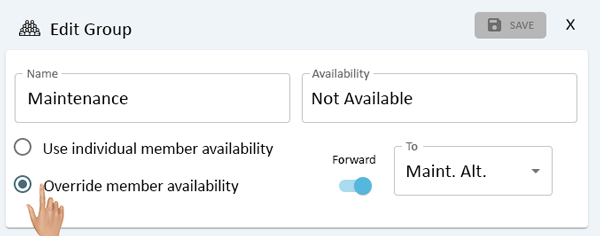
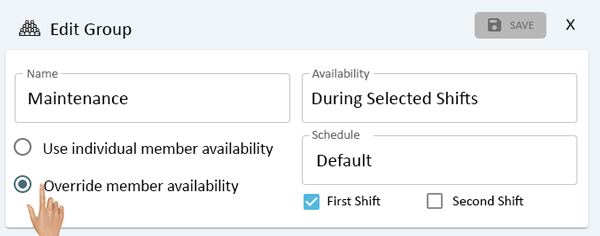
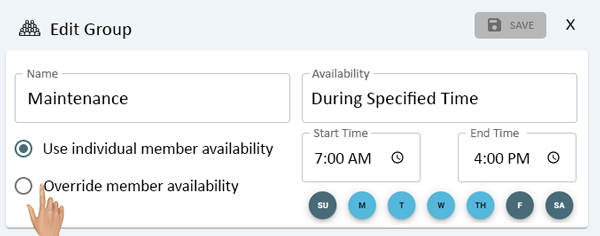
Below the Name field there are Availability options. Toggle the button on or off to enable or disable a type.
- Use Individual Member Availability - enabling this option will use the availability setup for the contact.
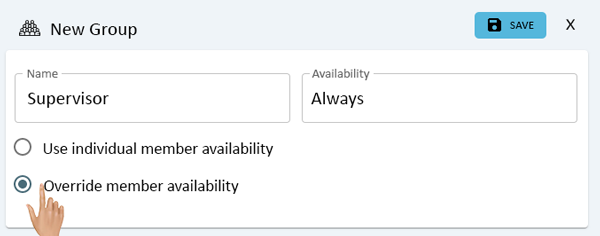
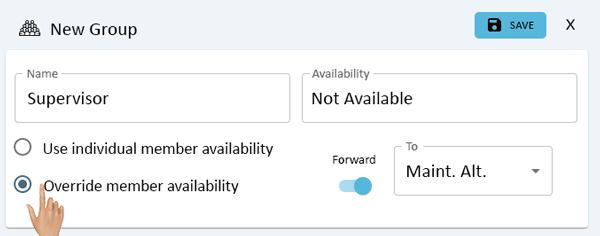
- Override Member Availability - enabling this option will allow the user to set a specific availability time. The options available are the same as what is available on an individual Contact (Always, Not Available, During Selected Shifts, or During a Specified Time).
Depending on the option selected, the interface will change.
- Use Individual Member Availability
- Override Availability - Always
- Override Availability - Not Available
- Override Availability - During Selected Shifts
- Override Availability - During Specified Time
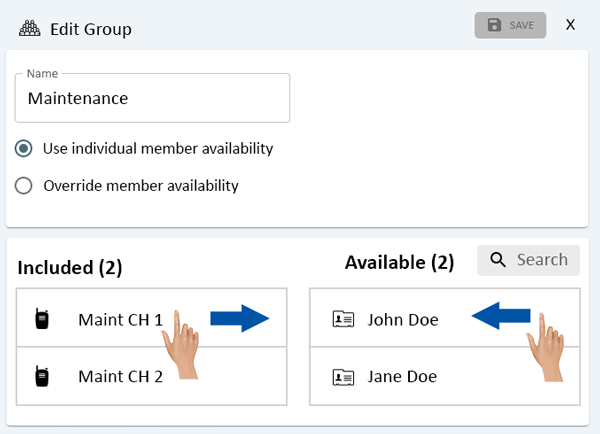
Below the name and availability settings the Included and Available Contact lists will show.
Click on a contact in the Included List and drag it to the Available List to remove it from the Group.
Click on a contact in the Available List and drag it to the Included List to add it to the Group
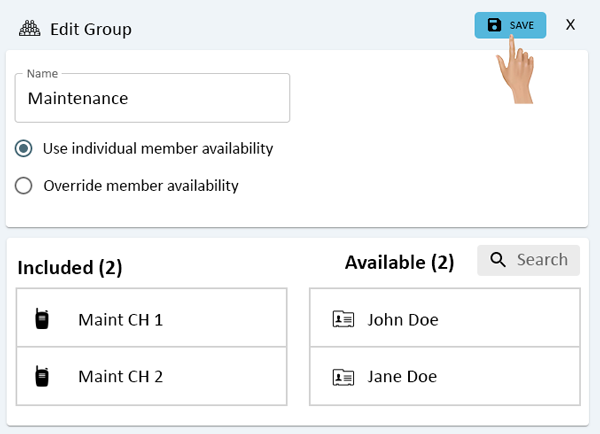
Select the Save button to save changes made to the Group.
To close the Edit Escalation window, click on the "X" next to the Save button.
|
|
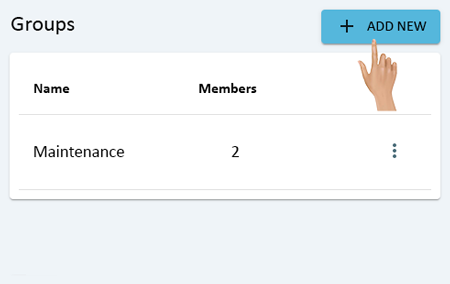
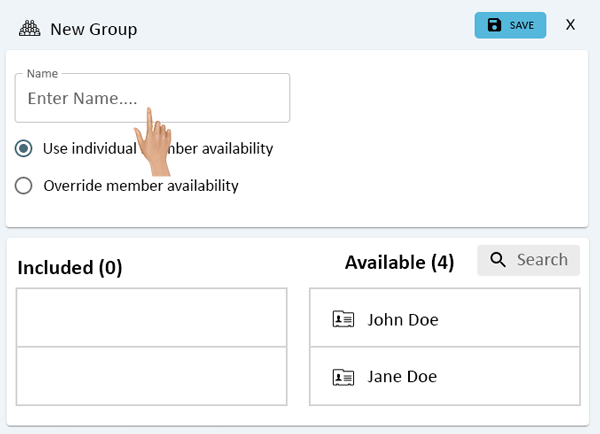
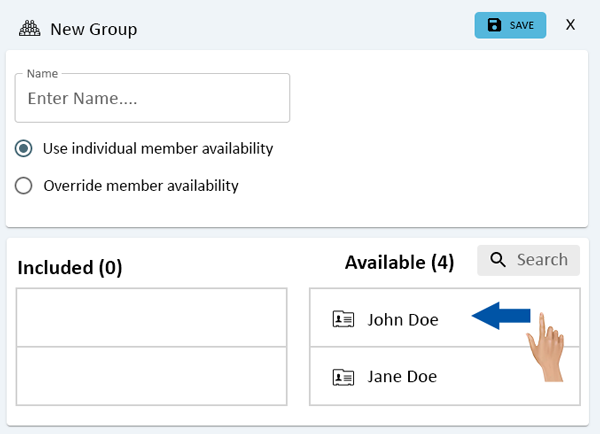
On the Groups page click on the Add New button.
On the right side of the Groups list a New Group window will load. Click in the Name field to add a name for the Group.
Below the Name field there are Availability options. Toggle the button on or off to enable or disable a type.
- Use Individual Member Availability - enabling this option will use the availability setup for the contact.
- Override Member Availability - enabling this option will allow the user to set a specific availability time. The options available are the same as what is available on an individual Contact (Always, Not Available, During Selected Shifts, or During a Specified Time).
Depending on the option selected, the interface and options will change.
- Use Individual Member Availability
- Override Availability - Always
- Override Availability - Not Available
- Override Availability - During Selected Shifts

- Override Availability - During Specified Time
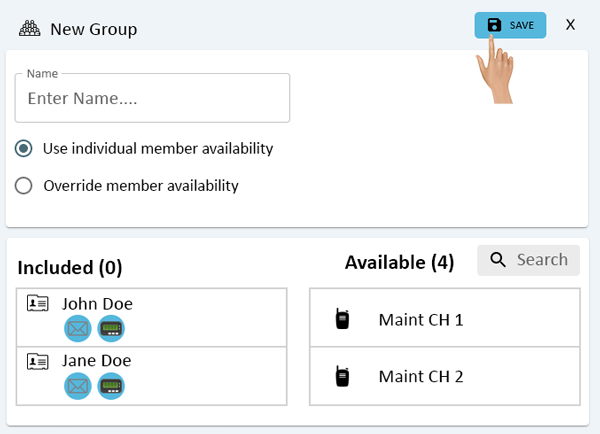
Below the Group name and availability options are the Included and Available Lists.
Contacts on the Included List are a part of the Group. Contacts on the Available List are not part of the group.
Click on a Contact on the Available List and drag it to the Included list.
Select the Save button to save the Group.
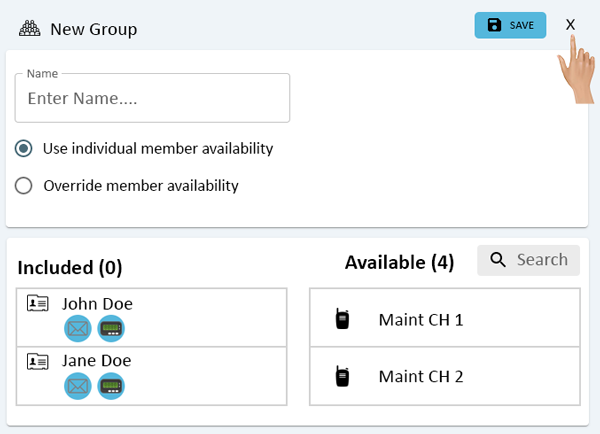
To close the Add Group window, click on the "X" next to the Save button.
The Group that was added will show in the Groups list.
|
|
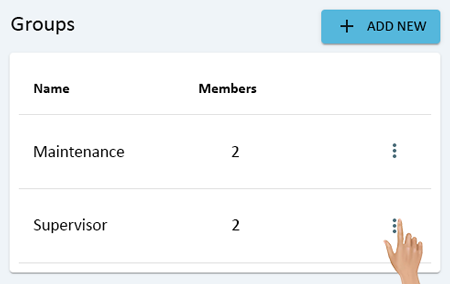
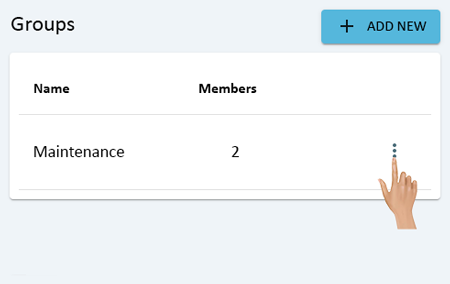
On the Groups page, click on the 3 dot menu for the Group the needs to be removed.
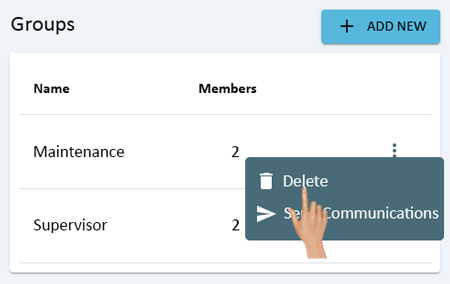
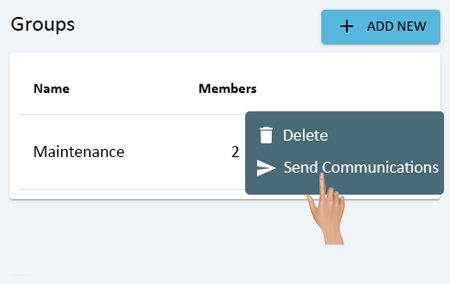
Select Delete from the pop-up menu.
A confirmation window will show on the screen. Select Delete to remove the Group. Select Cancel to keep the Group.
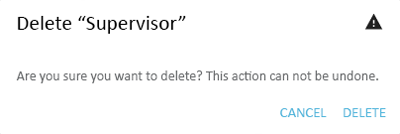
If Delete was selected, the Group will no longer show in the Groups List.
|
|
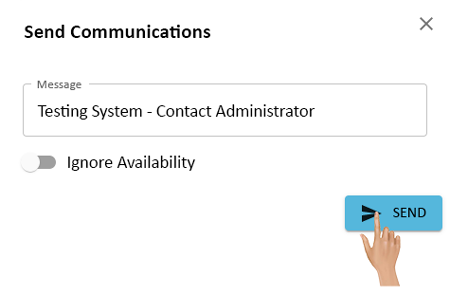
On the Groups page, click on the 3 dot menu for the Group the needs to be tested.
Select Send Communications from the pop-up menu.
A Send Communications window will load. Click in the Message field and type in the test message.
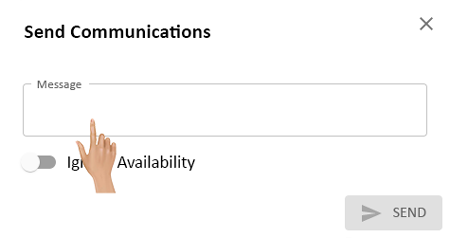
There is an option to ignore the Contact availability setting. Toggle this option on or off to enable or disable it.
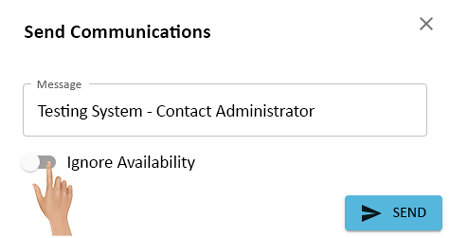
Click on the Send button to send the test message out to all the Contacts in the Group..
|
|

|