Existing System - USB Coordinator - Add On
From VersaVision Support

OVERVIEW
- A USB Coordinator can only be used on a Computer/Server provided by VersaCall.
- IT provided VM Servers must use the Remote (Ethernet Connected) Coordinator.
- This guide explains the process for connecting a USB Coordinator that is an Add-On to the existing system.
- This would be a Coordinator in addition to the existing Coordinator that came with the system originally.
REQUIREMENTS
- Computer/Server/VM must have have been provided by VersaCall directly.
- User must have be assigned to a Role (VersaVision) that allows them to access Administration - Mesh.
- Hardware must be installed prior to these instructions.
- Add-On USB Coordinator MUST be plugged into an open USB Port on the VersaCall Computer/Server.
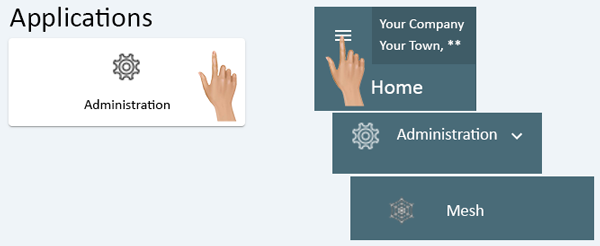
NAVIGATION
- Administration can be accessed via the Home page menu or the Administration icon. Once Administration has been selected - select Mesh from the menu.
INSTRUCTIONS
- Click on the Add New button in the right corner above the Coordinators List.
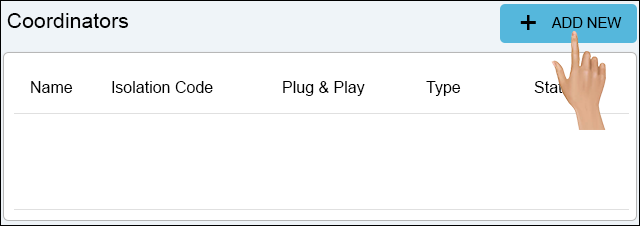
- The Add Coordinator properties window will show on the right side of the Coordinators list.
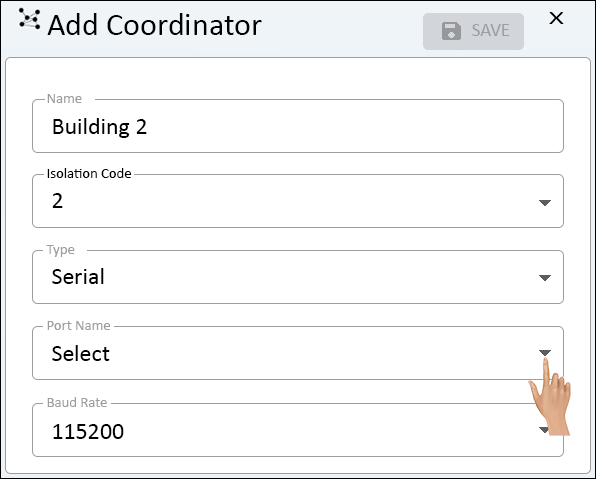
- Click in the Name field.

- Enter a name for the Coordinator.
- Good Practice - name the Coordinator something that will help you/others locate it.
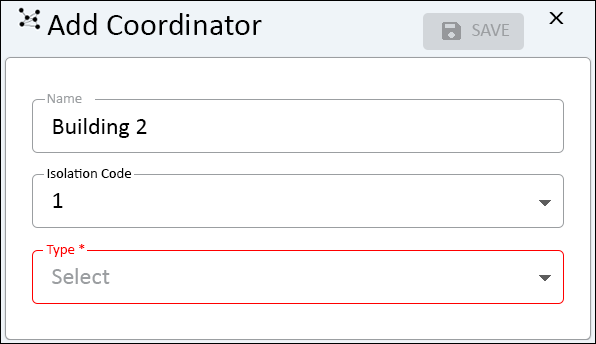
- On the left side of the Add Coordinator properties, all of the installed Coordinators will show.
- Make note of all the Isolation Codes.
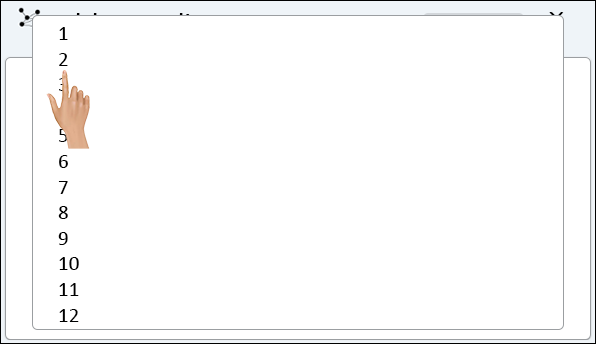
- Click on the down arrow on the Isolation Code field.
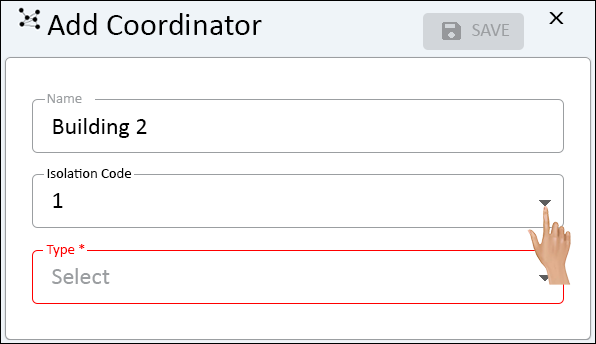
- Select an Isolation Code that is 1 greater than the highest value.
- For our example there is 1 Coordinator, the highest Isolation Code is 1.
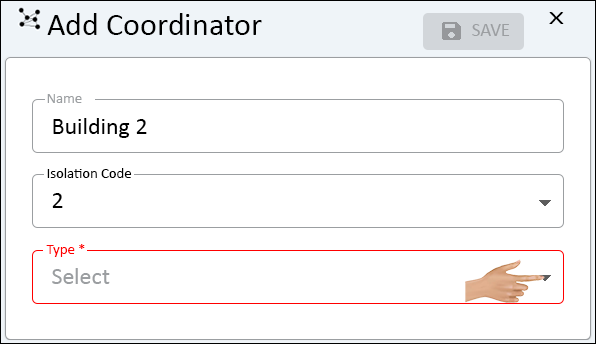
- The code that we will be selecting is 2.
- Click on the down arrow in the Type field.
- Select Serial from the list.
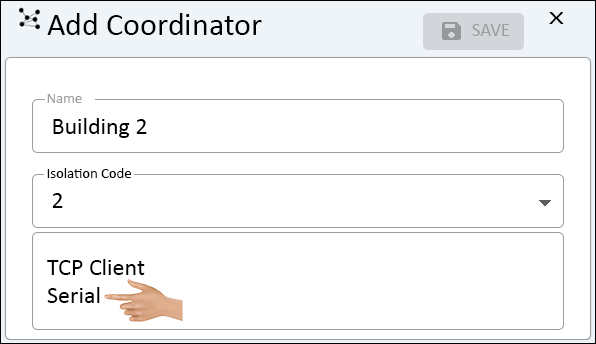
- Once Serial has been selected, the Coordinator properties options will update.
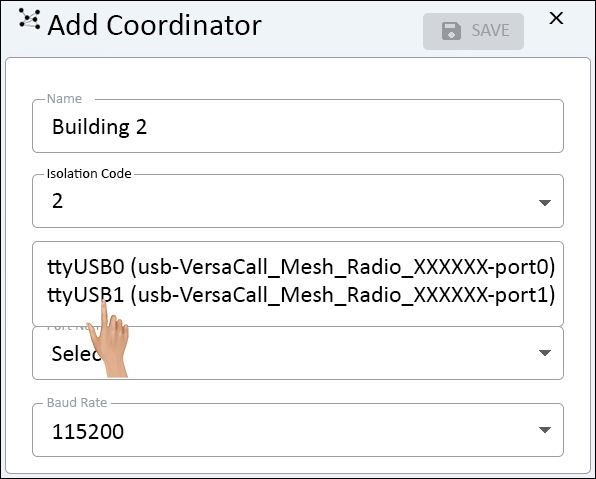
- There will now be additional fields - click on the down arrow on the Port Name field.
- There will be 2 "USB" ports listed, select the NEW port.
- The new port would be the port NOT assigned to the existing USB Coordinator.
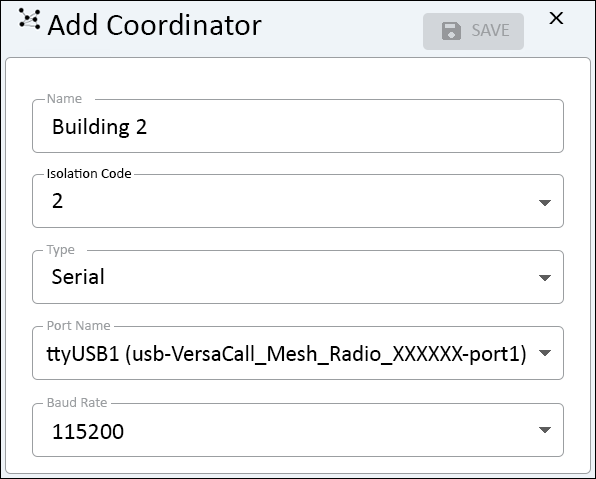
- For our example the name is "ttyUSB1 (usb-VersaCall_Mesh_Radio_XXXXXX-port1)"
- Leave the Baud Rate field set to "115200".
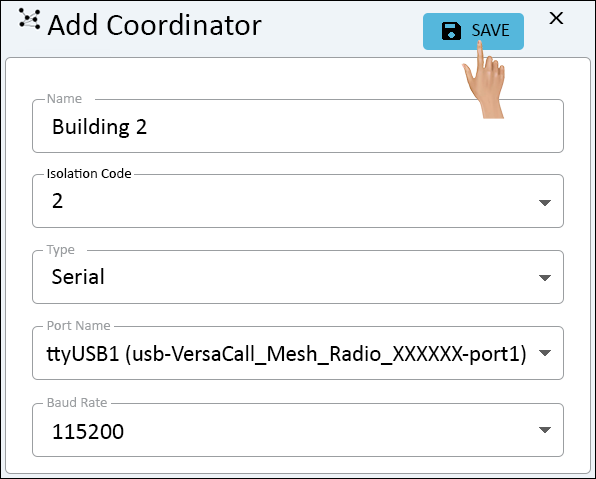
- Select the Save button at the top right side of the page.
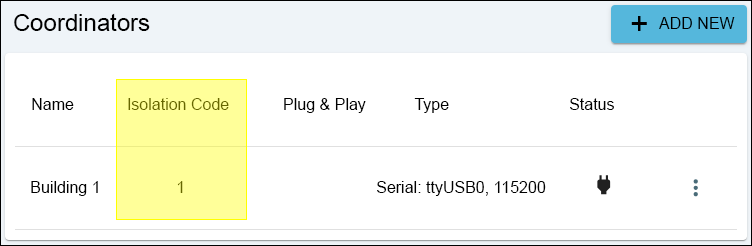
- Ensure the the newly added Coordinator shows in the Coordinator list.
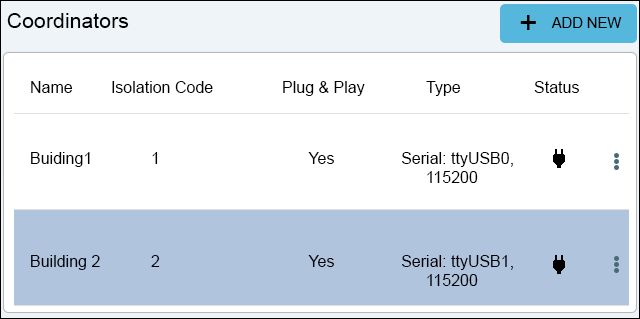
- If the New Coordinator is Connected, move on to the next Step - Check Status.
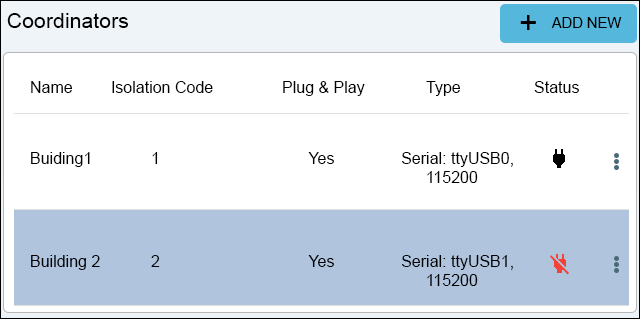
- If the New Coordinator is NOT Connected (image below), contact VersaCall Support for assistance.

|