IT - Static IP Setup
From VersaVision Support

IMPORTANT INFORMATION
- The instructions below can ONLY be used on a VersaVision Computer that was provided by VersaCall.
- If the VersaVision Computer/Server was provided by your IT Department, these instructions will not work properly and could cause errors.
- Contact your IT Department for assistance.
- VersaVision uses Linux Server as an operating system, there specific requirements when this interface is used.
- Ensure you follow the instructions below precisely.
- Before beginning the process, ensure that you have all of the information listed in the Requirements section.
OVERVIEW
- In some cases, you IT Team may want to setup the VersaVision Computer with a Static IP Address as opposed to using a DHCP Reserved Address.
- The instructions provided below will explain how to setup a Static IP on a VersaVision Computer that was provided by VersaCall.
REQUIREMENTS
- 1. Physical Access to the VersaVision Computer.
- 2. A Monitor, Keyboard & Mouse attached to the VersaVision Computer.
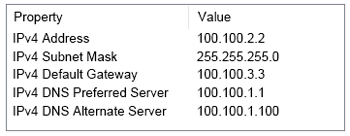
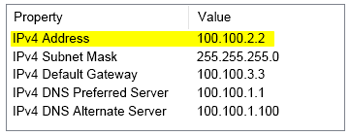
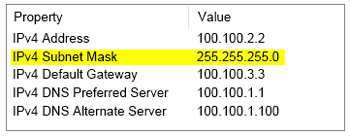
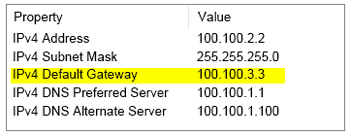
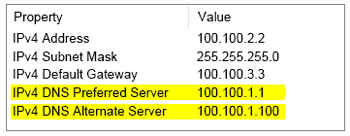
- 3. The following information from your IT Department or Network Administrator:
- a. Static IP Address for the VersaVision Computer.
- b. Subnet Mask
- c. Default Gateway
- d. Preferred DNS
- e. Alternate DNS
- Example of what the information above:
INSTRUCTIONS
- Go to the VersaVision server - turn on the Monitor.
- Computer will look similar to the image below:
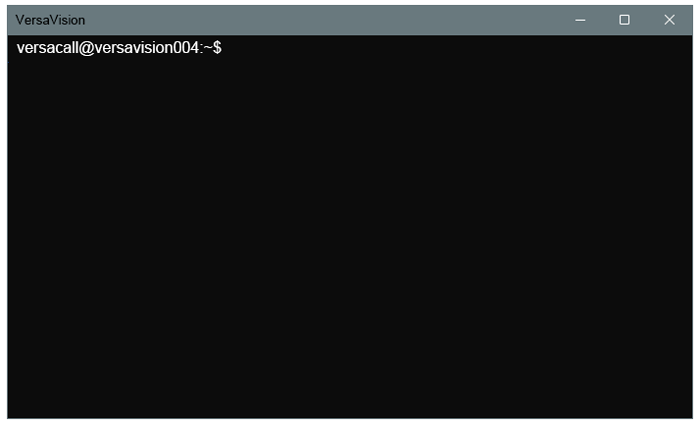
- The screen should have a Terminal that looks similar to the image below:
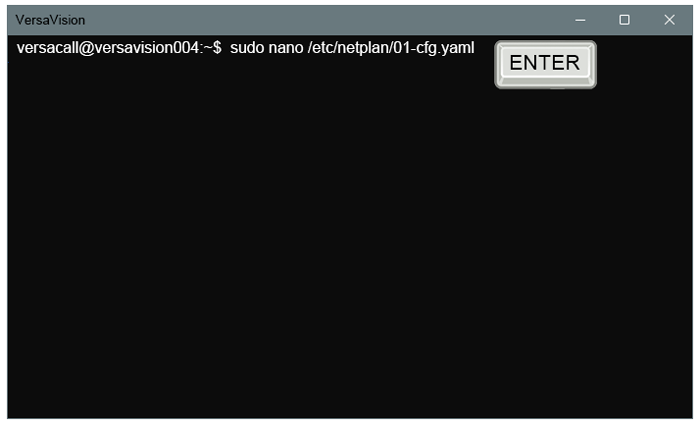
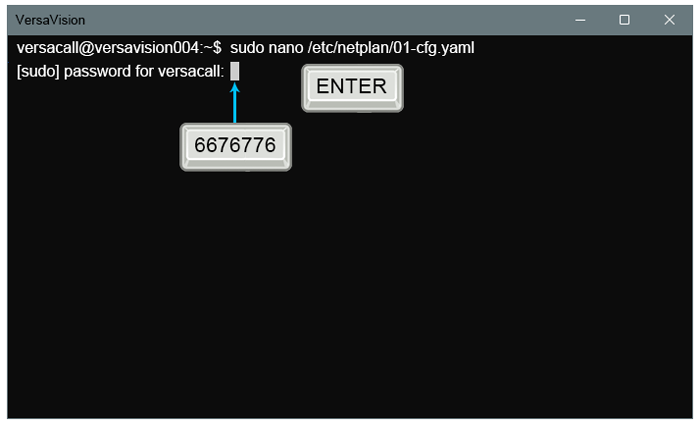
- Type in the following command:
- sudo nano /etc/netplan/01-netcfg.yaml
- ensure there is a space before sudo
- ensure there is a space after sudo
- ensure there is a space after nano
- sudo nano /etc/netplan/01-netcfg.yaml
- Press the "Enter" key.
- The system will ask for a password. Enter the following password:
- 6676776
- Press the "Enter" key.
- No characters will show on the screen when entering the password.
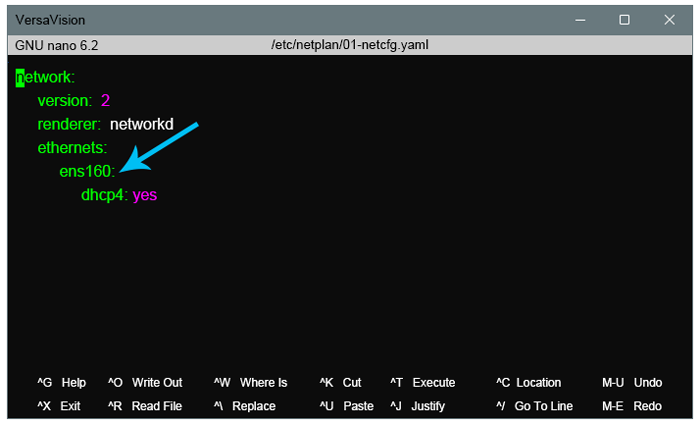
- A new screen will load on the Terminal titled "GNU nano 6.2".
- Before proceeding - make note of the address/port that is noted under the "ethernets" heading.
- In our example this is "ens160".
- Write down this information as you will need it after making all of the changes in this guide.
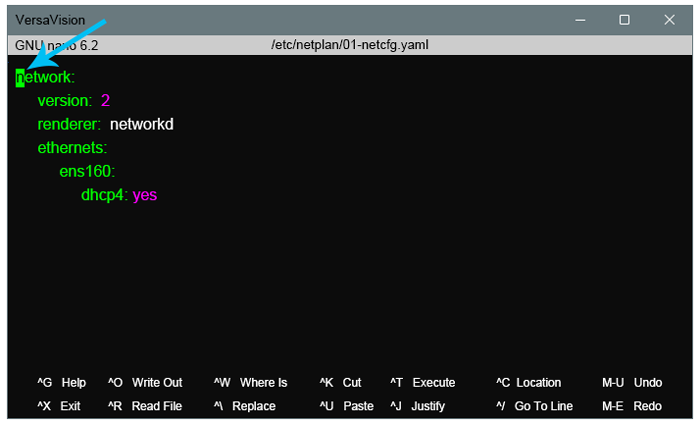
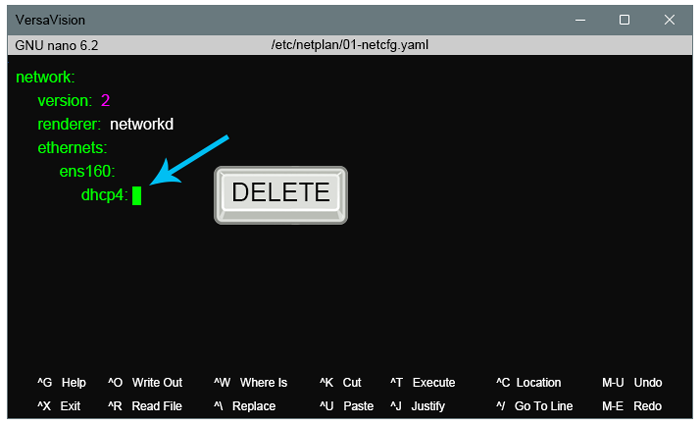
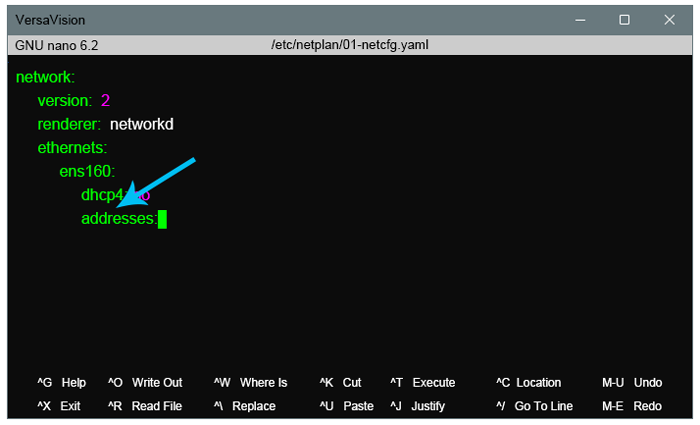
- The Cursor will be visible under the "n" in the "network" heading.
- Use the Arrow keys on your keyboard to move the cursor to the "y" in the "dhcp4" code line.
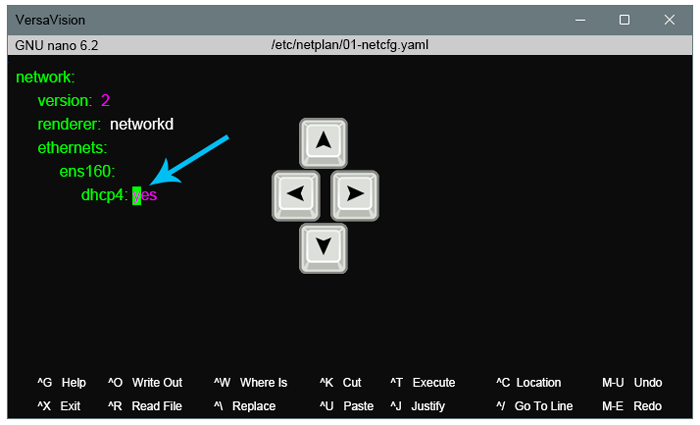
- Use the Delete key on your keyboard to remove "yes".
- Type in "no" for the "dhcp4" code line.
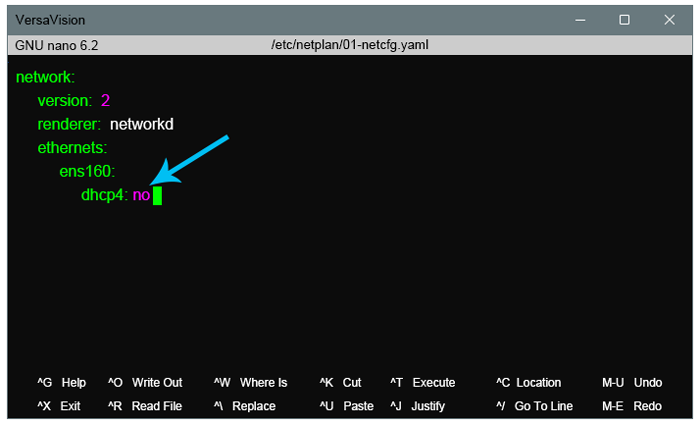
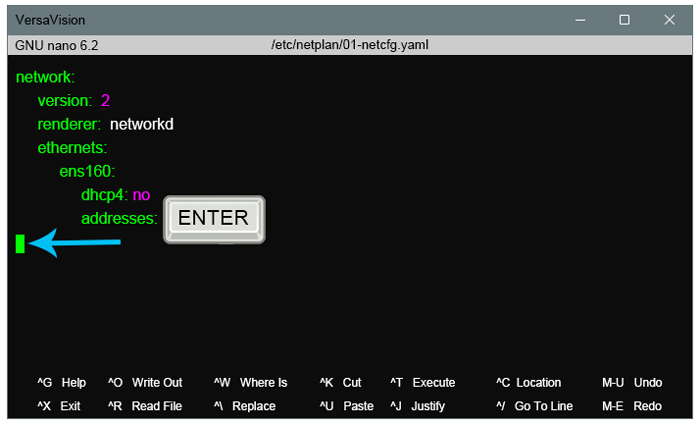
- Press the Enter key on your keyboard.
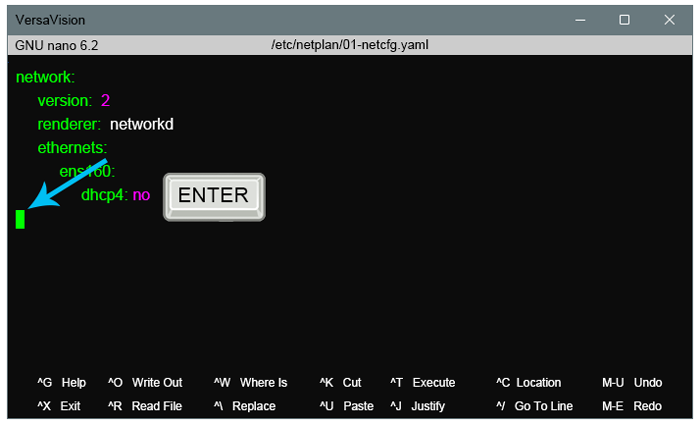
- Cursor will move to the beginning of the line under the "dhcp4" code line.
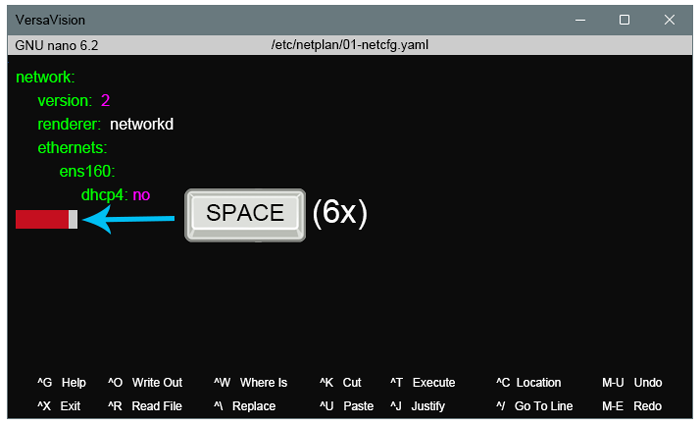
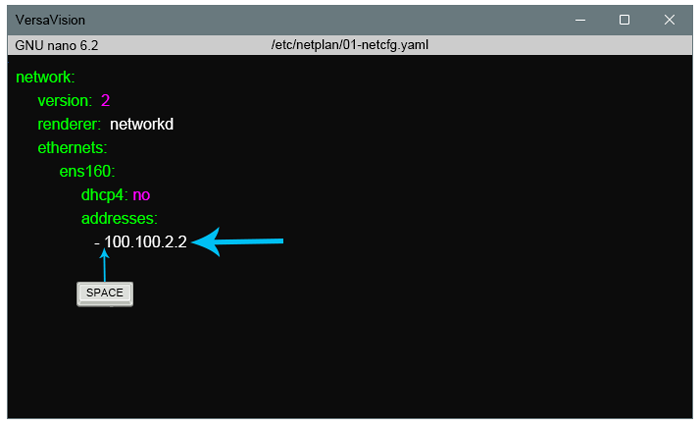
- Press the Space Bar on your keyboard 6 times.
- A red line will appear on the screen showing that the spaces have been added.
- The cursor should line up with the "dhcp4" code line.
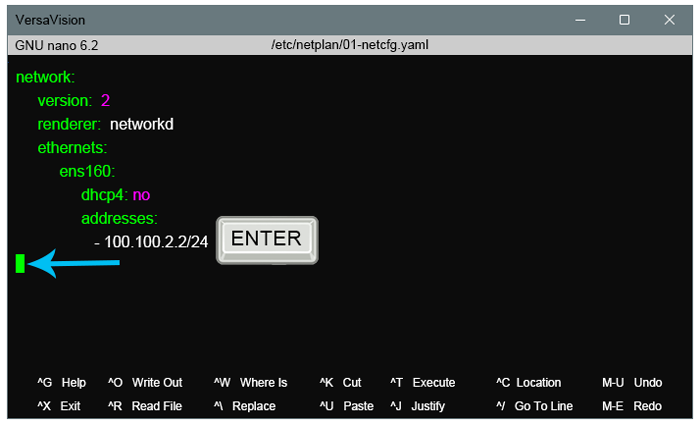
- Type in "addresses:"
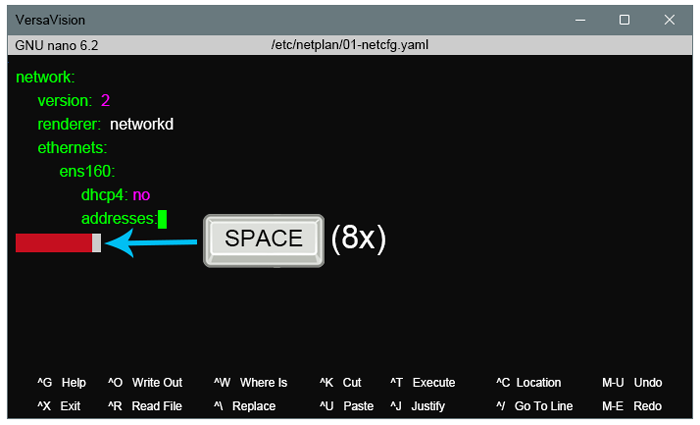
- Press the Enter key on your keyboard.
- Cursor will move to the beginning of the line under the "addresses" code line.
- Press the Space Bar on your keyboard 8 times.
- A red line will appear on the screen showing that the spaces have been added.
- The cursor should line up indented under the "addresses" code line.
- Get the document/note that has the Static IP Address information, for the VersaVision Computer, that was provided by your IT Department of Network Administrator.
- Find the IP Address that they provided.
- Type in "- (Static IP Address)".
- Ensure there is a space after the "-" before the first number in your Static IP Address.
- For our example, we are using the IP Address that was shown in the "Requirements" section.
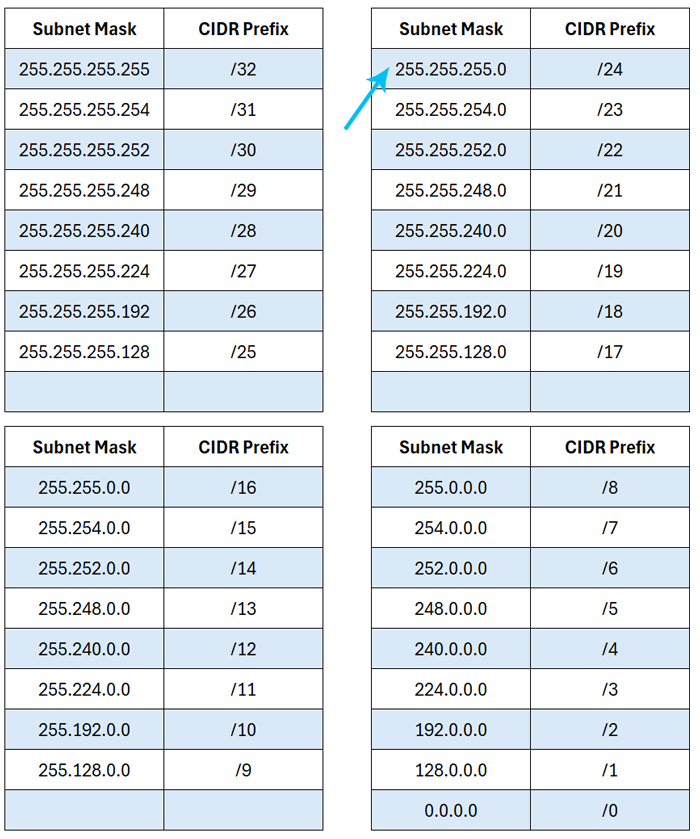
- Using the document/note that has your Static IP Address information, find the "Subnet Mask" address.
- Use the document shown below to match your Subnet Mask and find the "CIDR Prefix".
- For our example, we are using "255.255.255.0" which matches up to the "/24" CIDR Prefix
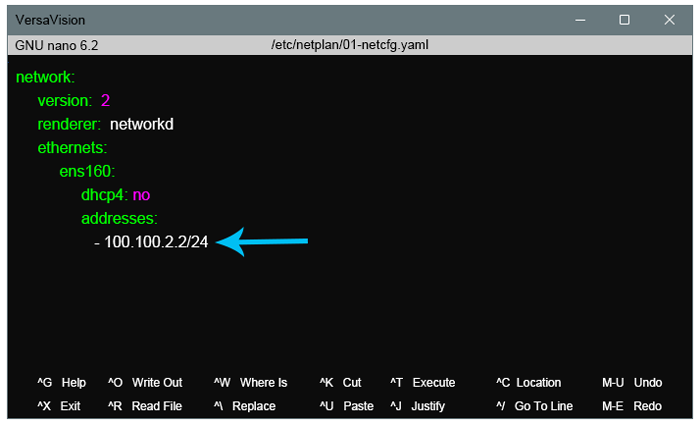
- Type in your CIDR Prefix after your Static IP Address.
- DO NOT put a space between the IP Address & the CIDR Prefix - No Spaces are required.
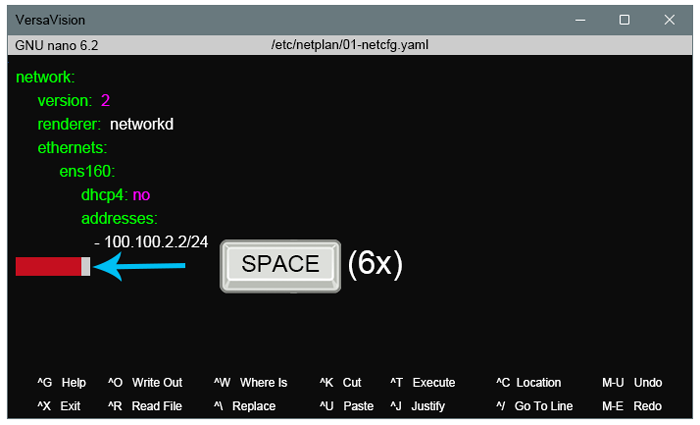
- Press the Enter key on your keyboard.
- Cursor will move to the beginning of the line under the Static IP Address/CIDR Prefix code line.
- Press the Space Bar on your keyboard 6 times.
- A red line will appear on the screen showing that the spaces have been added.
- The cursor should line up with the "addresses" code line.
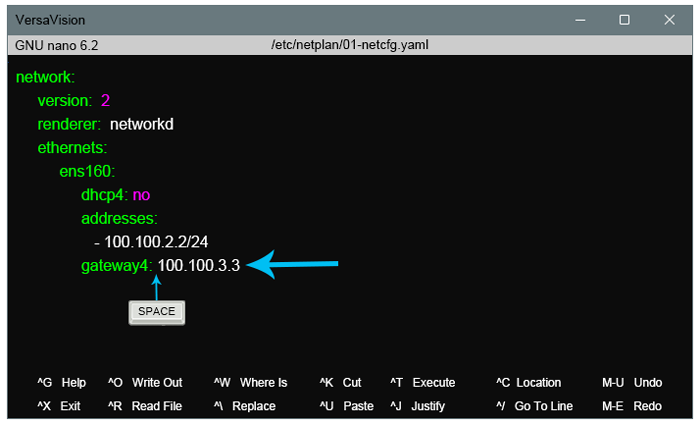
- Using the document/note that has your Static IP Address information, find the "Default Gateway" address.
- For our example, the address is 100.100.3.3
- Type in "gateway4: (Default Gateway Address)".
- Ensure there is a space after the ":" before the first number in your Default Gateway Address.
- For our example, we are using the Default Gateway Address that was shown in the line above.
- Press the Enter key on your keyboard.
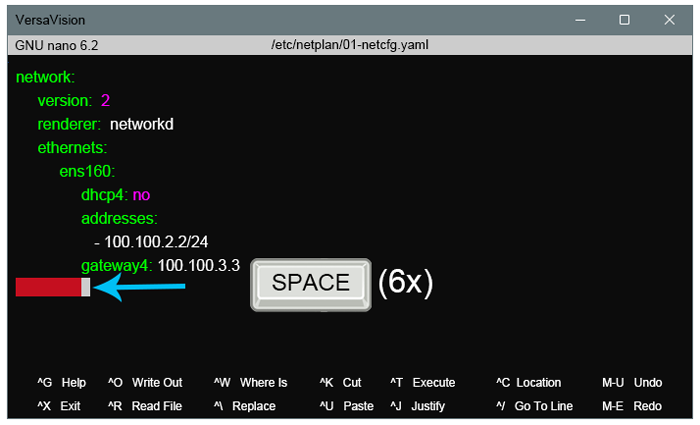
- Cursor will move to the beginning of the line under the "gateway4:" code line.
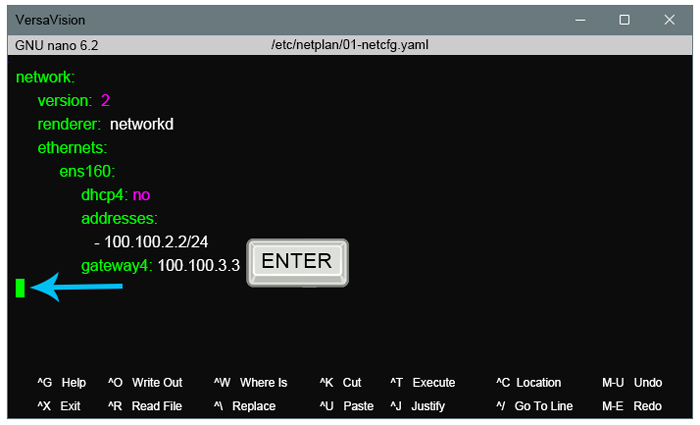
- Press the Space Bar on your keyboard 6 times.
- A red line will appear on the screen showing that the spaces have been added.
- The cursor should line up with the "gateway4" code line.
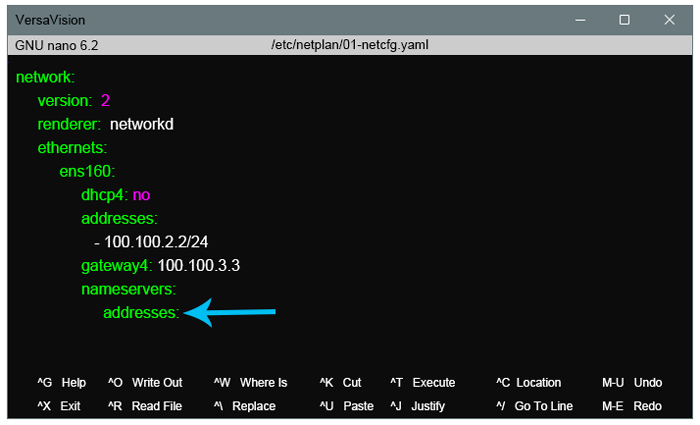
- Type in "nameservers:".
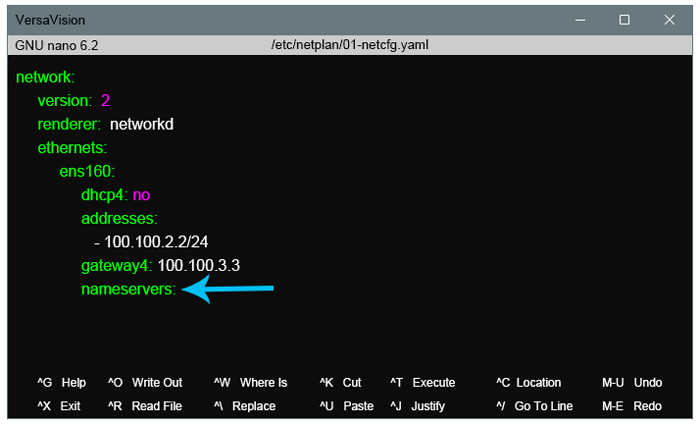
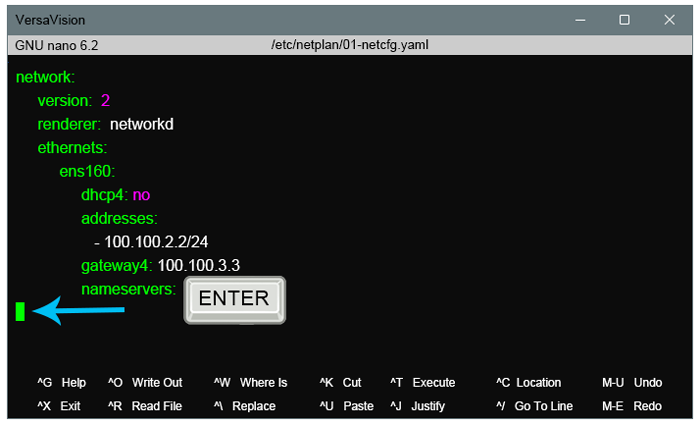
- Press the Enter key on your keyboard.
- Cursor will move to the beginning of the line under the "nameservers" code line.
- Press the Space Bar on your keyboard 8 times.
- A red line will appear on the screen showing that the spaces have been added.
- The cursor should be indented under "nameservers".
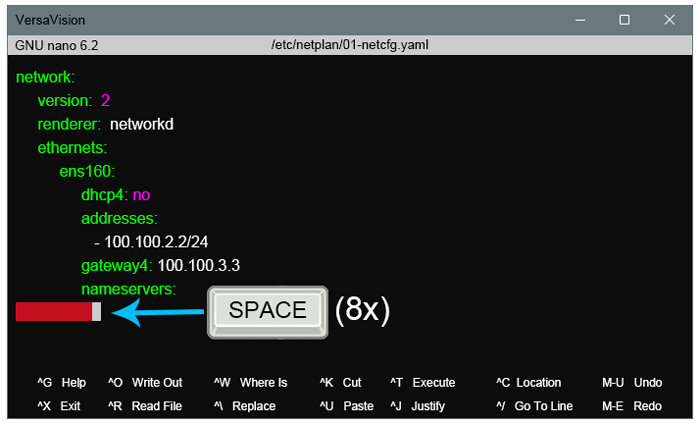
- Using the document/note that has your Static IP Address information, find the "DNS Preferred Server" and the "DNS Alternate Server" addresses.
- For our example, this would be 100.100.1.1 & 100.100.1.100
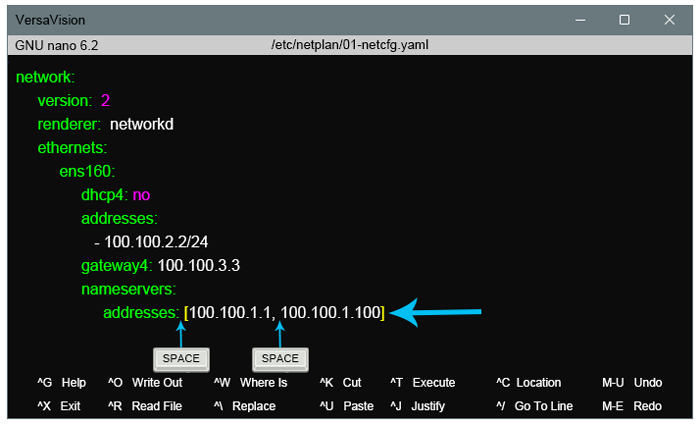
- Type in "addresses:".
- Type a Space after the ":" at the end of "addresses"
- Enter the following text using your addresses found previously.
- Our example below will be shown with our DNS addresses.
- Format - ["DNS Preferred Server", "DNS Alternate Server"]
- "[100.100.1.1, 100.100.1.100]"
- Ensure there is a space after the comma between the 2 addresses.
- We suggest verifying all of the addresses that were entered before proceeding.
- Once you have verified the information, Press & Hold the "Ctrl" button while pressing the "X" key.
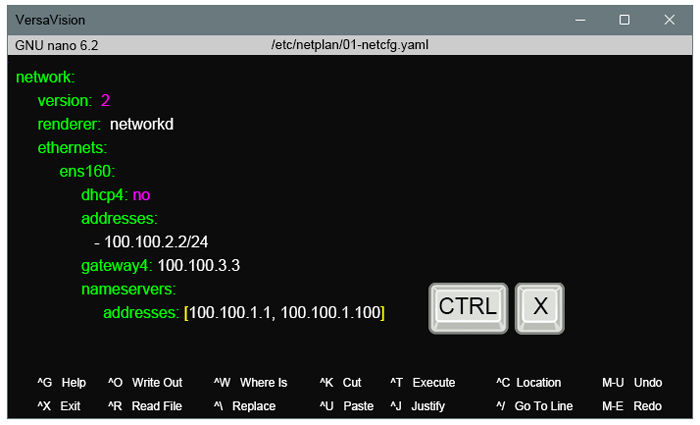
- A Save message will appear at the bottom of the screen asking if you want to save the changes that were made.
- Press the "Y" key on your keyboard to answer Yes & to save the changes.
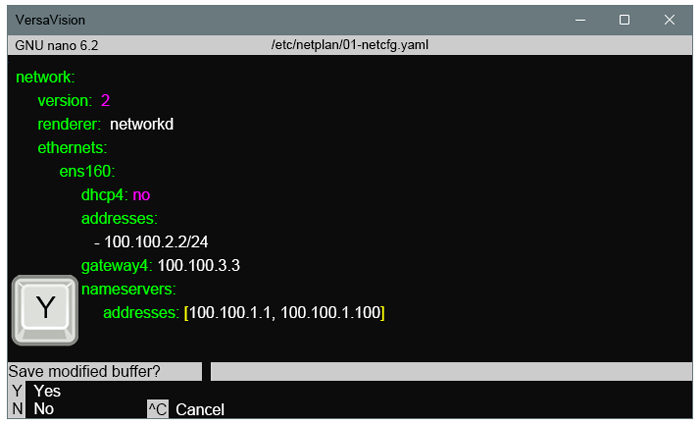
- You will be returned to the Terminal interface.
- Type in the following command:
- "sudo netplan apply"
- Ensure there is a space between each word.
- Press the "Enter" key on your keyboard.
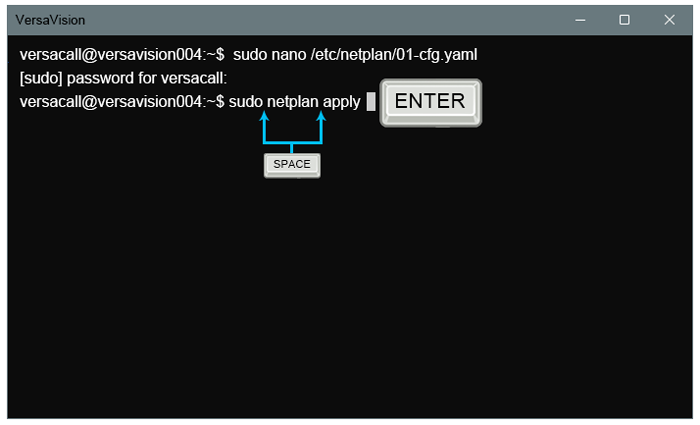
- The command will run and you will see a blank command line load below where you typed in the command.

- Retrieve the address/port that you wrote down at the beginning of this guide.
- It was shown to you when you first opened up the "GNU nano" interface.
- For our example, this is "ens160".
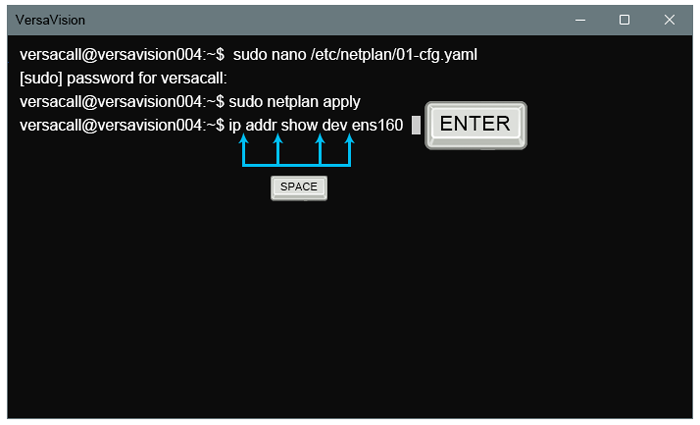
- Type in the following command:
- "ip addr show dev (enter the address/port from the previous step).
- For our example this would be "ip addr show dev ens160".
- Ensure that there is a space between each word.
- Press the "Enter" key on your keyboard.
- Many lines of code will load on the terminal, we only need to verify the correct Static IP Address is recorded.
- The Static IP Address should be shown on a line prefixed with "inet".
- Each system can be different, but the Static IP will show in the "inet" code line.
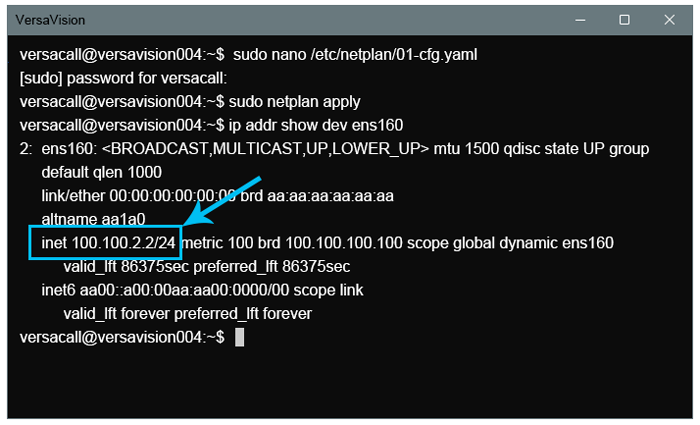
- If the Static IP Address is correct, you have completed the assignment.
- If the Static IP Address is incorrect, you will need to start the process again and edit the appropriate fields.
- Contact VersaCall Support for any questions or issues.

|