Windows Install - Hyper-V - Windows 10 & 11
From VersaVision Support

OVERVIEW
- In order to Install WSL on the Windows 1 or 11 Pro, the Hyper-V feature must be turned on. By default, this feature is turned off.
- If this is a VM (Virtual Server), Nested Virtualization must be setup with any & all settings enabled.
- VM Ware refers to this option as Virtualization Based Security (VBS).
- Azure enables this option with the Standard Security Type selection during creation.
- Each VM may have its own setting, please refer to their documentation for assistance.
REQUIREMENTS
- Log In: Installer/User must have a Windows Log In with Administrator permissions. This Account must remain active after the installation.
- Access: When using a VM, Installer/User must have Remote PC Access to the Windows 10 or 11 Pro instance.
- Internet Access: Computer/Server must have full internet access. Access can be removed after the installation is complete.
- VM Properties: VM must be setup with Nested Virtualization.
INSTRUCTIONS
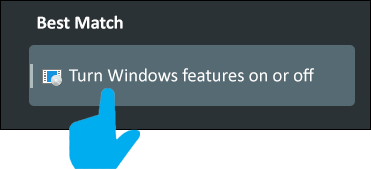
- Click in the Search field next to the Windows Start button.

- Type "Program and Features" into the Search field.

- Above the Search field, there will be results of the search - select the "Turn Windows Features On or Off" result.
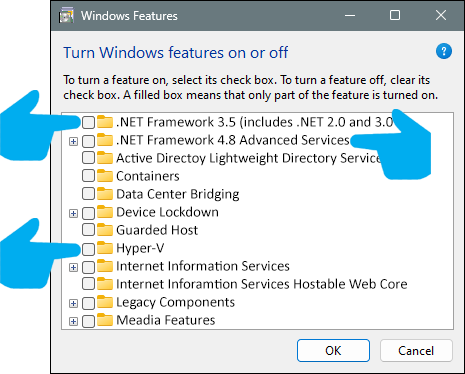
- A Windows Features window will load on the screen. Select the following features by clicking in the box next to the name. It is possible one or more of the options shown has been selected already.
- .NET Framework 3.5
- .NET Framework 4.x (Version may vary from screen shot).
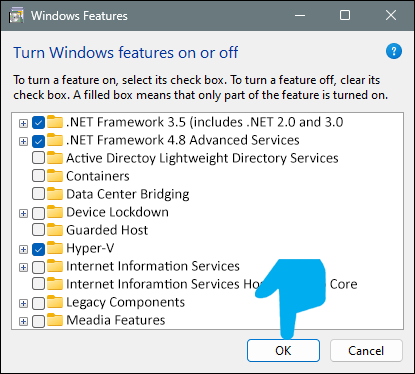
- After all features have been selected, click on the OK button,
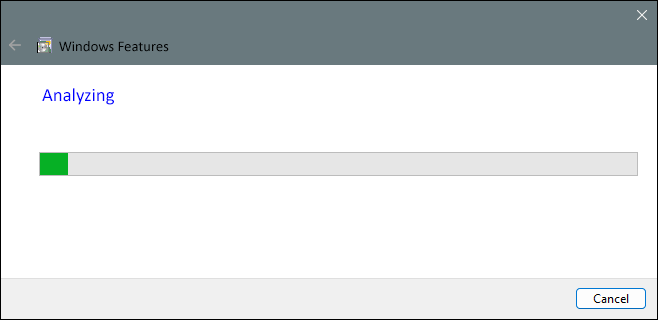
- A status screen will appear stating the system is Analyzing - allow this to finish.
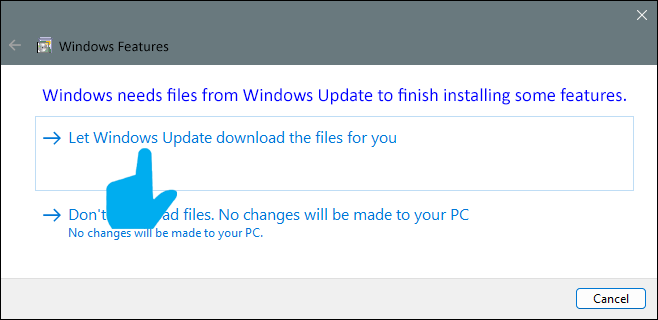
- After the system has finished Analyzing, the screen will ask you what method to use to get the required files. Select the "Let Windows Update download the files for you" option.
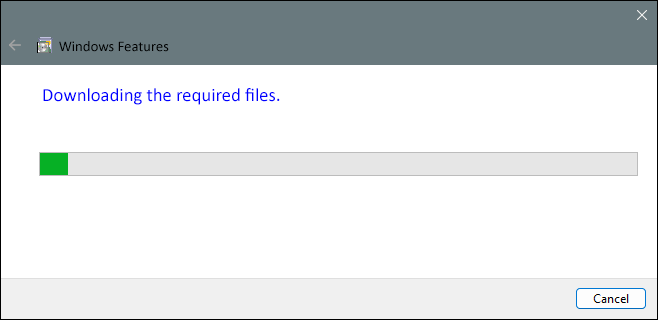
- A status screen will appear stating the system is Downloading the required files - allow this to finish.
- The status screen will change over to "Applying Changes" once the files have been downloaded - allow this to finish.

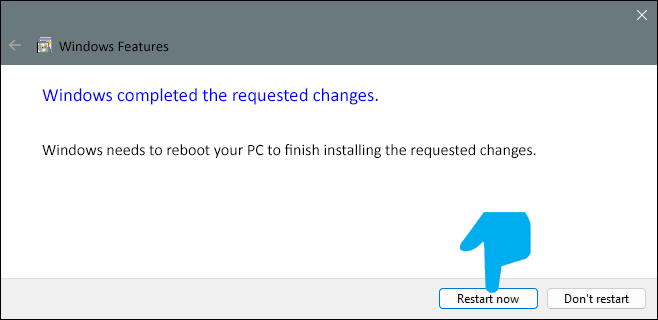
- Once the changes have been completed, a Reboot screen will appear. Select the "Restart Now" button.
- The system will automatically restart, allow this to finish.
- Return to the Software Install Main page and continue with the next Guide/Step.

|