Administration - Mesh
From VersaVision Support
![]()
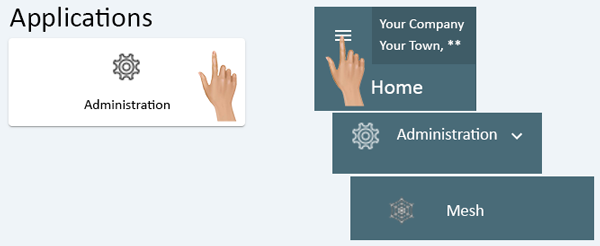
Administration is used to access important system components. There are multiple components inside Administration, this page is focused on the Mesh component.
When a system is using VersaCall hardware such as IO Modules, Touch Screens or Wireless Lights, the wireless mesh technology it being used. A Coordinator is required to be connected to the Server. This connection can be through USB or Ethernet.
This guide does not cover the hardware installation, only the setup after a Coordinator has been connected to the computer vis USB or Ethernet.
Administration can be accessed via the Home page menu or the Administration icon. Once Administration has been selected - select Mesh from the menu.
|
|
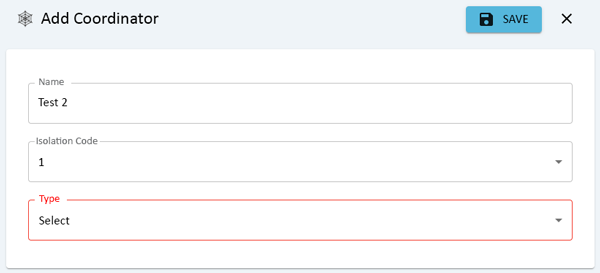
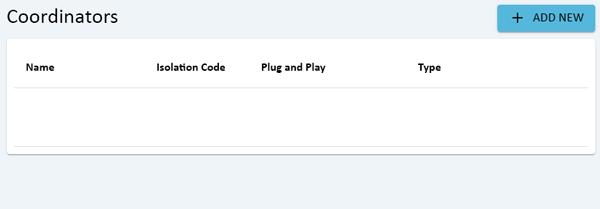
Select the "Add New" button at the top of the Coordinator list.
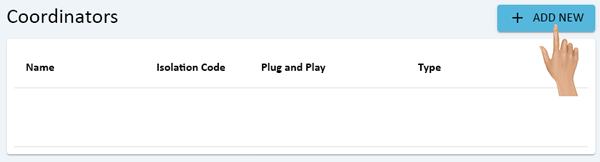
The Add Coordinator properties window will show on the right side of the Coordinators list.
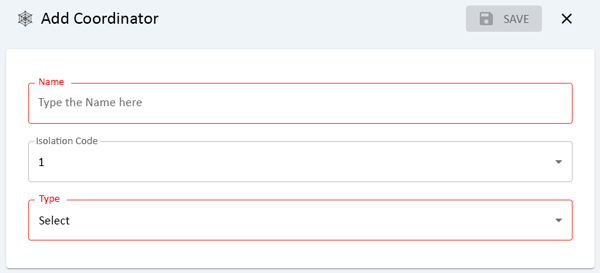
Click in the Name field and enter a name for the Coordinator.
On the Isolation Code, leave it set to 1 unless told to change by a VersaCall Technician.

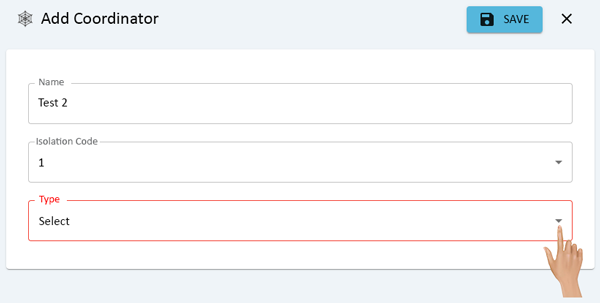
Click on the down arrow in the Type field, select Serial from the list.

Click on the down arrow in the Port Name, select the COM Port. If the USB Coordinator is not plugged into the computer, there will be no ports shown.
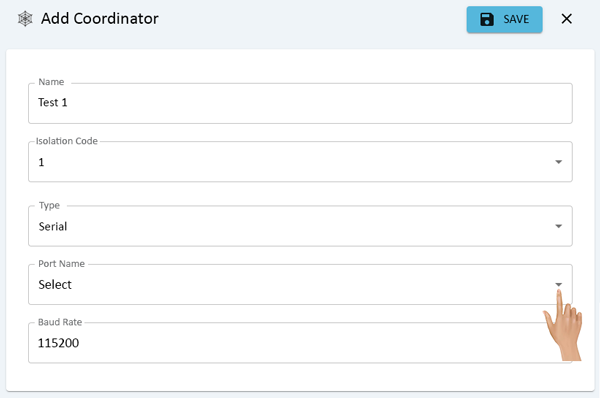
Leave the Baud Rate field set to 115200 unless told to change by a VersaCall Technician.
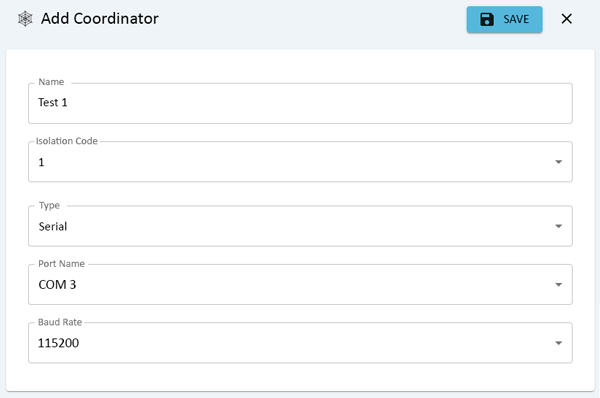
Once all the settings have been completed, click on the Save button.

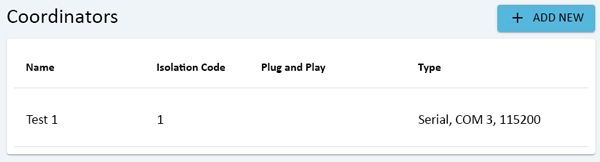
The USB Coordinator added will now show in the Coordinators list.
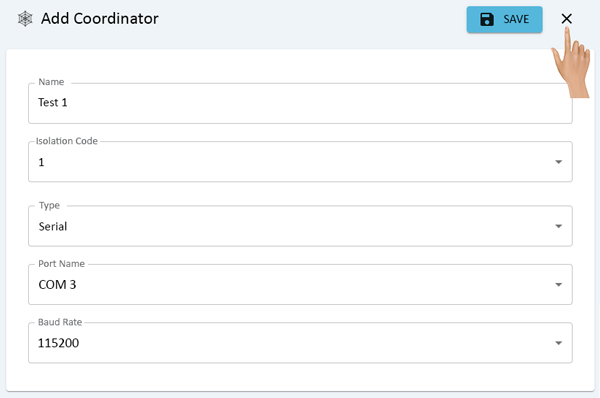
Close the Add Coordinator properties window by clicking on the "X" next to the Save button.
|
|
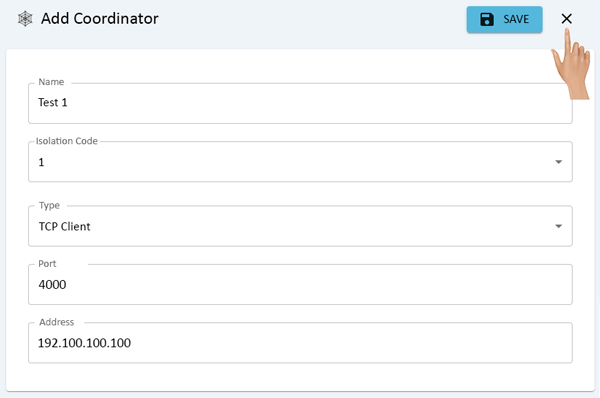
Select the "Add New" button at the top of the Coordinator list.
The Add Coordinator properties window will show on the right side of the Coordinators list.
Click in the Name field and enter a name for the Coordinator.
On the Isolation Code, leave it set to 1 unless told to change by a VersaCall Technician.
Click on the down arrow in the Type field, select TCP Client from the list.
Click in the Port field, enter 4000 unless specifically told a different port by a VersaCall Technician.
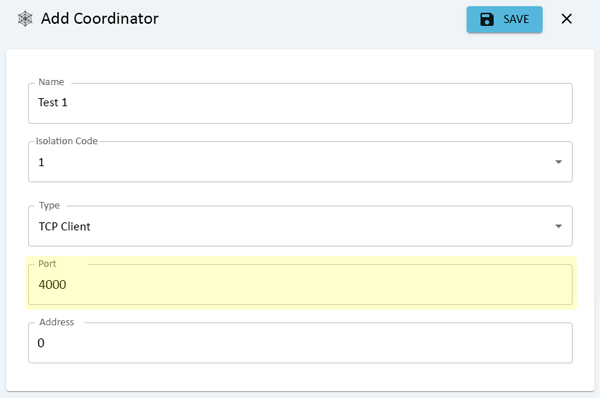
Click in the Address field, enter the IP Address of the Remote Coordinator. You may need to consult your IT Department.

Once all the settings have been completed, click on the Save button.
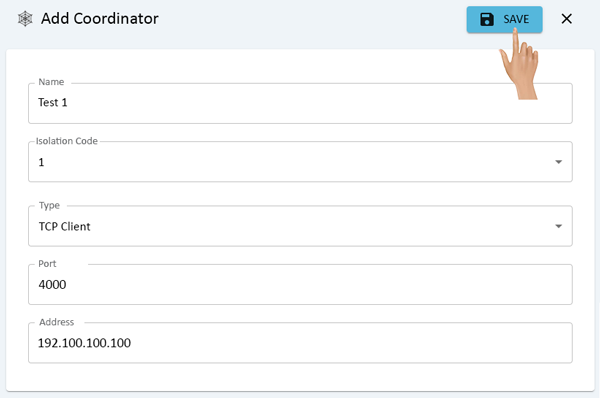
The Remote Coordinator added will now show in the Coordinators list.
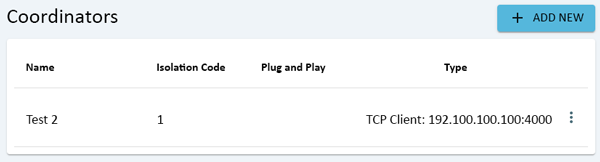
Close the Add Coordinator properties window by clicking on the "X" next to the Save button.
|
|
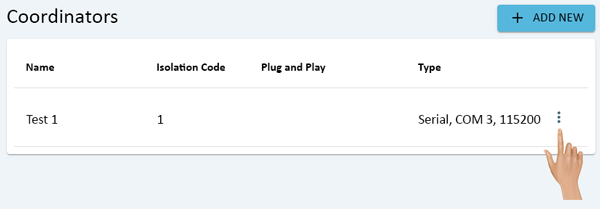
Click on the 3 dot menu for the Coordinator that needs to be removed.
A pop-up window will load, click on the Delete option in the list.
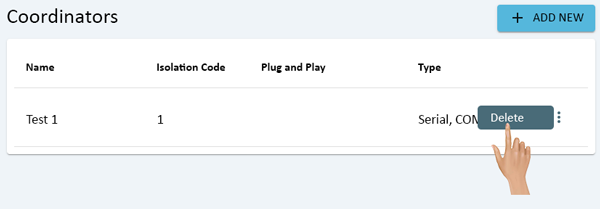
A warning message will appear on the screen. Select Delete to remove the Coordinator or select Cancel to keep the Coordinator.
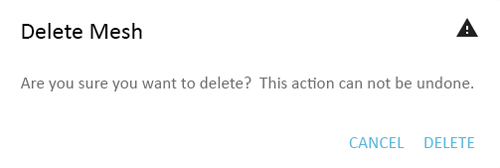
If Delete was selected, a Success message will appear at the bottom of the screen.

The Coordinator that was selected for deletion will no longer appear on the Coordinator list.
|
|

|