Administration - Two Way Radio
From VersaVision Support
![]()
Administration is used to access important system components. There are multiple components inside Administration, this page is focused on the Two Way Radio component.
A Two Way Radio is a hardware module that a user will need to purchase from VersaCall. This module is plugged into your network and assigned a Static IP Address or DHCP Reserved Address.
If a Radio needs to be Added or Edited, the user will need to know the IP Address assigned to the module.
This page will concentrate on Viewing, Editing & Adding a Two Way Radio.
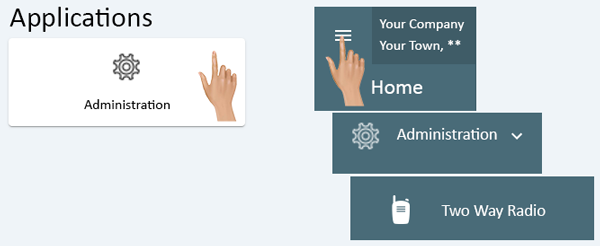
Administration can be accessed via the Home page menu or the Administration icon. Once Administration has been selected - select Two Way Radio from the menu.
|
|
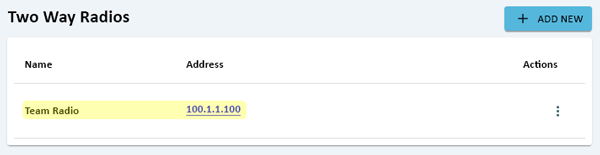
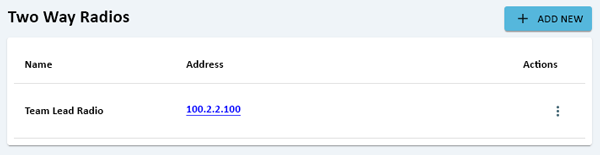
On the Two Way Radio page there will a list of all the Radios setup in the system. Each Radio in the list will display the name given to the module and the IP Address that is being used to communicate with the module.
To view all of the settings for the Radio, click anywhere on the row.
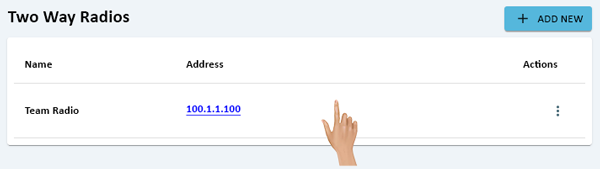
The row will highlight.
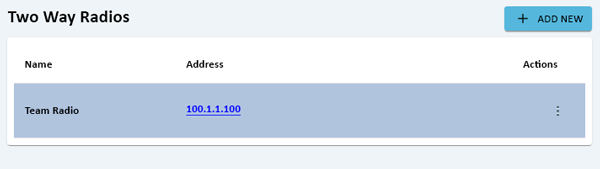
On the right side of the Radio list, a Properties window will load.
The user will be able to see the Radio Name, IP Address, and all of the Channels that are being used.

To close the Radio Properties window, click on the "X" in the right corner next to the Save button.

|
|
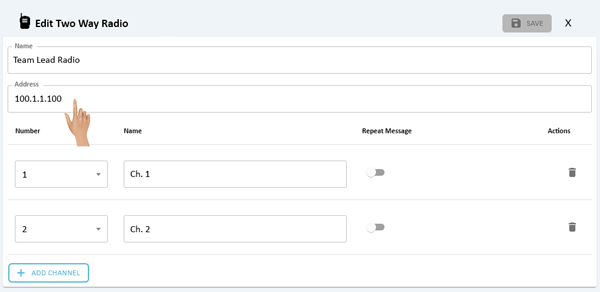
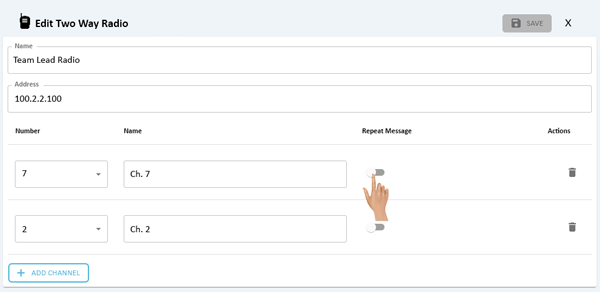
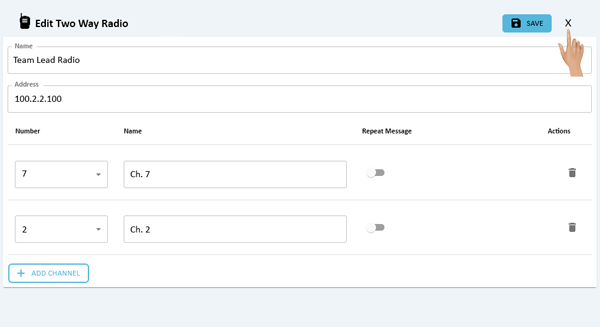
On the Two Way Radio page click anywhere on the row for the Radio that needs to be edited.
The Radio will highlight in the list.
On the right side of the Radio list, the Properties window will load.
Click in the Name field to change the name of the Radio.

Click in the Address field to change the IP Address being used.
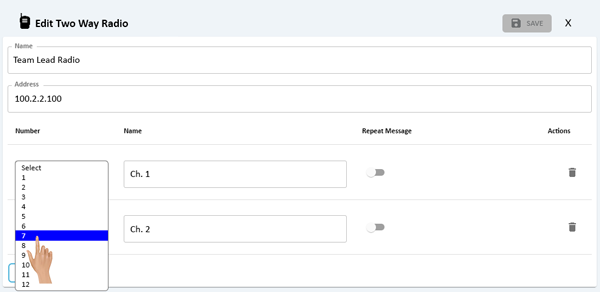
Click on the down arrow on any Channel Number field to change it.
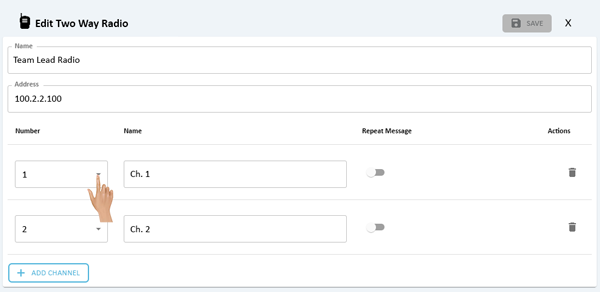
Select the appropriate channel from the list.
Click in the Channel Name field to change the name of the channel.
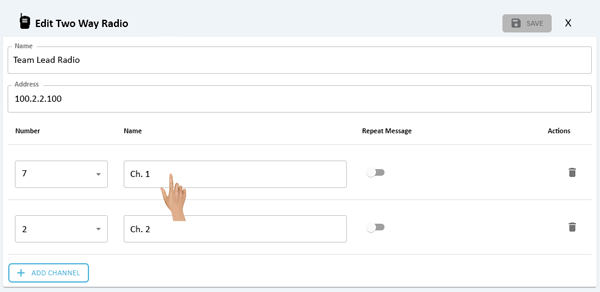
When a message is sent out to a channel, it will play 1 time. If there is a need to have the message played 2 times, toggle the Repeat Message.
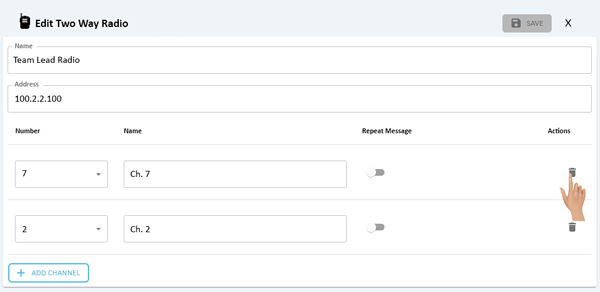
Select the Delete Icon on the right side of any Channel to remove it.
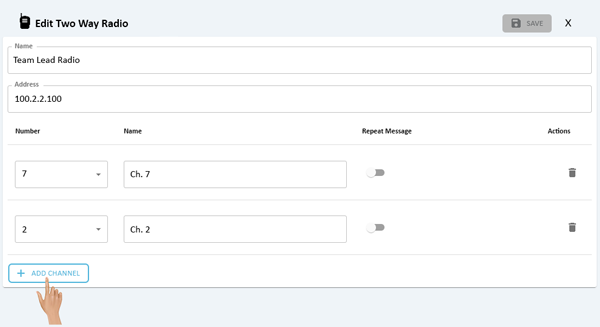
Select the Add Channel button to setup a new Channel. When selecting this option the user will need to know the Channel Number being used on the Radio.
Once all of the changes have been made, click on the Save button in the top right corner of the window.
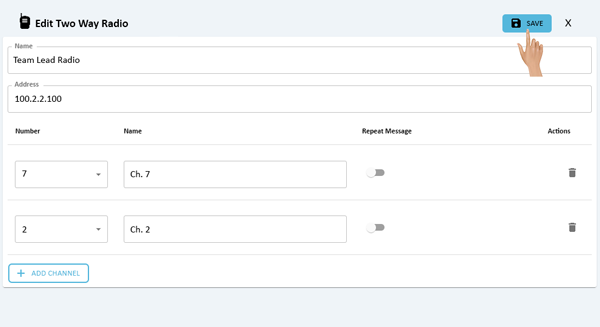
Any changes made to the Radio Name or Address will be reflected in the Radio List.
Close the Radio Properties window by clicking on the "X" next to the Save button.
|
|
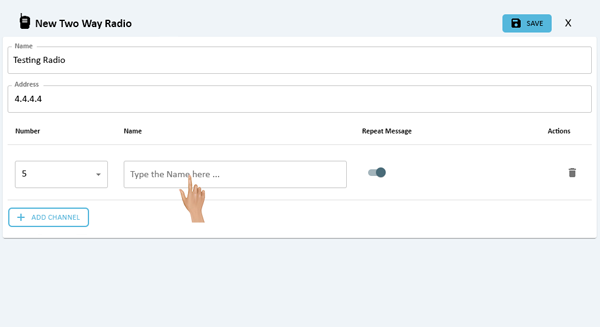
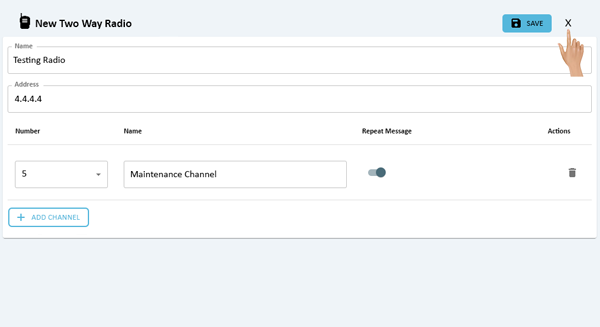
On the Two Way Radio page click on the Add New button.
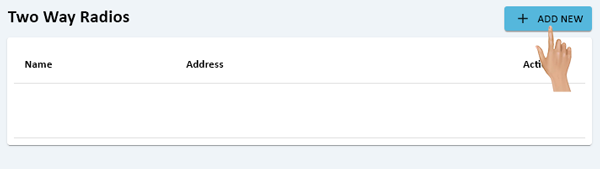
The New Two Way Radio window will show on the right side of the Radio list.
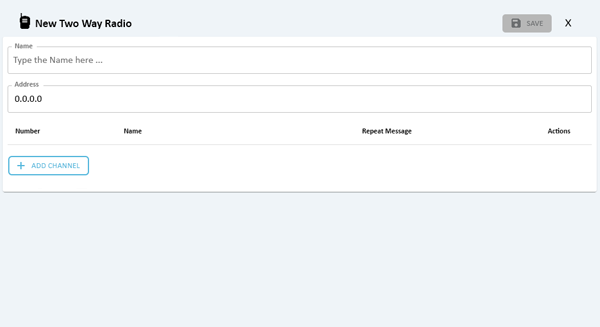
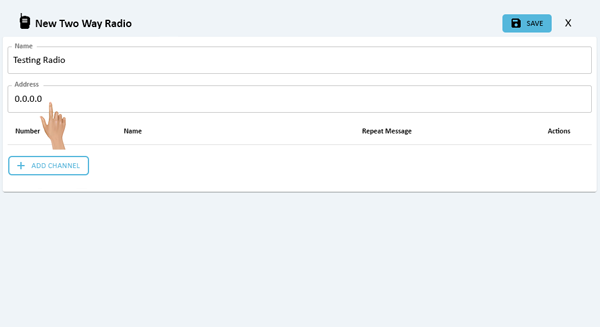
Click in the Name field to setup a name for the Radio.
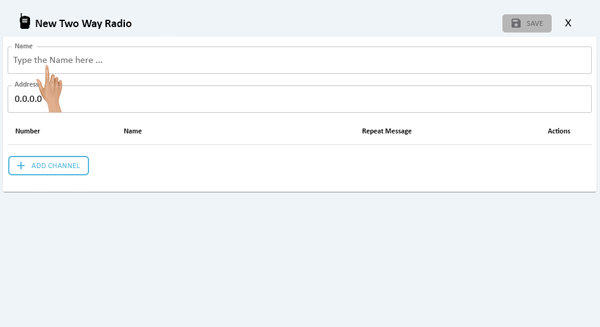
Click in the Address field to enter the IP Address to use for communications with the Radio Module.
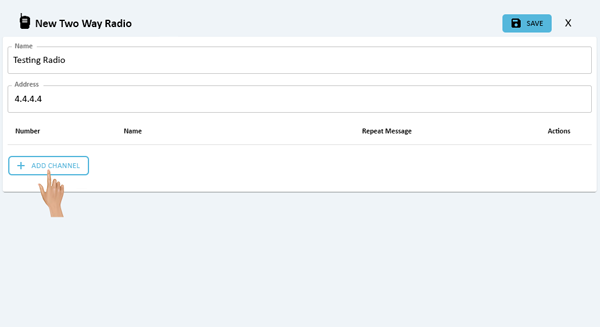
Click on the Add Channel button to add a channel to communicate over.
Click on the down arrow on the Channel Number field to select the channel number.
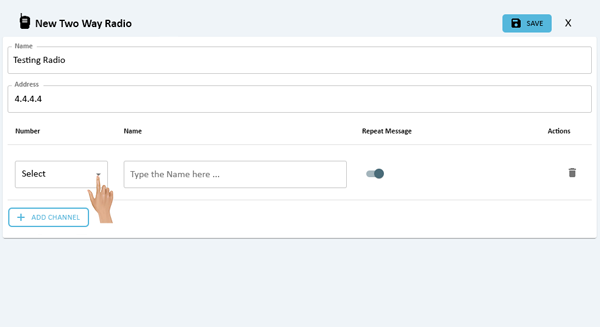
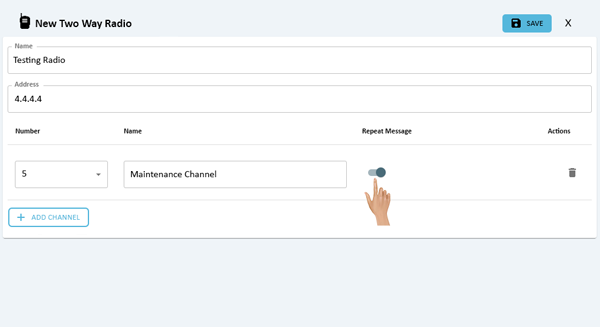
Select the Name field to enter a name for the channel.
By default, the Repeat Message toggle is on. This means the message sent out over the Radio will play 2 times. If the message is only required to be played 1 time, disable the toggle.
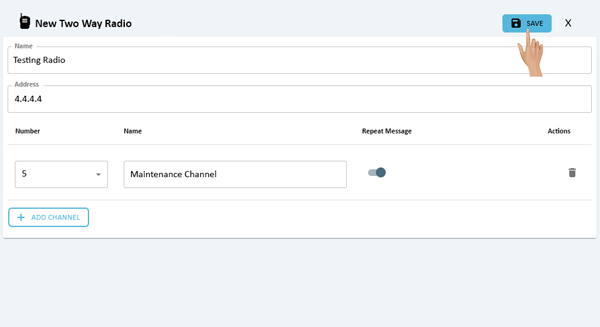
Setup all additional Channels using the same process as above. Once all of the Channels have been entered, click on the Save button in the top right corner of the window.
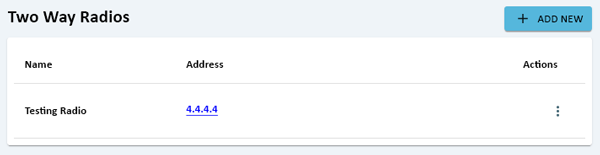
The new Radio will show in the Radio List.
Close the Radio Properties window by clicking on the "X" next to the Save button.
|
|
On the Two Way Radio page click on the 3 dot icon in-line with the Radio that needs to be removed.
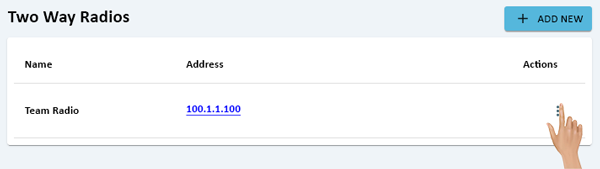
Select Delete from the pop-up menu.
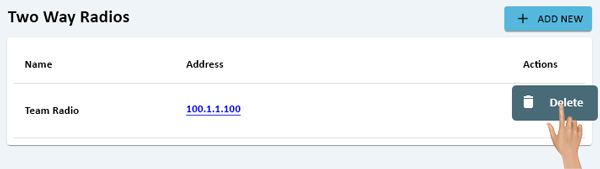
A confirmation window will show on the screen. Select Delete to remove the Radio. Select Cancel to keep the Radio.
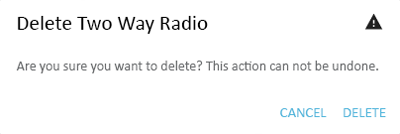
If Delete was selected, the Radio will no longer show in the Radio list.

|
|

|