Difference between revisions of "Red Hat - Driver Install - Real Port Coordinator"
From VersaVision Support
| Line 40: | Line 40: | ||
|<span style="color:#90A4AE; font-size:120%">'''Red Hat Guides'''</span> || [[File:Coor-Req-Btn.png|center|150px|Select to View Page|link=IT - Coordinator Requirements]] || [[File:Network-Install-Coor-Btn.png|Select to View Page|150px|link=Installation - Network Coordinator (RealPort)]] || [[File:RPLinux-Btn.png|150px|Select to View Page|link=Linux - Driver Install - Real Port Coordinator]] || [[File:LinuxRP-VV-Btn.png|150px|Select to View Page|link=Linux - VersaVision Setup - Real Port Coordinator]] || [[File:Coor-Status-Btn.png|150px|Select to View Page|link=Coordinator - Check Status]] | |<span style="color:#90A4AE; font-size:120%">'''Red Hat Guides'''</span> || [[File:Coor-Req-Btn.png|center|150px|Select to View Page|link=IT - Coordinator Requirements]] || [[File:Network-Install-Coor-Btn.png|Select to View Page|150px|link=Installation - Network Coordinator (RealPort)]] || [[File:RPLinux-Btn.png|150px|Select to View Page|link=Linux - Driver Install - Real Port Coordinator]] || [[File:LinuxRP-VV-Btn.png|150px|Select to View Page|link=Linux - VersaVision Setup - Real Port Coordinator]] || [[File:Coor-Status-Btn.png|150px|Select to View Page|link=Coordinator - Check Status]] | ||
|} | |} | ||
</div> | </div> | ||
---- | ---- | ||
Latest revision as of 15:33, 7 May 2024

OVERVIEW
- In order to get the Ethernet connected Real-Port Coordinator to communicate with the VersaVision software, you will need to install the driver.
- Prior to receiving the Coordinator, you will need to have either provided VersaCall with the Static IP information or have your IT team setup a DHCP Reserved IP Address.
- When using a Static IP Address, the Coordinator will be pre-programmed before shipping from VersaCall.
- When using a DHCP Reserved IP Address, VersaCall Technician will provide you with the MAC Address prior to shipment.
- The guide below will explain uploading the files via an SSH Client, feel free to use a different SSH Client or upload the files using the Terminal if you have physical access.
REQUIREMENTS
- Computer/Server/VM must be loaded with Red Hat 8 or 9.
- IT must assign an Administrator level user name and password for VersaCall Installation/User.
- Internet Access Required for the Installation process. Access can be removed after installation.
- SSH Client is required if the User/Installer does not have physical access to the server.
- Server/Computer/VM must have a Static IP Address or a DHCP Reserved IP Address.
- Coordinator must have a Static IP Address or a DHCP Reserved IP Address.
- Link for Driver file provided by VersaCall Technician.
TOOL TIP
- There is specific Code that needs to be entered in on the steps below. The Paste function in Terminal works differently from Windows.
- To Copy - select the Code/Text in the cell so that it is highlighted. Press the Control Key & C Key on your keyboard at the same time. Alternatively, you can right click on the highlighted text and select Copy from the pop-up menu.
- To Paste - Right Click on the Cursor next to the User Prompt in the Terminal. The copied text will fill in automatically.
- There is specific Code that needs to be entered in on the steps below. The Paste function in Terminal works differently from Windows.
| Red Hat Guides |
INSTRUCTIONS
- IMPORTANT NOTE: some of the commands require downloads, updates and/or upgrades. Each of these can take some time to complete. Please be patient and allow each to complete its process.
- Download the Real-Port driver file from the link provided by the VersaCall Technician.
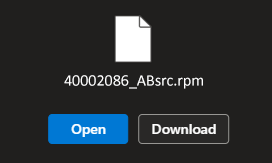
- For ease of navigation, we suggest downloading the file to your Downloads folder.

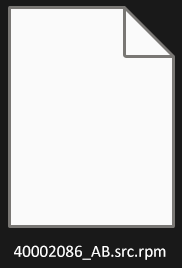
- After the download has been completed, you will see the driver file in the folder.
- The icon will look like a File icon.
- The driver file will need to be uploaded to the Computer/Server/VM.
- Our guide will show using an FTP inside of an SSH Client.
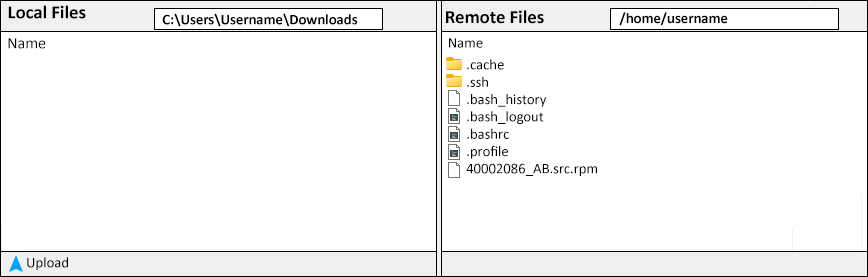
- Upload the file to the /home/<username> location.
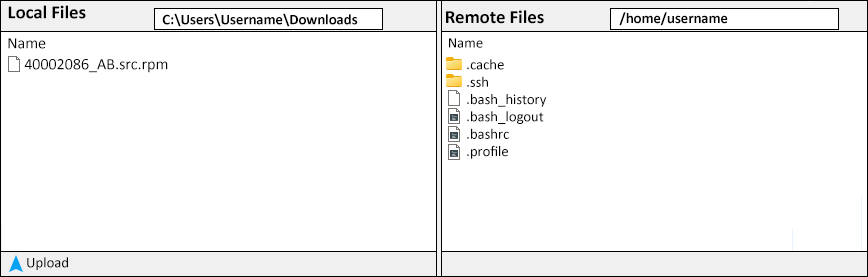
- The driver file should now show in the VersaVision Computer/Server/VM.
- Open the Terminal on the VersaVision Computer/Server/VM.
- Terminal can be accessed on the physical Computer/Server/VM or by using an SSH Client.

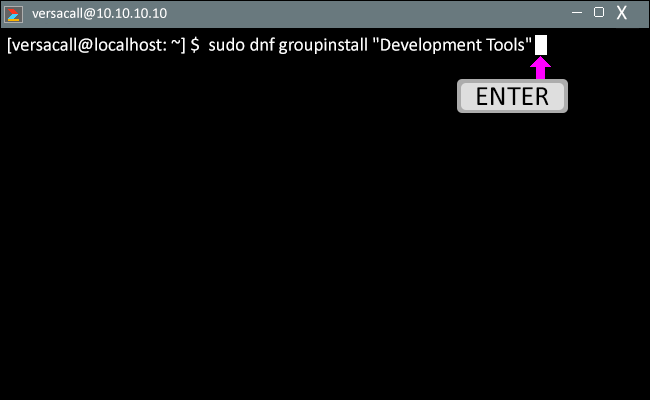
- Copy the Code/Text from the cell below.
- sudo dnf groupinstall "Development Tools"
- Paste the Code/Text into the Terminal.
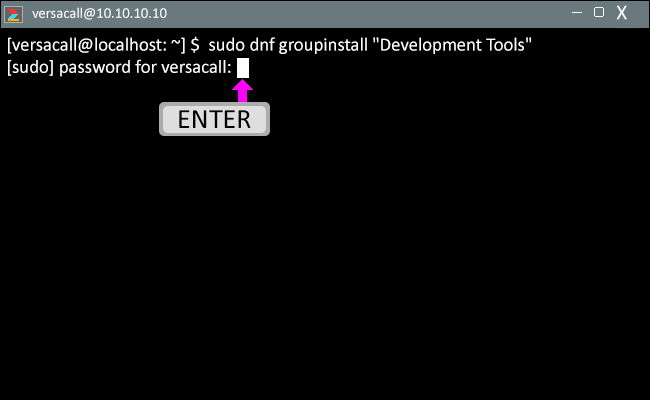
- Press the Enter key on your keyboard after the Code/Text is pasted in.
- Enter your user password - press the Enter key.
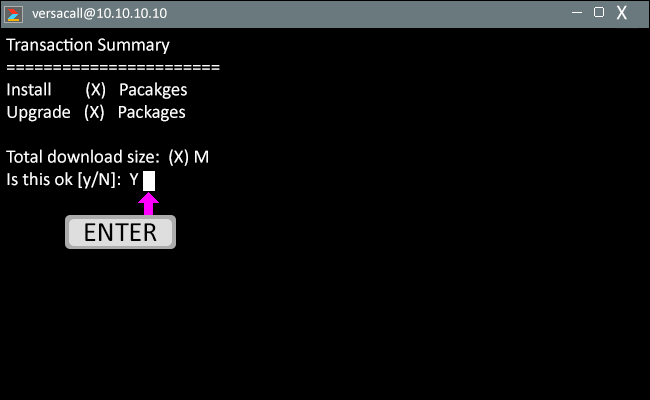
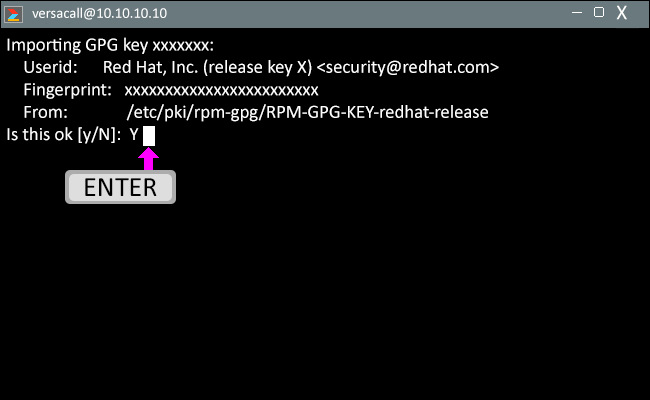
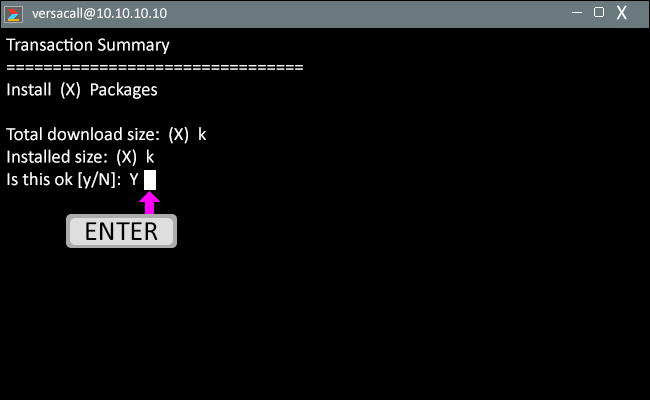
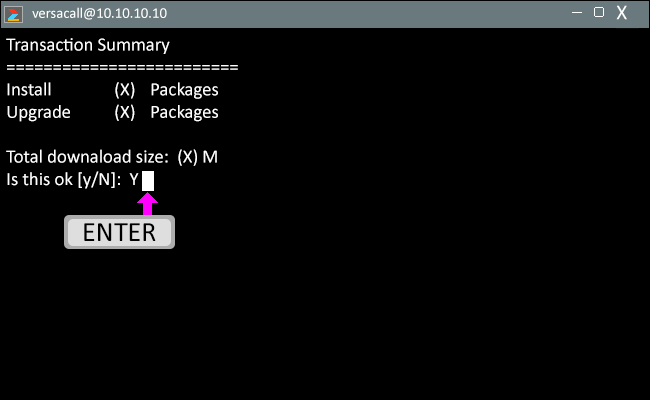
- After a few minutes You will be prompted for a Y or N response to continue with the install.
- Press the letter Y and press the Enter key to continue.

- After a few minutes You will be prompted for a Y or N response to continue with the install.
- Press the letter Y and press the Enter key to continue.
- After a few minutes You will be prompted for a Y or N response to continue with the install.
- Press the letter Y and press the Enter key to continue.
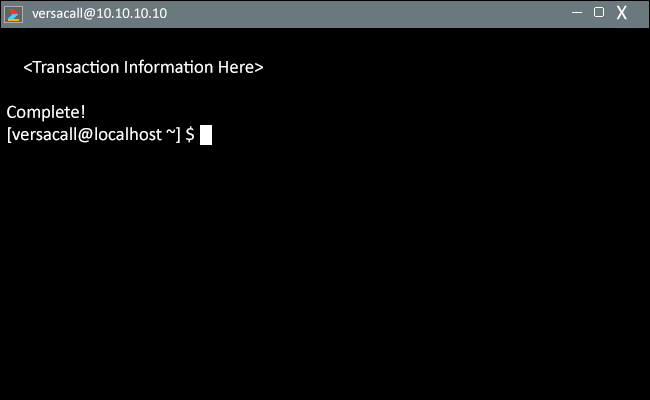
- After all the files have been installed/upgraded you will see a "Complete!" message.
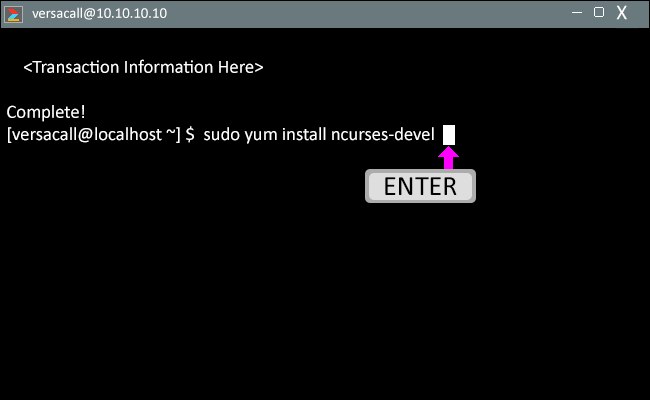
- Copy the Code/Text from the cell below.
- sudo yum install ncurses-devel
- Paste the Code/Text into the Terminal.
- Press the Enter key on your keyboard after the Code/Text is pasted in.
- After a few minutes You will be prompted for a Y or N response to continue with the install.
- Press the letter Y and press the Enter key to continue.
- After all the files have been installed/upgraded you will see a "Complete!" message.

- Copy the Code/Text from the cell below.
- sudo dnf distro-sync
- Paste the Code/Text into the Terminal.
- Press the Enter key on your keyboard after the Code/Text is pasted in.
- After a few minutes You will be prompted for a Y or N response to continue with the install.
- Press the letter Y and press the Enter key to continue.
- After all the files have been installed/upgraded you will see a "Complete!" message.
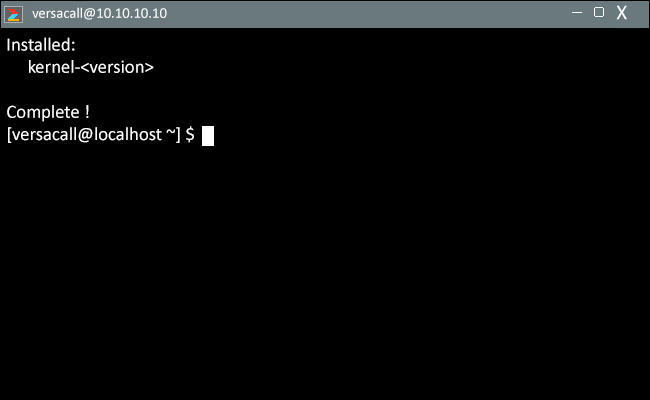
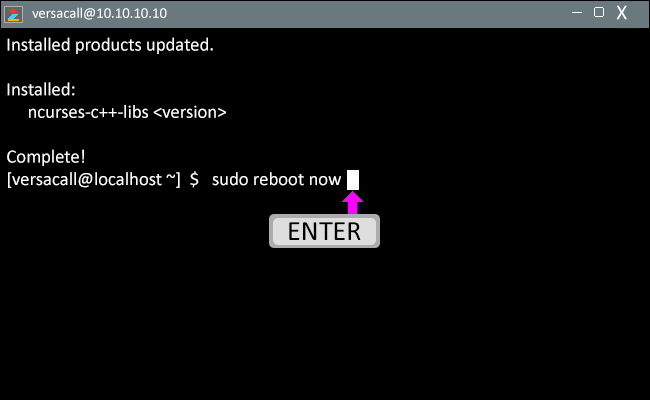
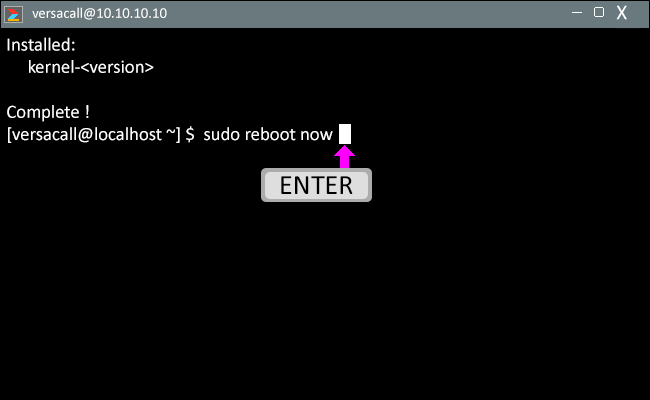
- You will need to reboot the server at this time.
- Copy the Code/Text from the cell below.
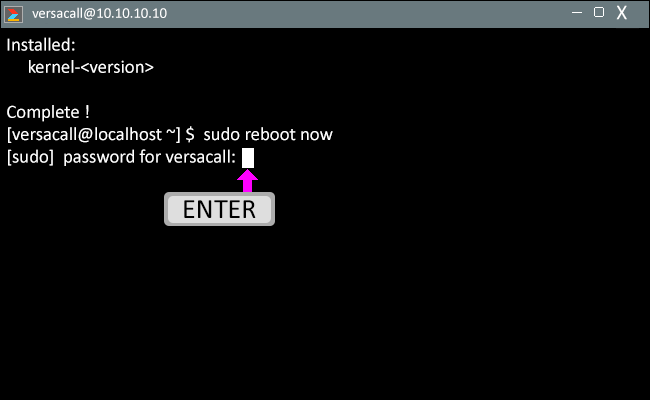
- sudo reboot now
- Paste the Code/Text into the Terminal.
- Press the Enter key on your keyboard after the Code/Text is pasted in.
- Enter your user password - press the Enter key.
- Once the server has rebooted - Open the Terminal on the VersaVision Computer/Server/VM.
- Terminal can be accessed on the physical Computer/Server/VM or by using an SSH Client.
- You will need to reboot the server at this time.
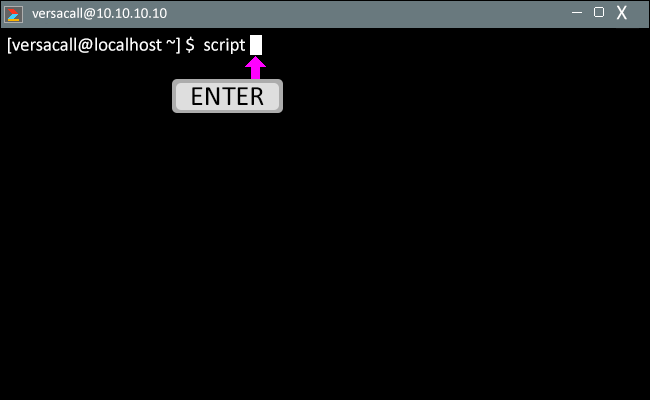
- Copy the Code/Text from the cell below.
- script
- Paste the Code/Text into the Terminal.
- Press the Enter key on your keyboard after the Code/Text is pasted in.
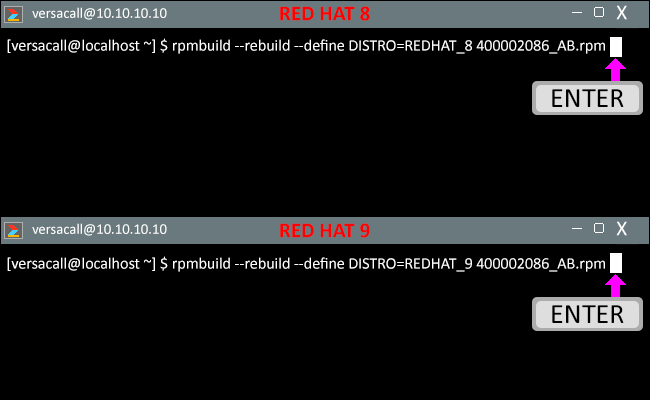
- There are 2 separate Codes/Text below, ensure you copy the correct one based on your Red Hat version.
- Red Hat 8
- rpmbuild --rebuild --define DISTRO=REDHAT_8 400002086_AB.rpm
- Red Hat 9
- rpmbuild --rebuild --define DISTRO=REDHAT_9 400002086_AB.rpm
- Paste the Code/Text into the Terminal.
- Press the Enter key on your keyboard after the Code/Text is pasted in.
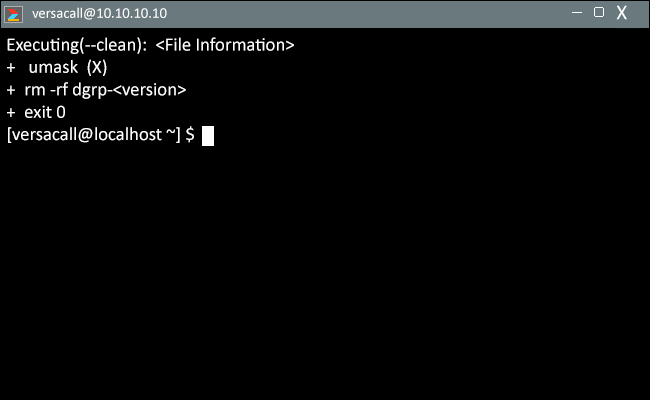
- After a few minutes you will recieve an "Exit 0" message, this indicates a successful update/install.
- Copy the Code/Text from the cell below.
- cd /home/<username>/rpmbuild/RPMS/x86_64
- Paste the Code/Text into the Terminal.
- NOTE:' Replace the "<username>" text with your Red Hat username.
- In our example, the username is versacall.
- Press the Enter key on your keyboard after the Code/Text is pasted in.
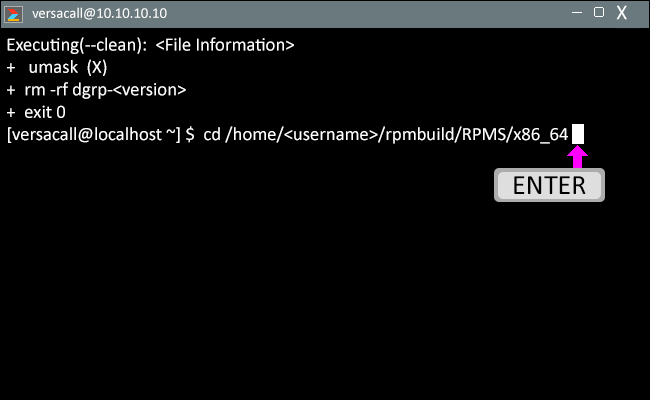
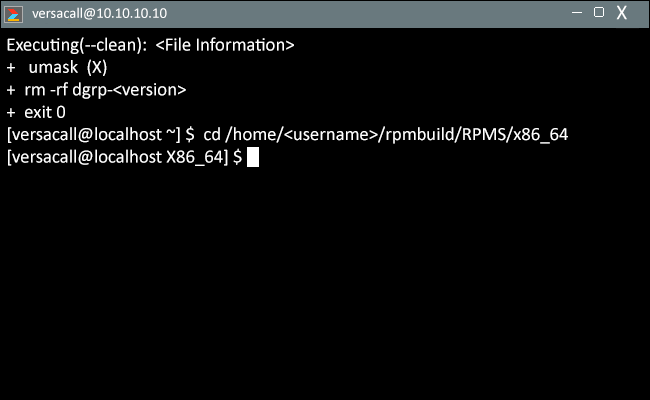
- The User Prompt will change and show that you have changed directories.
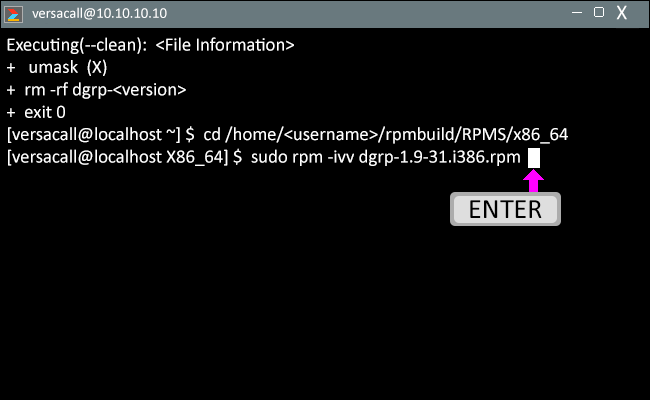
- Copy the Code/Text from the cell below.
- sudo rpm -ivv dgrp-1.9-31.i386.rpm
- Paste the Code/Text into the Terminal.
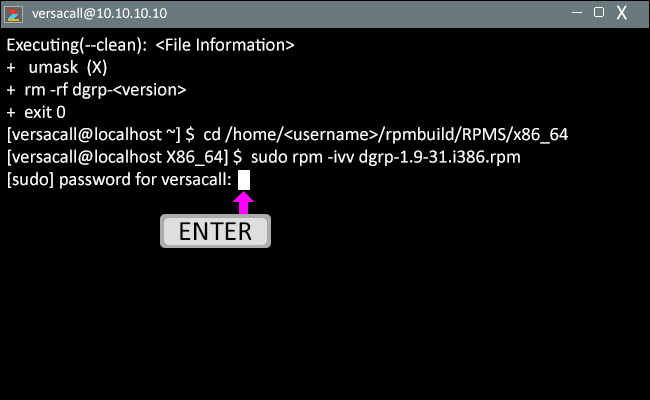
- Press the Enter key on your keyboard after the Code/Text is pasted in.
- Enter your user password - press the Enter key.
- After a few minutes you will recieve an "Exit 0" message, this indicates a successful update/install.
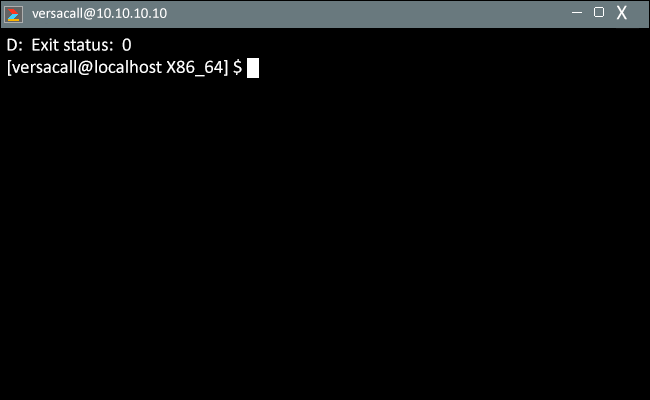
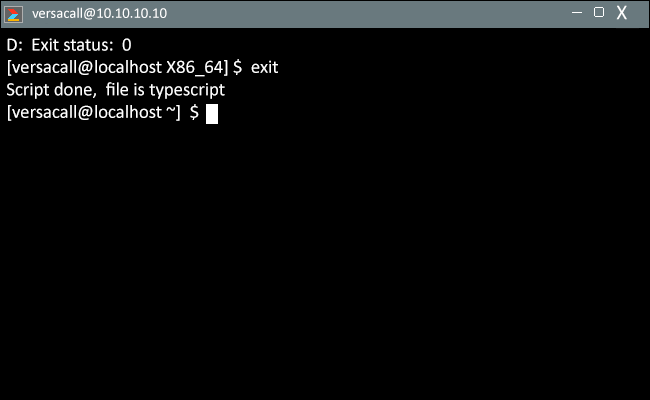
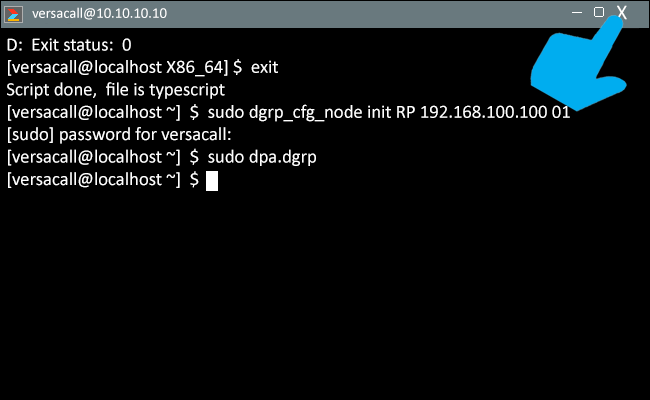
- Press and hold down the Ctrl key and press the letter D key on your keyboard.
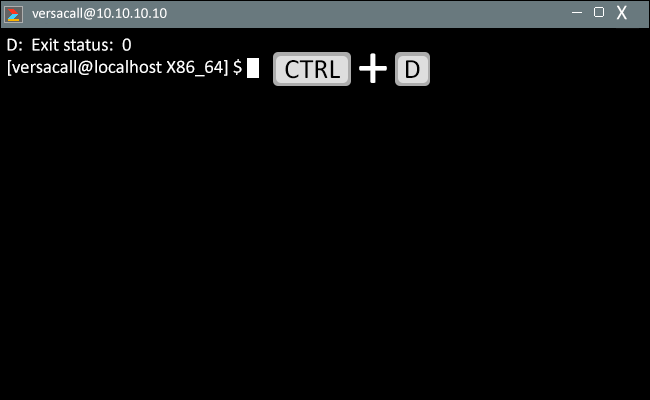
- The Terminal will show a "Script Done" message.
- The User Prompt will return to the Home directory.
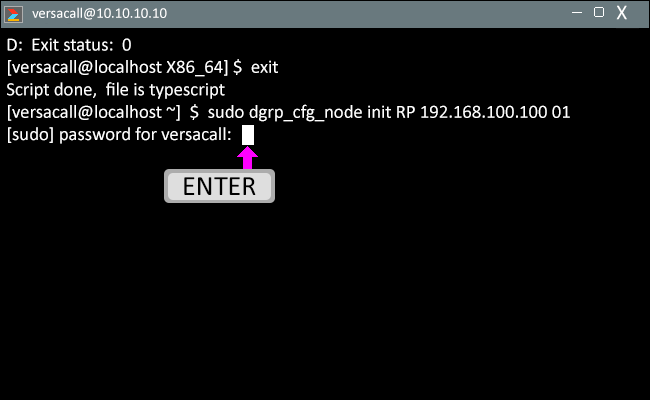
- Before copying this code, you will need to know the Static or DHCP Reserved IP Address that has been assigned to the Coordinator.
- This step will assign a port for the Coordinator IP Address.
- If the IP Address is entered incorrectly, VersaVision will not be able to communicate with the Coordinator.
- Copy the Code/Text from the cell below.
- sudo dgrp_cfg_node init RP <coordinator ip address here> 01
- Paste the Code/Text into the Terminal.
- Replace the "<coordinator ip address>" section of the code with the Static or DHCP Reserved IP Address assigned to the Coordinator.
- In our example, the IP Address is 192.168.100.100.
- Press the Enter key on your keyboard after the Code/Text is pasted in and the IP Address has been entered.
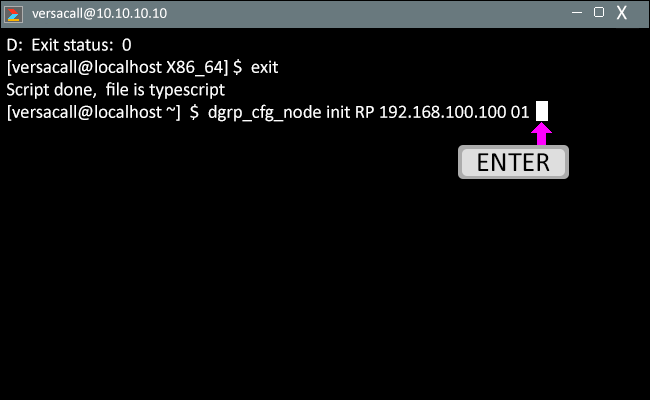
- Enter your user password - press the Enter key.
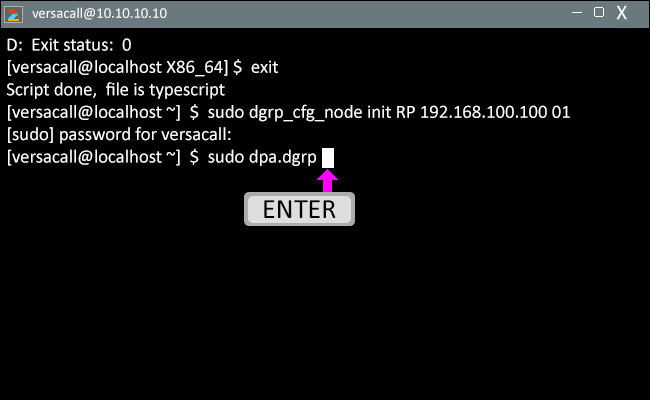
- You will need to verify that the port created is connected to the Real-Port Coordinator.
- Copy the Code/Text from the cell below.
- sudo dpa.dgrp
- Paste the Code/Text into the Terminal.
- Press the Enter key on your keyboard after the Code/Text is pasted in.
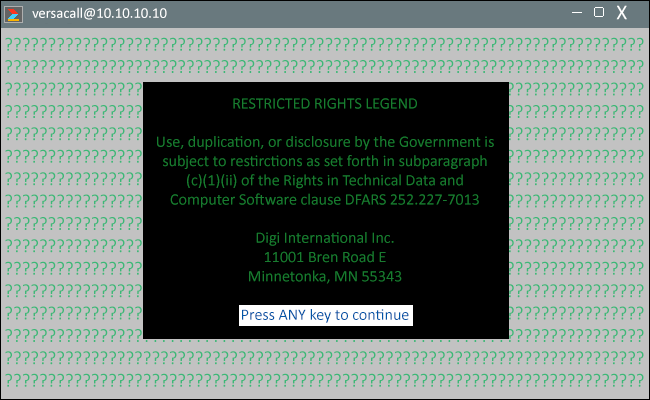
- The digi connection portal interface will load.
- Press any key on your keyboard to continue.
- The Digi Port Authority interface will load and the RP Port that was added will display.
- Verify that the Port Status shows as Connected.

- You should see that the port shows as connected - proceed to the next step of adding the Coordinator to VersaVision.
- If the system does NOT show as connected, ensure the device is powered and plugged into the network.
- Please contact VersaCall for assistance if you cannot resolve the connection.
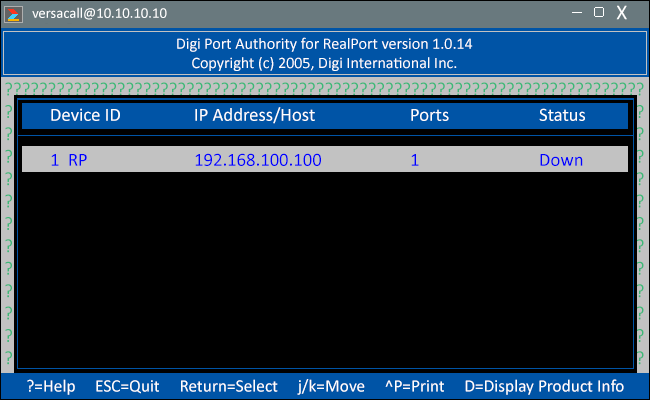
- Press the ESC key on your keyboard to exit the Digi Port Authority interface.
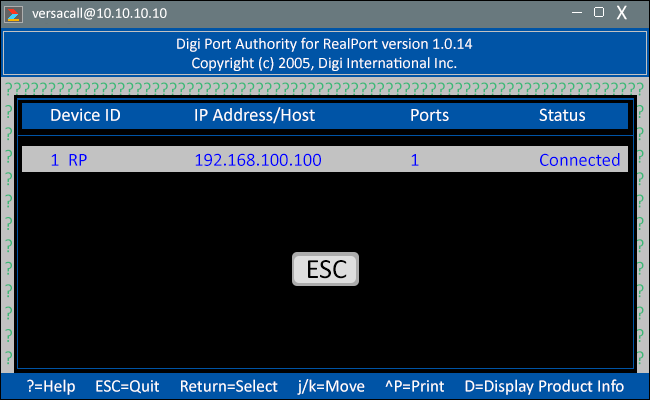
- You will be returned to the Terminal.
- Close the Terminal if you are using an SSH Client.
- Move on the next installation step - Adding the Remote Coordinator to VersaVision.
| Red Hat Guides |

|