Variables - Time Calculation
From VersaVision Support
![]()
Variables can be setup on Widgets or Dashboards. Each Variable has a specific purpose or data it gathers.
This page is dedicated to the Time Calculation Variable which allows the user to combine 2 or more Variables into 1 result. This Variable is a more advanced feature, we recommend contacting VersaCall Support if you need assistance.
This page explains how to setup a Time Calculation Variable.
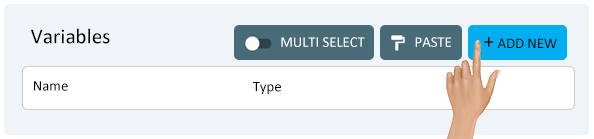
With a new or existing widget or dashboard opened, click on the Variables button at the top-right position above the layout.

On the Variables window click on the Add New button.
Each New Variable will have 4 property fields available. Depending on the Type selected, these fields may change. Select the Variable Name field.
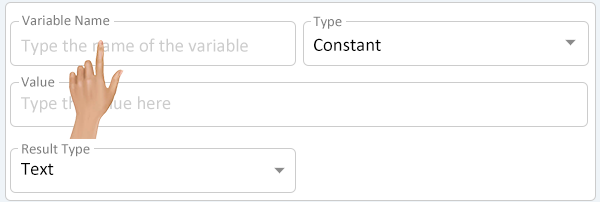
Enter a Name for the Variable being created. Ensure the name is recognizable for use in creating the Dashboard or Widget cell.
- NOTE - a name must be uppercase letters or numbers. When a space is required, the user must use and underscore "_"
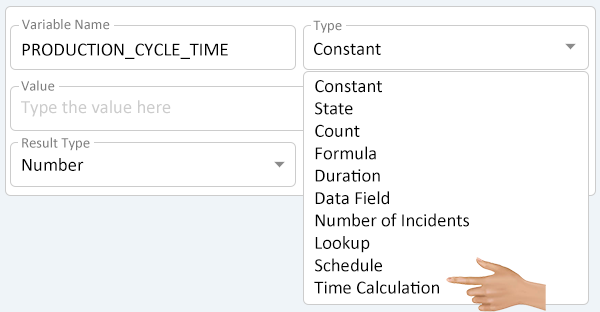
After entering a Variable Name, select the down arrow in the
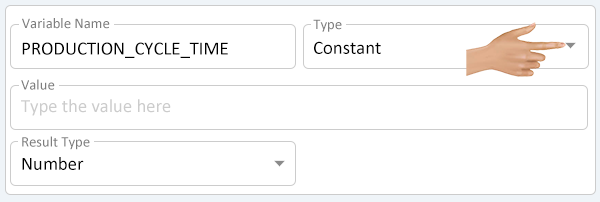
Select Time Calculation from the list.
The Variable Properties will change to show the following fields.
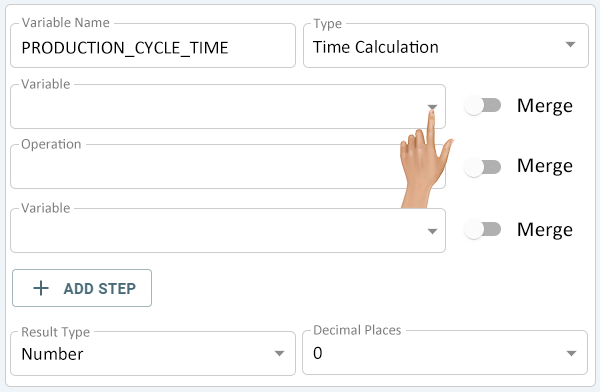
- Variable - user will select which existing Variable will be used in the calculation first.
- Operation - user will select the calculation type.
- Variable - user will select the additional Variable to be used in the calculation.
- Result Type - select how the result should be shown.
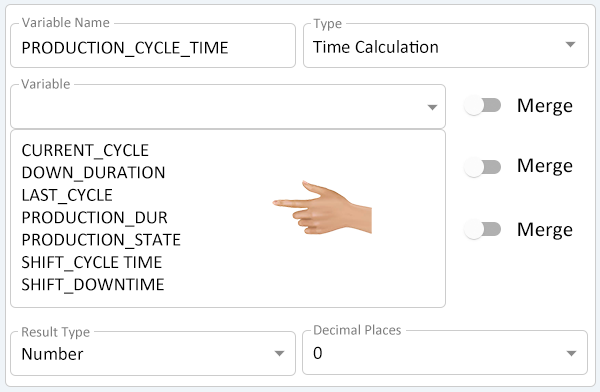
Click on the down arrow in the Variable field.
A list of all the Variables setup on the current Dashboard/Widget will be shown. Select the best option for the Variable being created.
Example - this setup will show how to get the Cycle Time for the Time Period when Production was active.
The merge switch is available for the Variable. The purpose of the Merge is to combine the Variable before the Operation is initiated. Select the best option for the Variable being created.
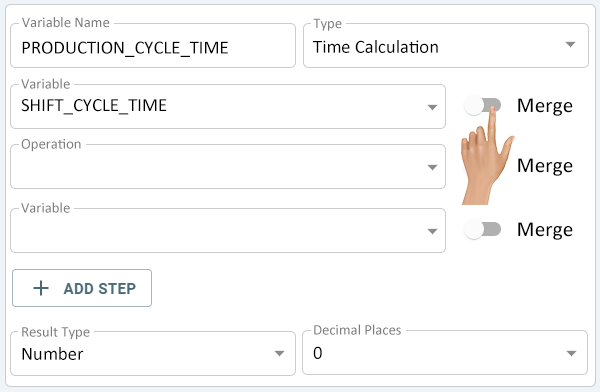
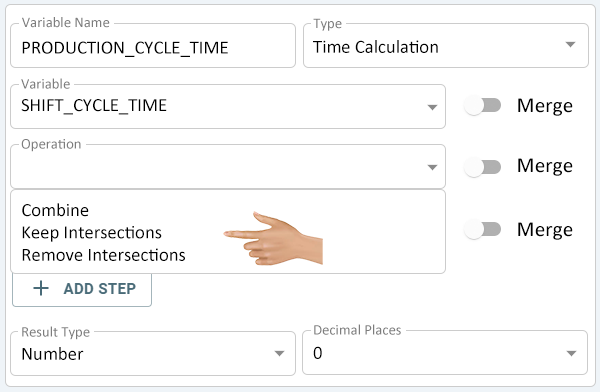
Click on the down arrow in the Operation field.
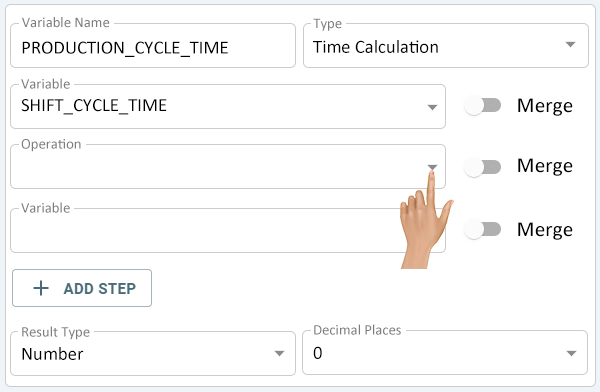
There will be 3 options for the Operation field.
- Combine- this will combine both Time Variables.
- Keep Intersections - this will only keep the Time where both Variables intersect/overlap.
- Remove Intersections - this will only keep the Time where both Variables do not intersect/overlap.
The merge switch is available for the Operation. The purpose of the Merge is to combine the Variables after the Operation is initiated. Select the best option for the Variable being created.
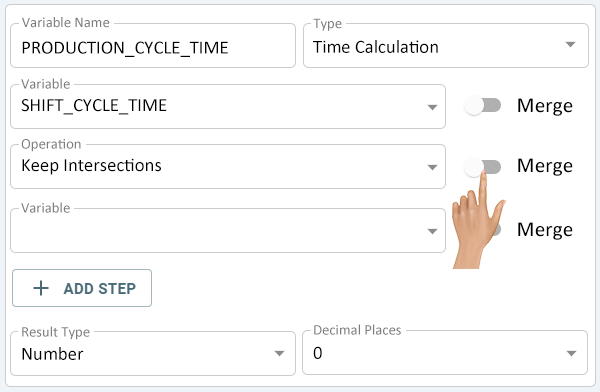
Click on the down arrow in the 2nd Variable field.
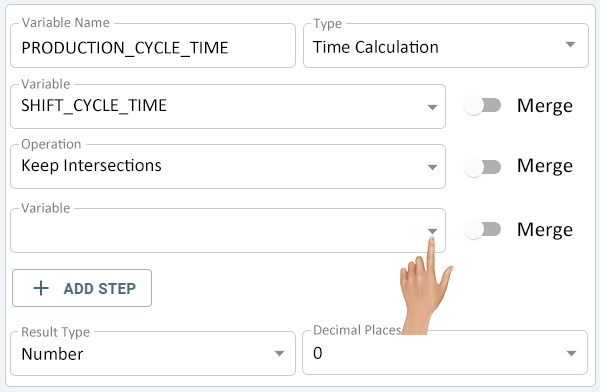
A list of all the Variables setup on the current Dashboard/Widget will be shown. Select the best option for the Variable being created.

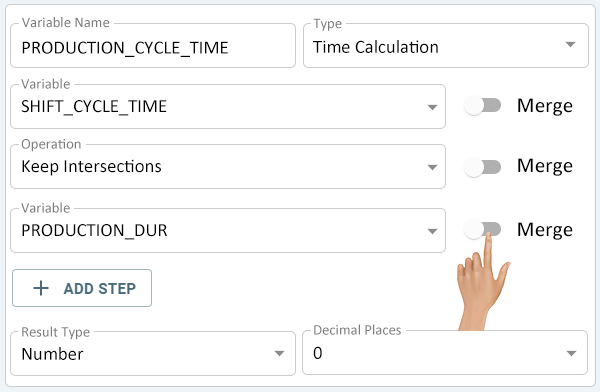
The merge switch is available for the Variable. The purpose of the Merge is to combine the Variable before the Operation is initiated.
As a general rule, there are exceptions, the user would only need to use this option if there was another Step added to the calculation. Select the best option for the Variable being created.
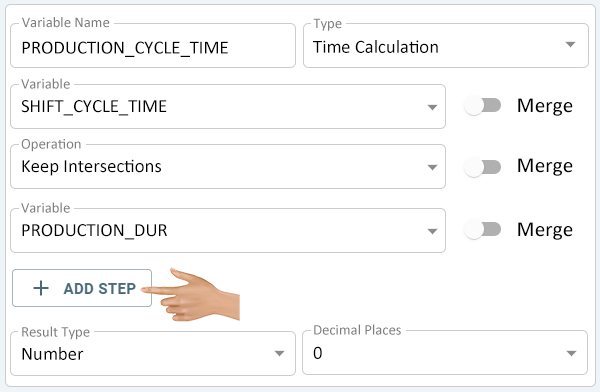
Click on the Add Step button to add another Variable and Operation to the Calculation when Needed/Required.
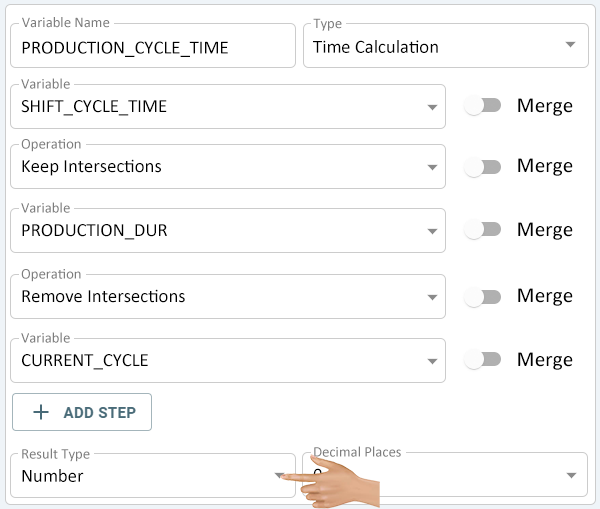
The image below shows the Cycle Time Calculation example that was shown at the beginning.
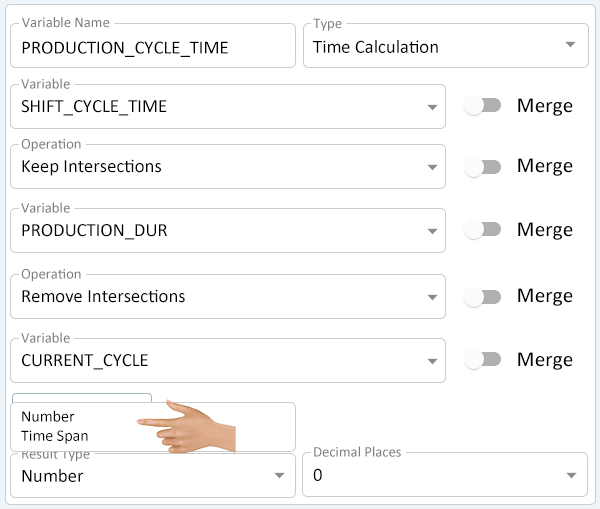
Click on the down arrow in the Result Type field to change it.
There will be 2 options available - select the best option for the Variable being created.
- Number - this will return a result as an integer.
- Time Span - this will return the result as a time stamp (HH:MM:SS).
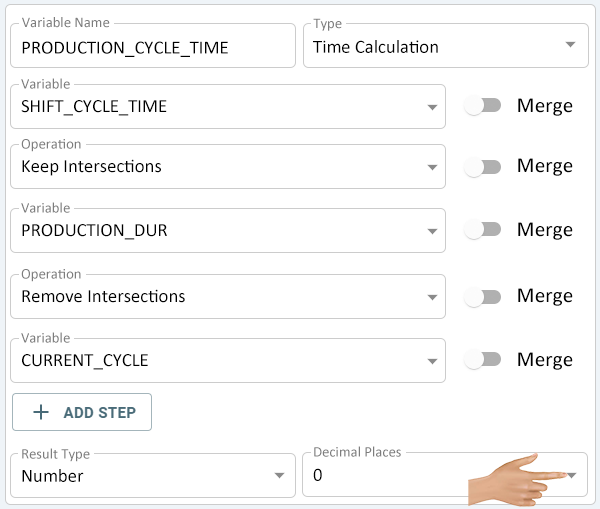
When Number is selected as the Result Type, a Decimal Place field will load. Click on the down arrow in the Decimal Places field.
There will be 4 options available - select the best option for the Variable being created.
- 0 - this option will only return a whole number. Example: 3
- 1 - this option will return a number with 1 decimal place. Example: 3.5
- 2 - this option will return a number with 2 decimal place. Example: 3.58
- 3 - this option will return a number with 3 decimal place. Example: 3.586

|