Windows Install - Hyper-V - Server 2022
From VersaVision Support

OVERVIEW
- In order to Install WSL on the Windows Server, the Hyper-V feature must be turned on. By default, this feature is turned off.
- If this is a VM (Virtual Server), Nested Virtualization must be setup with any & all settings enabled.
- VM Ware refers to this option as Virtualization Based Security (VBS).
- Azure enables this option with the Standard Security Type selection during creation.
- Each VM may have its own setting, please refer to their documentation for assistance.
REQUIREMENTS
-
- Log In: Installer/User must have a Windows Log In with Administrator permissions. This Account must remain active after the installation.
- Access: When using a VM, Installer/User must have Remote PC Access to the Server instance.
- Internet Access: Server must have full internet access. Access can be removed after the installation is complete.
- VM Properties: VM must be setup with Nested Virtualization.
INSTRUCTIONS
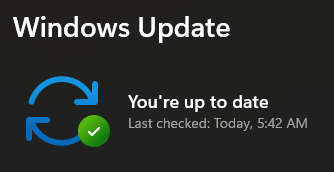
- Ensure Windows is completely updated.
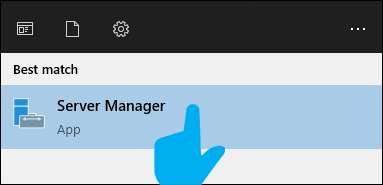
- Open Server Manager on the VM – type “Server Manager” in the search field next to the Windows button.

- Select the Server Manager application.
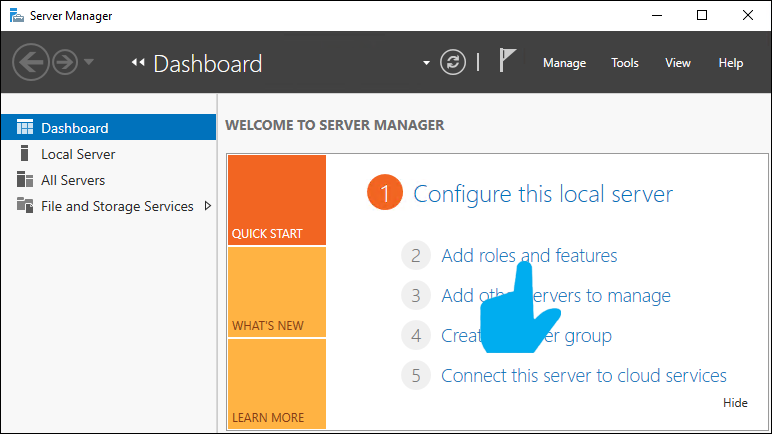
- On the Server Manager Dashboard select the “Add Roles and Features” option.
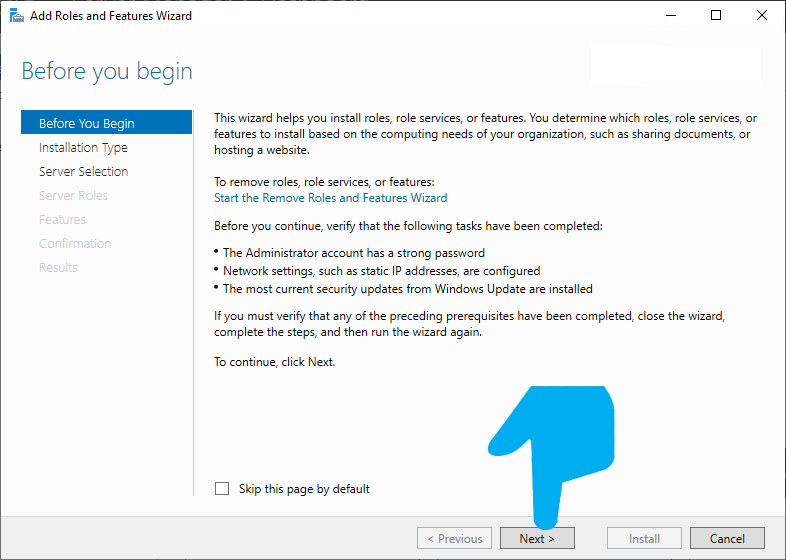
- Select the Next button on the “Before you Begin” window.
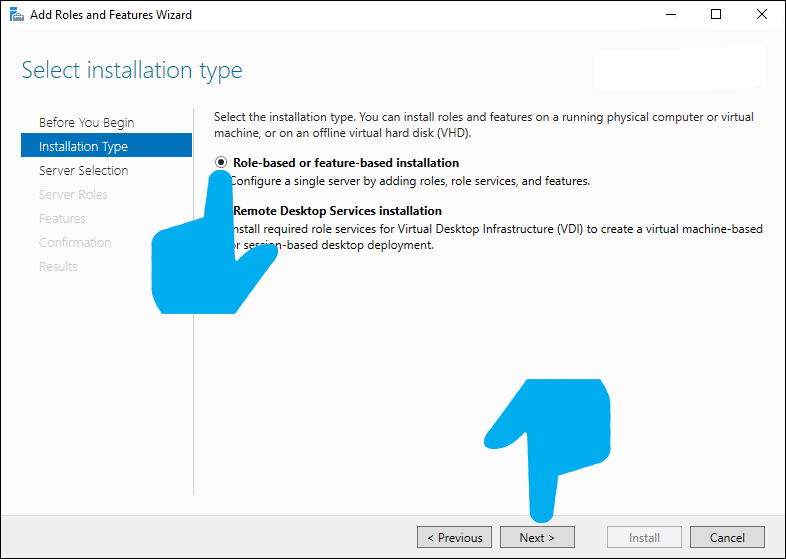
- On the “Selection Installation Type” window, ensure the “Role-based or feature-based installation” option is selected. Select the Next button.
- On the “Server Selection” window, ensure the correct Server Name is selected. Select the Next button.

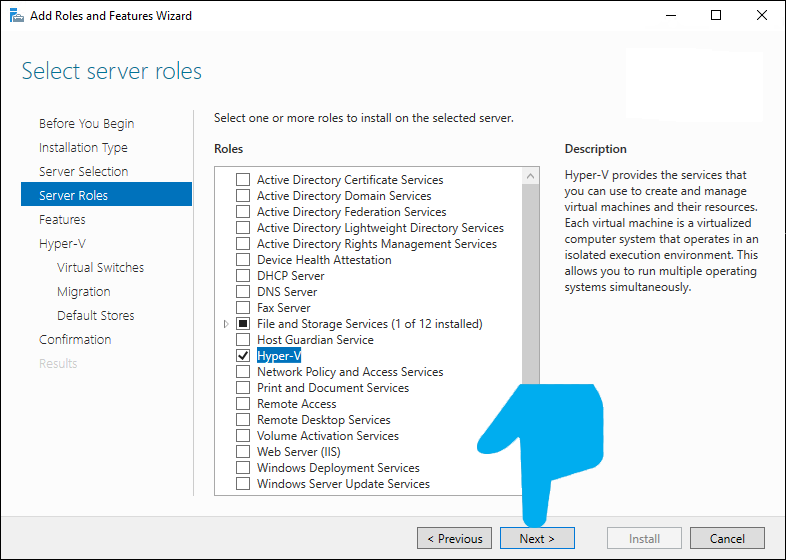
- On the “Select Server Roles” window, select the Hyper-V option.

- An “Add Roles and Features Wizard” window will load, ensure the “Include management tools” option is selected. Select the Add Features button.

- You will be returned to the “Select Server Roles” window, the Hyper-V option should now have a checkmark in the selection box. Select the Next button.
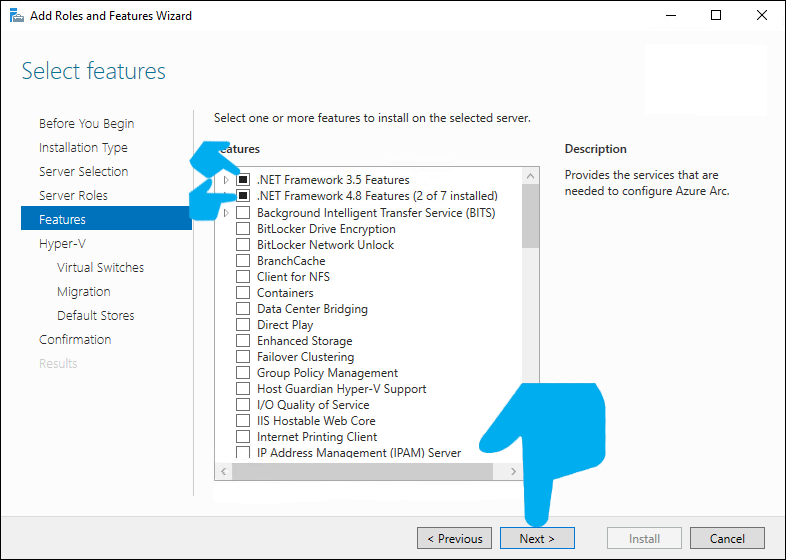
- On the “Select Features” window, ensure both ".NET Framework" versions are selected. Select the Next button.
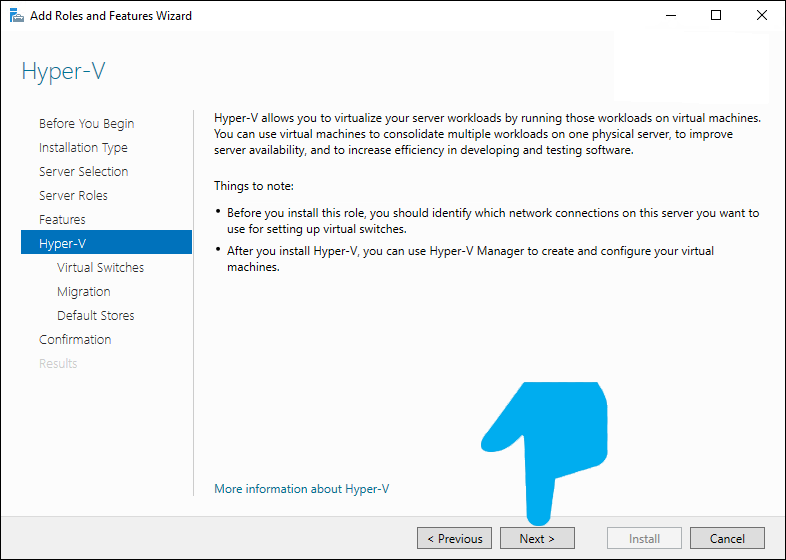
- On the “Hyper-V” window, select the Next button.
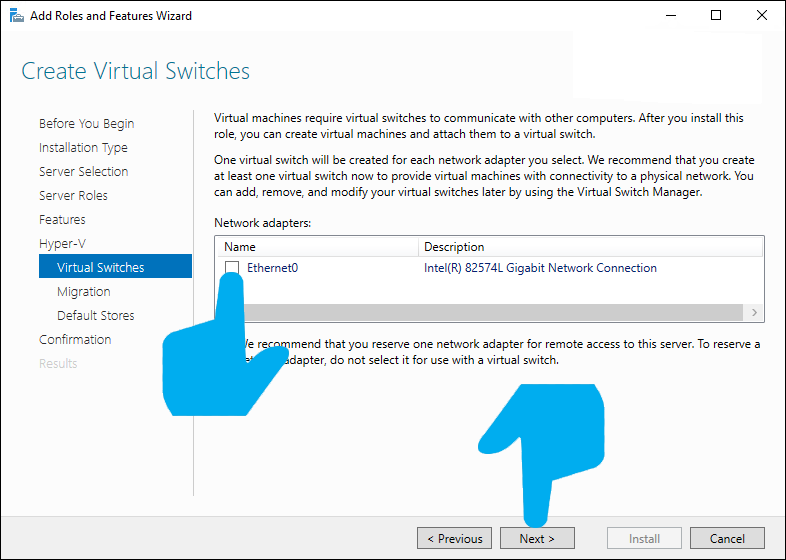
- On the “Create Virtual Switches” window, select the appropriate connection for your VM. Select the Next button.
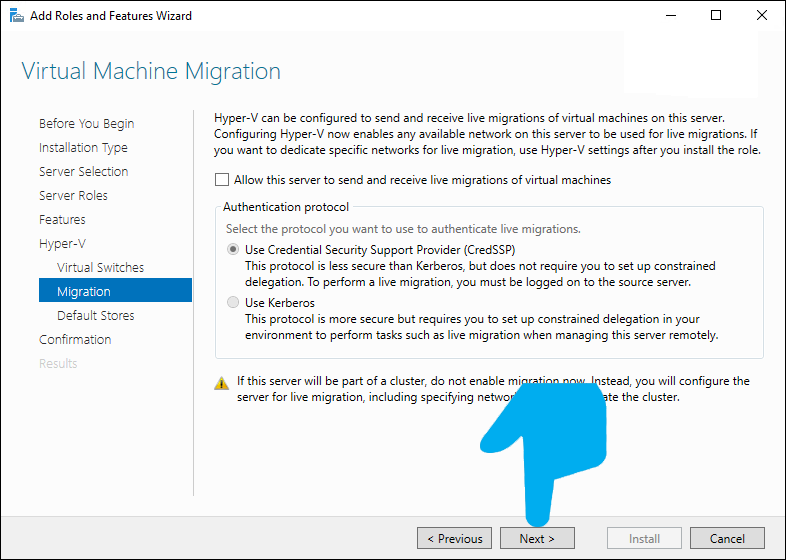
- On the “Virtual Machine Migration” window, leave the default settings. Select the Next button.
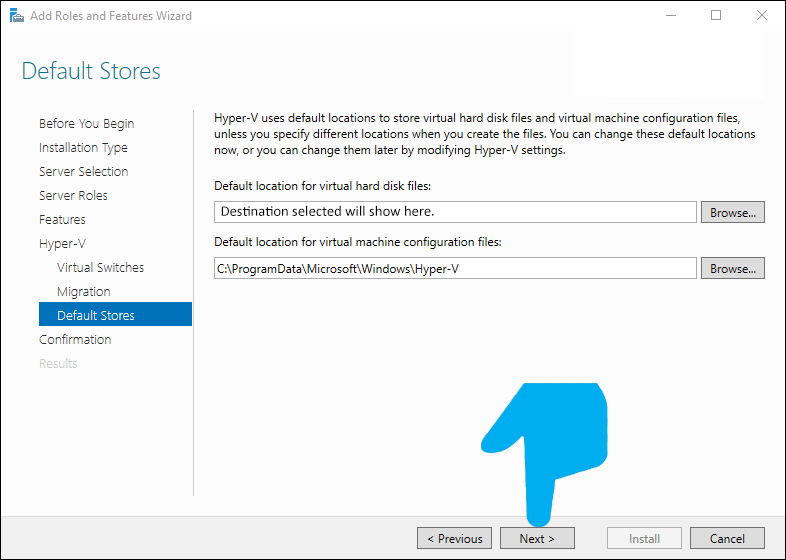
- On the “Default Stores” screen, select a location for the Virtual Hard disk. Select the Next button.
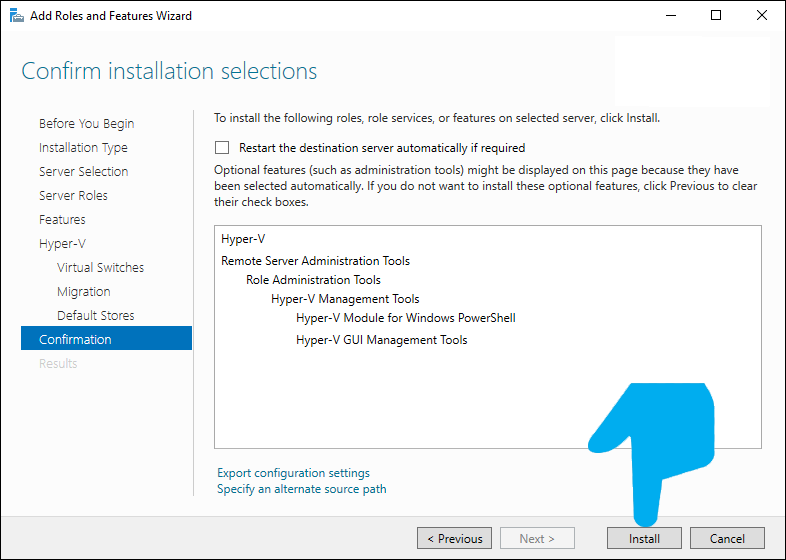
- On the “Confirm Installation Selections” window, select the Next button.
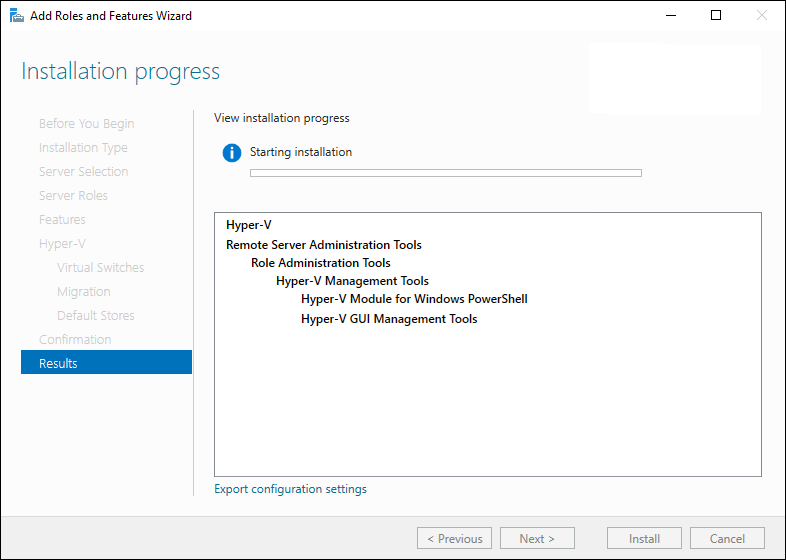
- The “Installation Progress” window will load to show the progress of the installation.
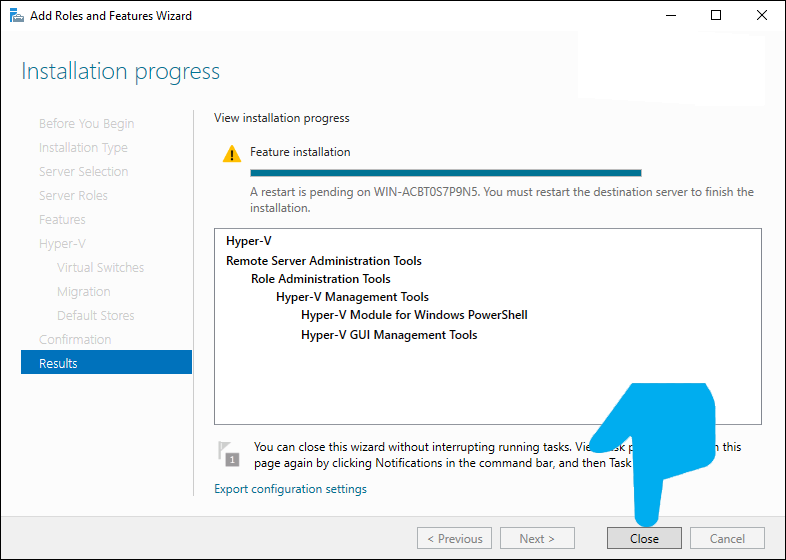
- Once the installation is complete, a Server Reboot/Restart is required. Select the Close button.
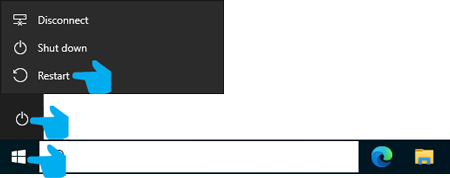
- Click on the Windows Start button, select Power – Restart.
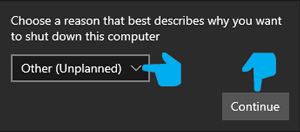
- Select an option for the Reboot if needed, select the Continue button.
- Return to the Software Install Main page and continue with the next Guide/Step.

|