Wireless (I/O) Light Stack Installation
From VersaVision Support
Revision as of 10:48, 19 December 2023 by VVSupportAdmin (talk | contribs) (Created page with "<BR> <span style="box-shadow:2px 2px 15px #90A4AE; border-radius:5px; padding:20px">250px|link=USB Light Stack Install</span> <div style="text-align: center;"><span style="color:#0054a6; font-size:150%;"><u>'''OVERVIEW'''</u></span></div> <BR> Wireless (I/O) Stacklights will be delivered fully assembled. <BR> Each Wireless Stack Light unit will have an attached mounting bracket (referred to as L-Bracket). <BR> The L-Bracket must be attache...")

OVERVIEW
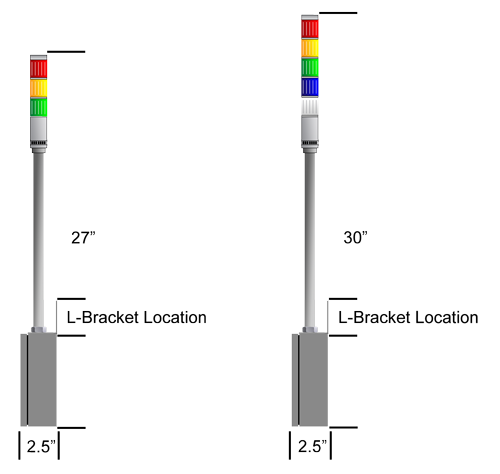
Wireless (I/O) Stacklights will be delivered fully assembled.
Each Wireless Stack Light unit will have an attached mounting bracket (referred to as L-Bracket).
The L-Bracket must be attached to a surface that can accept screws or anchors.
This page explains how to attach the L-Bracket/Mounting bracket.
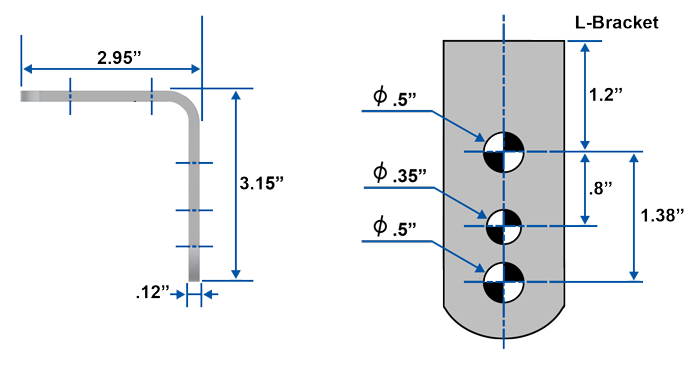
MOUNT LOCATION & DIMENSIONS
REQUIRED TOOLS
- (2) Screws or Anchors for use on the selected/available surface - Top & Bottom Holes.
- Diameter no larger than .5" (1/2")
- .5" (1/2") Diameter Drill Bit appropriate for the selected/available surface.
- Diameter no larger than .35" (11/32")
- .35" (11/32") diameter Drill Bit apporpirate for the selected/available surface.
- Drill
- Torpedo Level
- Hand Tools for securing the Screws or Anchors.
- (2) Screws or Anchors for use on the selected/available surface - Top & Bottom Holes.
INSTRUCTIONS
Drill out the 3 holes required for the mount, using the measurements found on the image in the Mount Location & Dimensions section of this page.
Attach the Light Stack bracket to the pre-drilled holes/anchors.
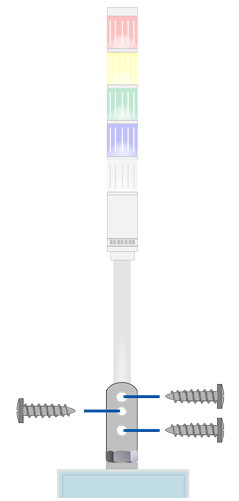
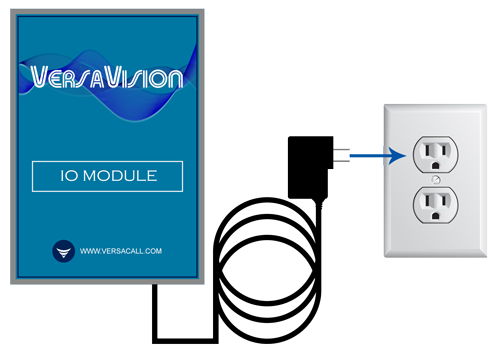
Extend the Power Cord from the bottom of the Light Stack to an available 110v Outlet and plug it in.
OTHER INFORMATION

|