Count - PSM
From VersaVision Support
Counts are Monitoring Points that can be setup to capture when a piece/part has been completed.
A Count on a PSM has 3 different types available:
- Default - simple Count - press the button increase the Count by 1.
- Distribution - Count that allows the user to enter a count for multiple items/reasons.
- Quantity - Count that allows the user to enter a Total Pieces.
This page will provide information on each property required to each Count Type.
To access the Count setup, the user will need to select an existing Count under Monitoring Points or select to Add a new Count.


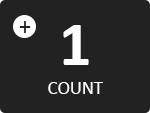
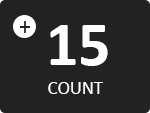
A Default Count button would show as a button on the PSM interface in the bottom right corner of the screen. The user would press the button to increase the Count by 1.
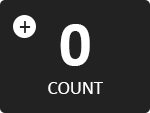
The Count button will show the total Count.
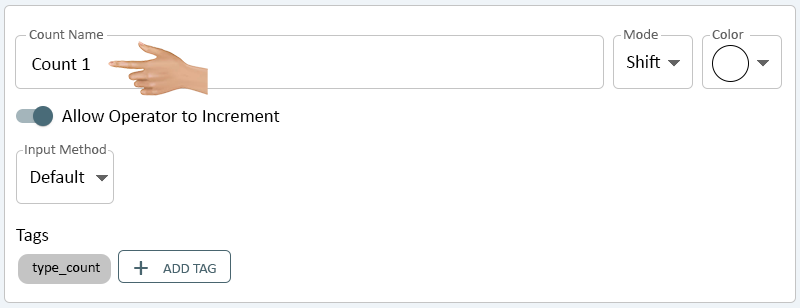
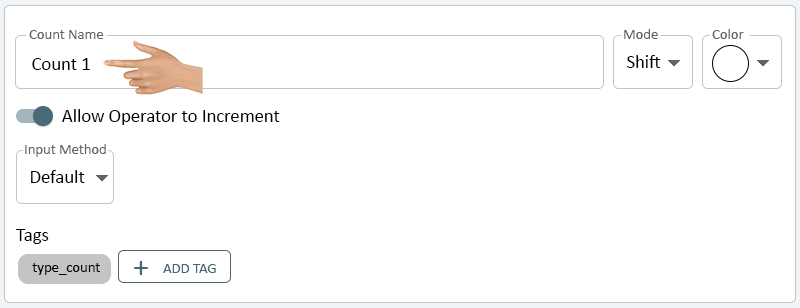
After selecting to Add or Edit a Count, the Properties will show on the right side of the screen. Click in the Count Name field
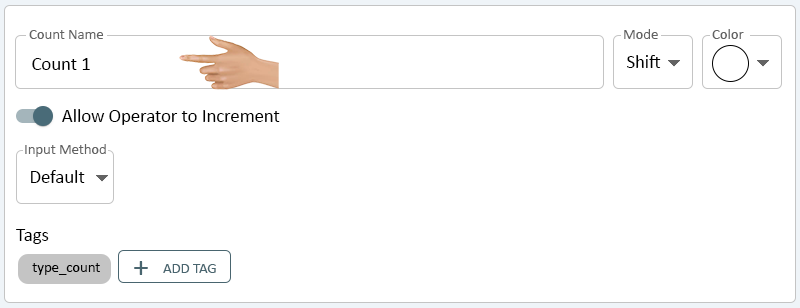
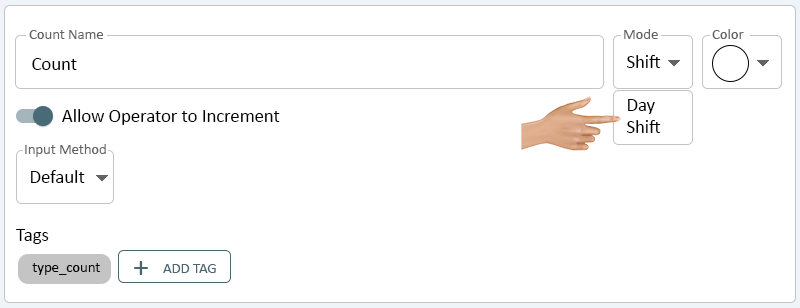
Enter a Name for the Count. This name will appear on the Count button. Click on the down arrow in the Mode field.
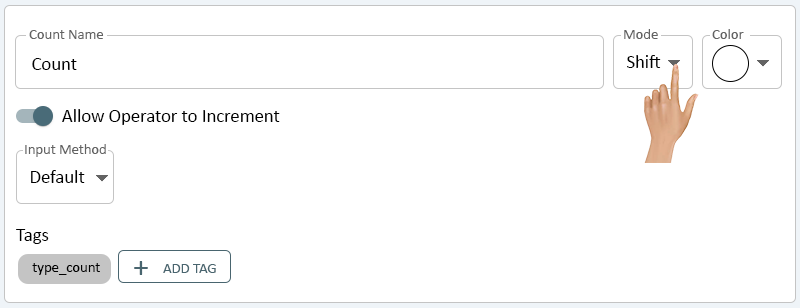
There will be 2 options for the Mode - select the best option for the Count being created.
- Shift - selecting the option will reset the Count at the end of every Shift.
- Day - selecting this option will reset the Count at the end of the Day (midnight).

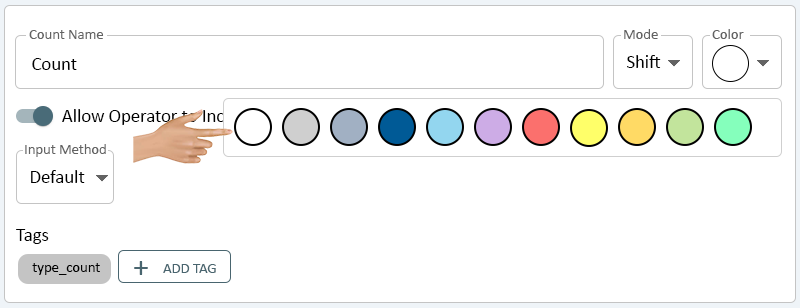
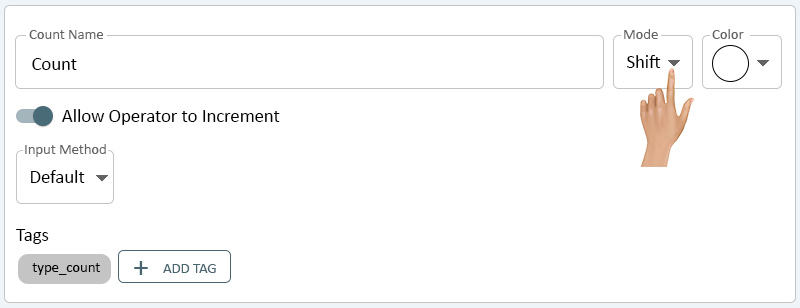
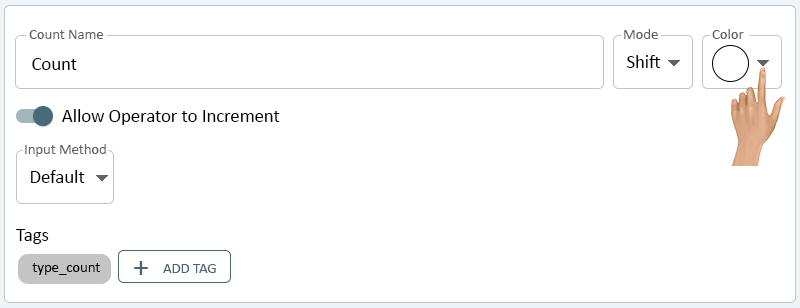
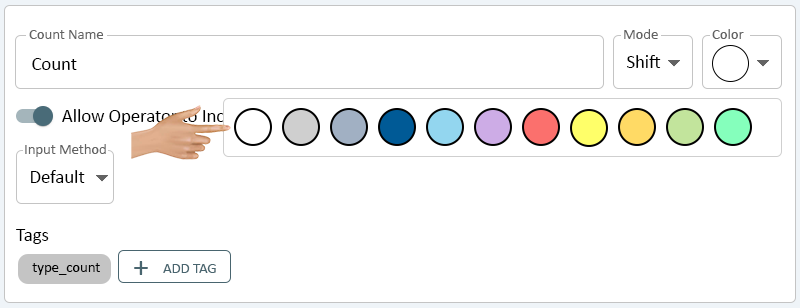
Click on the down arrow in the Color field.

A list of 11 Colors will be available. Select the best Color for the Count being created.

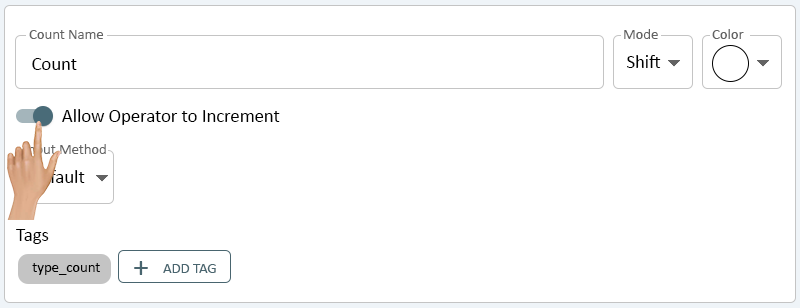
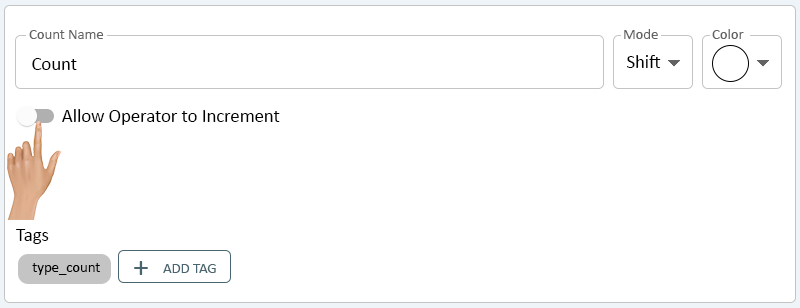
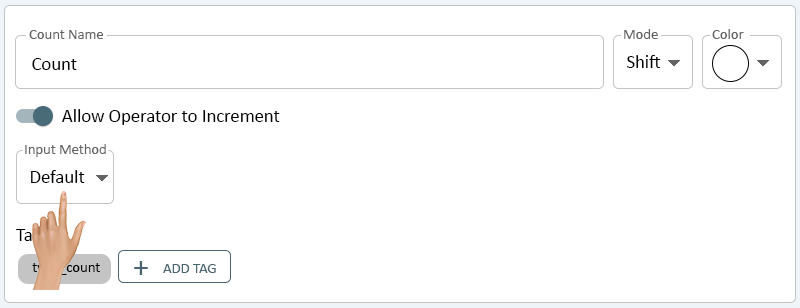
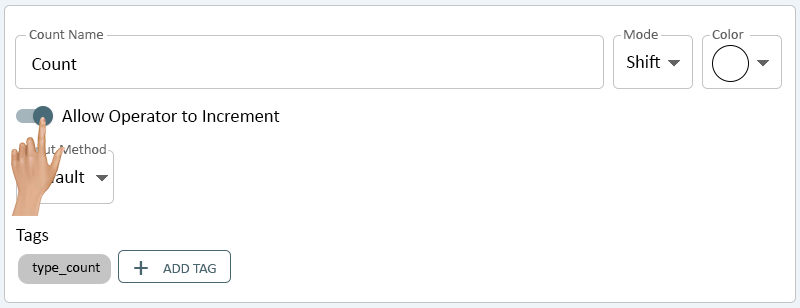
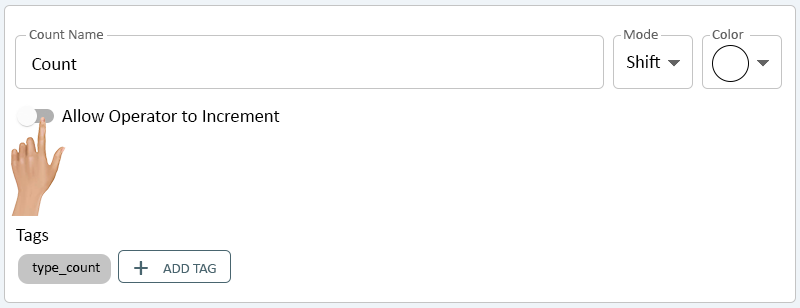
Toggle the "Allow Operator to Increment" On or Off.
- On - the Operator will be able to click on the Count button to increase the Count by 1.
- Off - the Operator will NOT be able to click on the Count button.
- Generally used when the Count comes from an input from a machine (I/O Module).
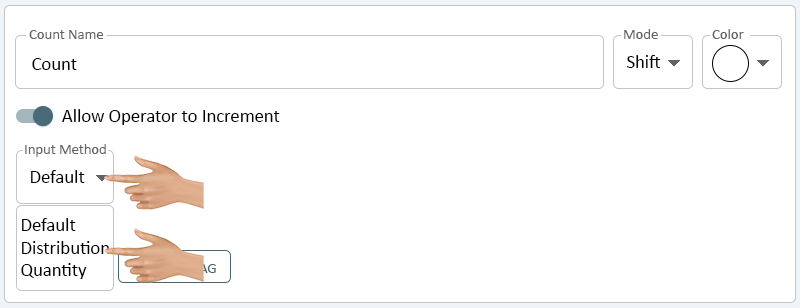
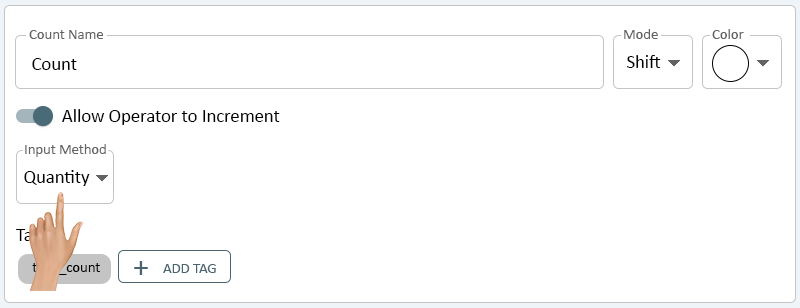
Set the Input Method field to Default when the "Allow Operator to Increment" is enabled.
By default the Count will have a "type_count" tag assigned - click on the Add Tag button to create a Custom Tag.
- Click Here for information on setting up a Tag.

Click on the Add Actions button in the Actions section to setup an Action for the Count.
- Click Here for information on setting up an Action.

A Distribution Count button would show as a button on the PSM interface in the bottom right corner of the screen. The user would press the button to increase the Count by Item/Part.
A menu of Items/Parts will show on the screen. The user will click on the "+" button to increase the Count. Use the "-" button to decrease the Count.
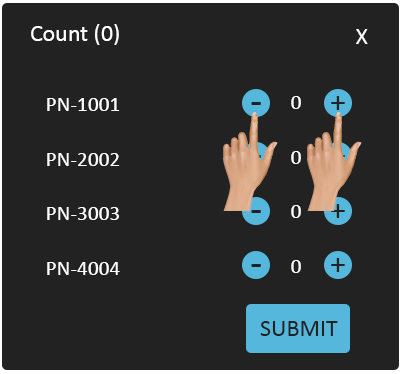
Once the appropriate Count has been entered - click on the Submit button.
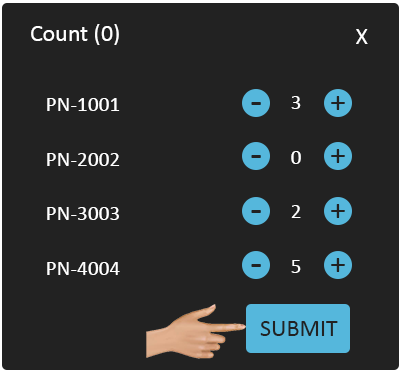
The Count button will show the total Count.
After selecting to Add or Edit a Count, the Properties will show on the right side of the screen. Click in the Count Name field
Enter a Name for the Count. This name will appear on the Count button. Click on the down arrow in the Mode field.

There will be 2 options for the Mode - select the best option for the Count being created.
- Shift - selecting the option will reset the Count at the end of every Shift.
- Day - selecting this option will reset the Count at the end of the Day (midnight).
Click on the down arrow in the Color field.

A list of 11 Colors will be available. Select the best Color for the Count being created.
Toggle the "Allow Operator to Increment" On or Off.
- On - the Operator will be able to click on the Count button to increase the Count.
- Off - the Operator will NOT be able to click on the Count button.
- Generally used when the Count comes from an input from a machine (I/O Module).
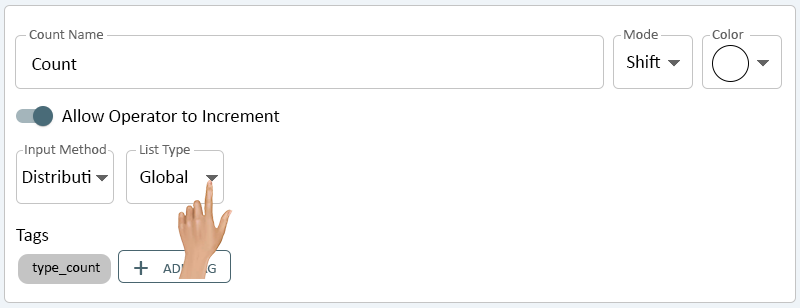
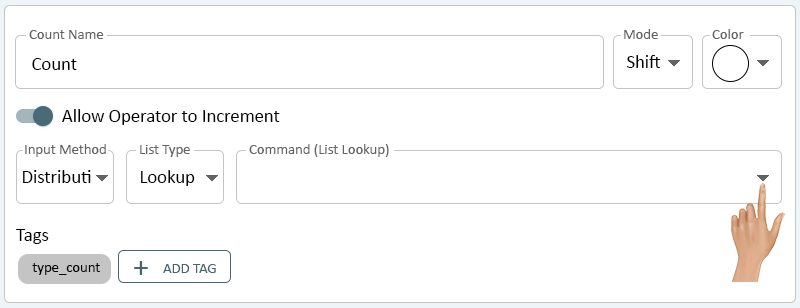
Select the down arrow on the Input Method field.
Set the Input Method field to Distribution when the "Allow Operator to Increment" is enabled.
Click on the down arrow in the List Type field. The list selected, in the next section, will show as the individual Items/Parts menu.
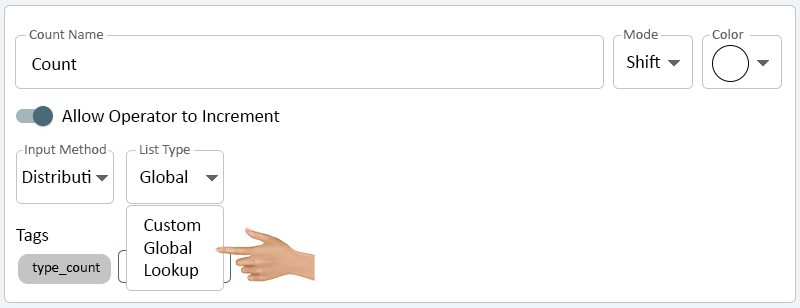
There will be 3 options available - select the best option for the Count being created:
- Custom - select this option to setup a List specifically for the configuration being setup.
- Click Here for information on setting up a Custom List.
- Global - select this option to select a List that has been setup in the system.
- Lookup - select this option to use a Command to get a List from a Table that has been setup in the system.
- Custom - select this option to setup a List specifically for the configuration being setup.
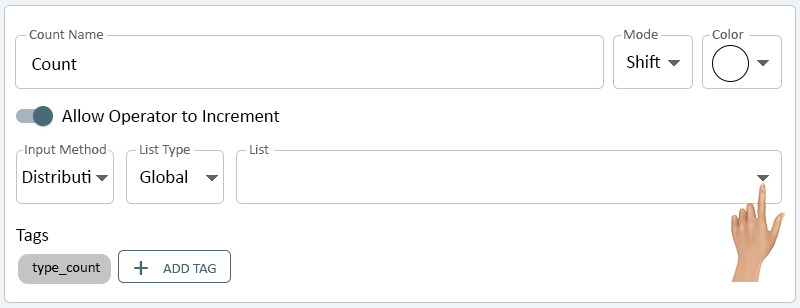
When selecting a Global List, click on the down arrow in the List field.
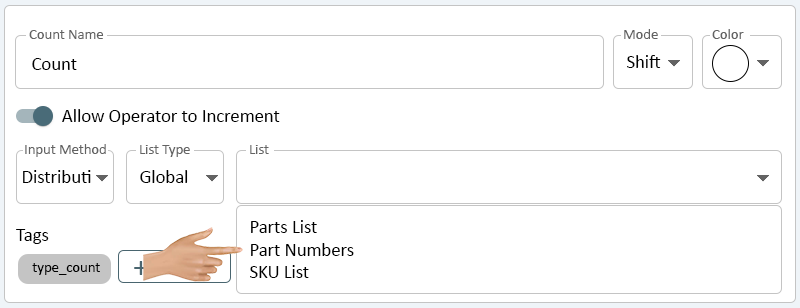
A list all the Lists setup in Assets will show - click on the List that is needed for the Count being created.
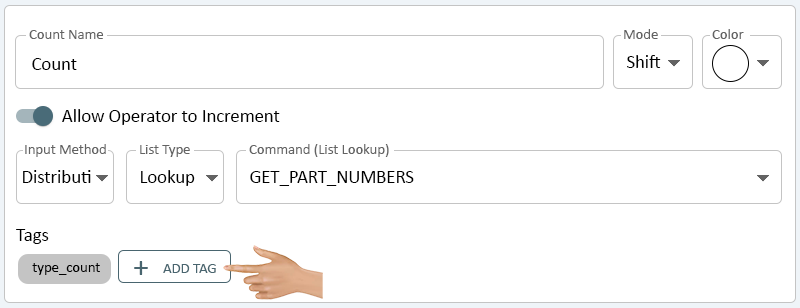
When selecting a Lookup List, click on the down arrow in the Command field.
A list all the List Lookup Commands setup in the system will show - click on the Command that is needed for the Count being created.

By default the Count will have a "type_count" tag assigned - click on the Add Tag button to create a Custom Tag.
- Click Here for information on setting up a Tag.
Click on the Add Actions button in the Actions section to setup an Action for the Count.
- Click Here for information on setting up an Action.
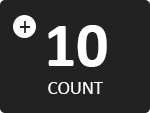
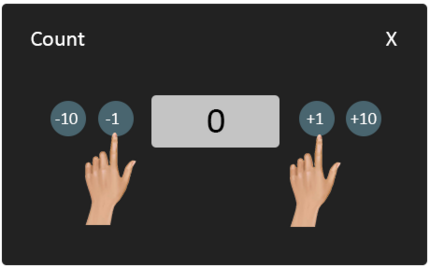
A Quantity Count button would show as a button on the PSM interface in the bottom right corner of the screen. The user would press the button to increase the Count.
A entry menu will show on the screen. The user will click on the "+1" or "+10" button to increase the Count. Use the "-1" or "-10" button to decrease the Count.
Once the appropriate Count has been entered - click on the Submit button.
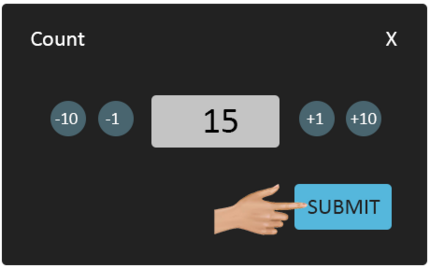
The Count button will show the total Count.
After selecting to Add or Edit a Count, the Properties will show on the right side of the screen. Click in the Count Name field
Enter a Name for the Count. This name will appear on the Count button. Click on the down arrow in the Mode field.
There will be 2 options for the Mode - select the best option for the Count being created.
- Shift - selecting the option will reset the Count at the end of every Shift.
- Day - selecting this option will reset the Count at the end of the Day (midnight).

Click on the down arrow in the Color field.
A list of 11 Colors will be available. Select the best Color for the Count being created.
Toggle the "Allow Operator to Increment" On or Off.
- On - the Operator will be able to click on the Count button to increase the Count by 1.
- Off - the Operator will NOT be able to click on the Count button.
- Generally used when the Count comes from an input from a machine (I/O Module).


Set the Input Method field to Quantity when the "Allow Operator to Increment" is enabled.
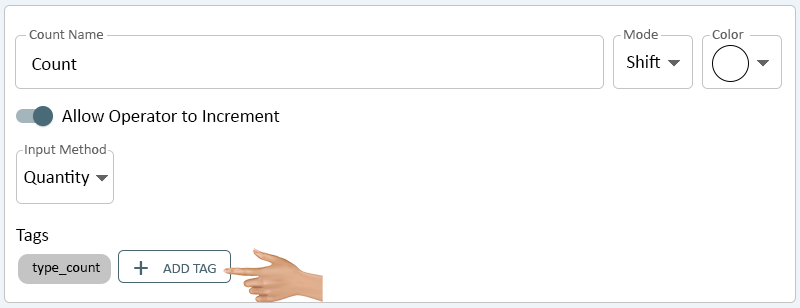
By default the Count will have a "type_count" tag assigned - click on the Add Tag button to create a Custom Tag.
- Click Here for information on setting up a Tag.
Click on the Add Actions button in the Actions section to setup an Action for the Count.
- Click Here for information on setting up an Action.

|