Administration - Paging
From VersaVision Support
Revision as of 13:52, 5 June 2024 by VVSupportAdmin (talk | contribs)
![]()
- OVERVIEW
- Administration is used to access important system components. There are multiple components inside Administration, this page is focused on the Paging component.
- If a VersaVision system is going to be communicating using Pagers, a Paging Transmitter would need to be installed and configured. There are 2 types of Transmitter installations, USB & Remote/Ethernet.
- This page will concentrate on setting up the Paging Transmitter once it has been installed.
- NAVIGATION
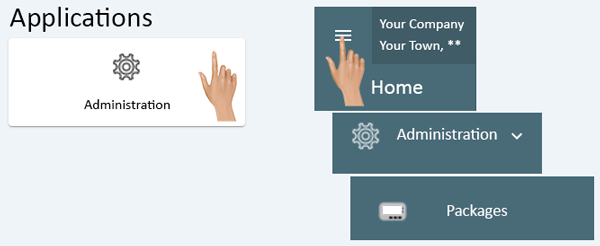
- Administration can be accessed via the Home page menu or the Administration icon. Once Administration has been selected - select Paging from the menu.
-
Additional Information Add a Pager | View Capcode | Setup Capcode | Requirements
- USB TRANSMITTER
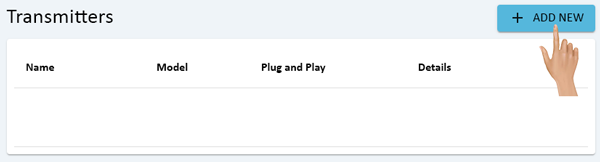
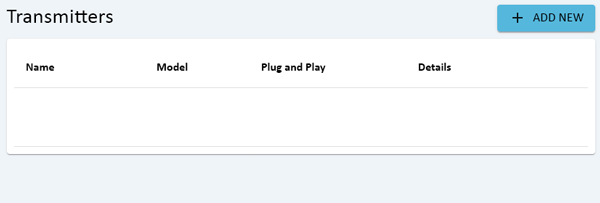
- On the Transmitters page, click on the Add New button.
-
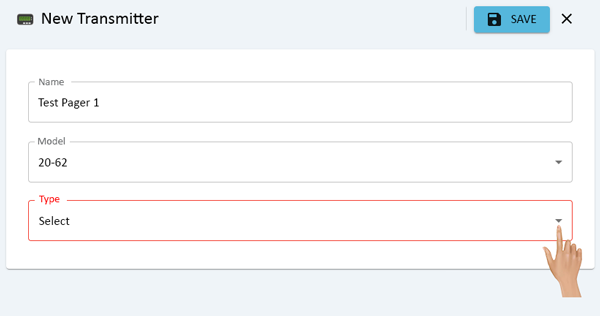
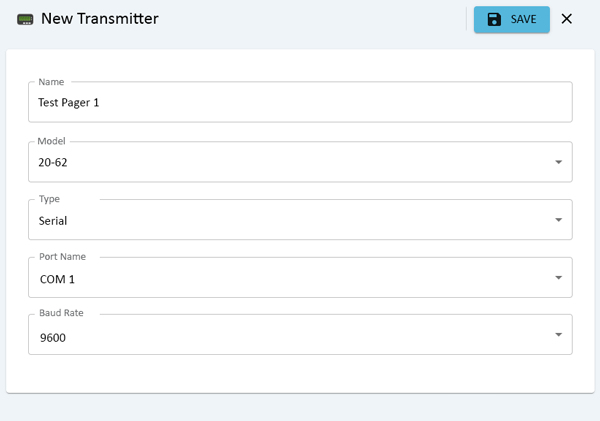
- The New Transmitter properties window will load to the right of the Transmitters list. Click in the Name field and enter a name for the transmitter.
-

- In the Model field, select 20-62 unless told to select something different by a VersaCall Technician.
-

- Click on the down arrow in the Type field, select Serial from the list.
-
- Click on the down arrow in the Port Name, select the COM Port. If the USB Paging Transmitter is not plugged into the computer, there will be no ports shown.
-
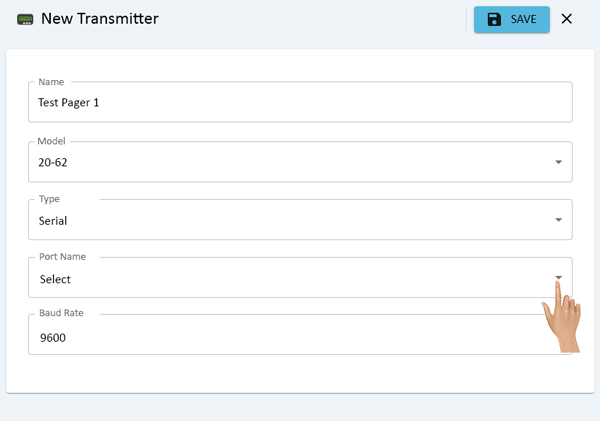
- Leave the Baud Rate set to 9600.
-
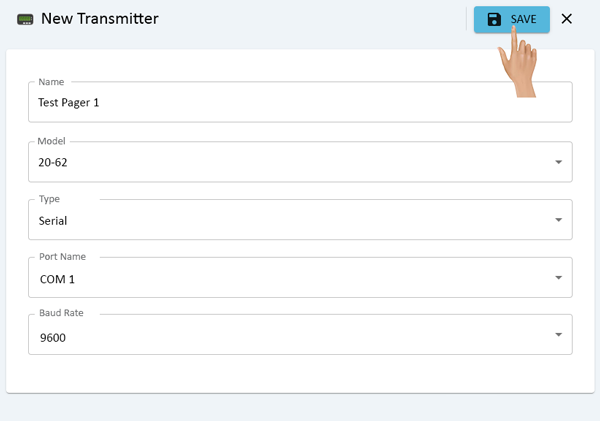
- Once all the settings have been completed, click on the Save button.
-
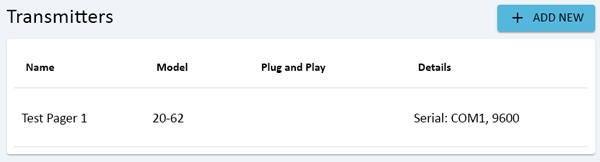
- The USB Transmitter added will now show in the Transmitters list.
-
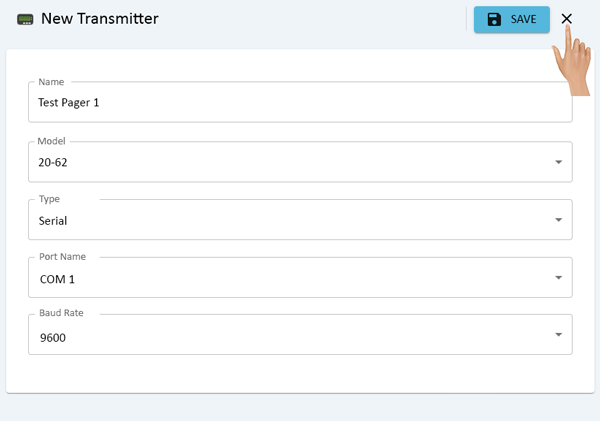
- Close the Add Transmitter properties window by clicking on the "X" next to the Save button.
-
Additional Information Add a Pager | View Capcode | Setup Capcode | Requirements
- ETHERNET TRANSMITTER
- On the Transmitters page, click on the Add New button.
-
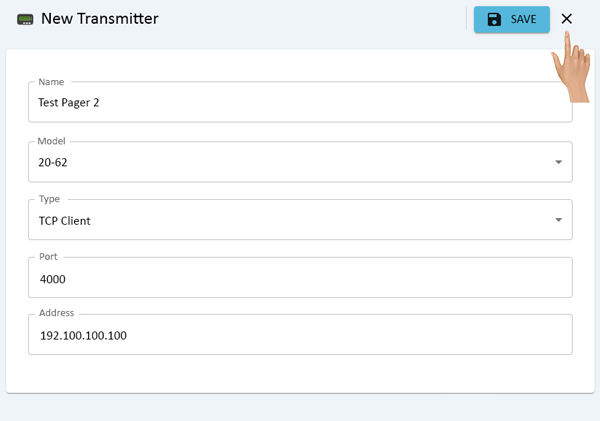
- The New Transmitter properties window will load to the right of the Transmitters list. Click in the Name field and enter a name for the transmitter.
-
- In the Model field, select 20-62 unless told to select something different by a VersaCall Technician.
-
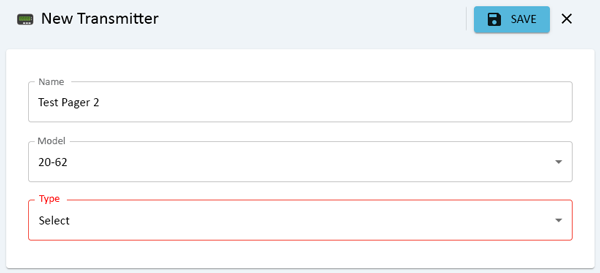
- Click on the down arrow in the Type field, select TCP Client from the list.
-

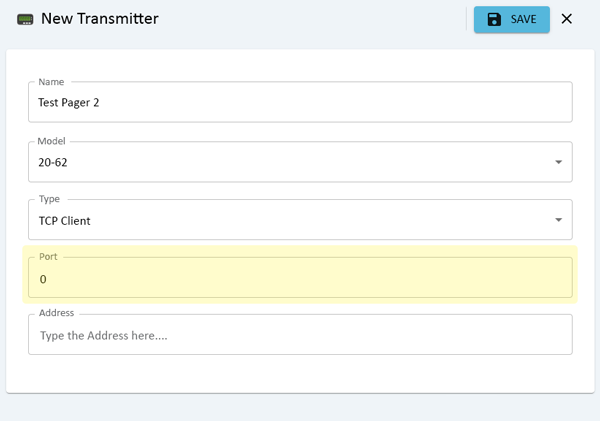
- Click in the Port field, enter 4000 unless specifically told a different port by a VersaCall Technician.
-
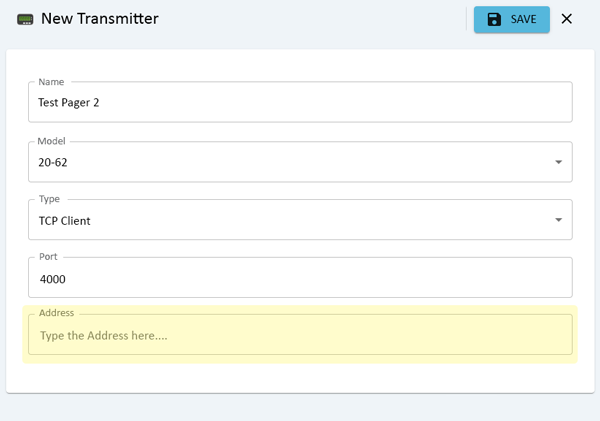
- Click in the Address field, enter the IP Address of the Remote Paging Transmitter. You may need to consult your IT Department.
-
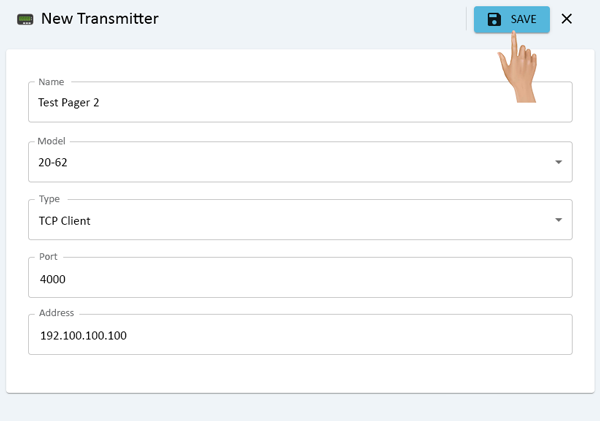
- Once all the settings have been completed, click on the Save button.
-
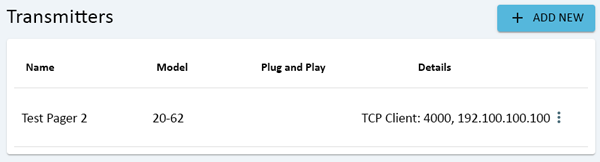
- The Remote Transmitter added will now show in the Transmitters list.
-
- Close the Add Transmitter properties window by clicking on the "X" next to the Save button.
-
Additional Information Add a Pager | View Capcode | Setup Capcode | Requirements
- DELETE TRANSMITTER
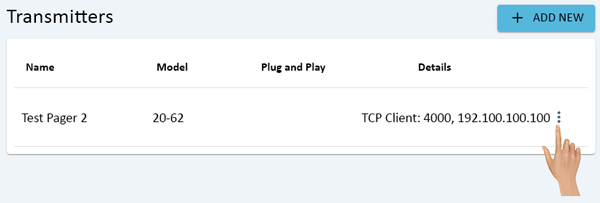
- Click on the 3 dot menu for the Paging Transmitter that needs to be removed.
-
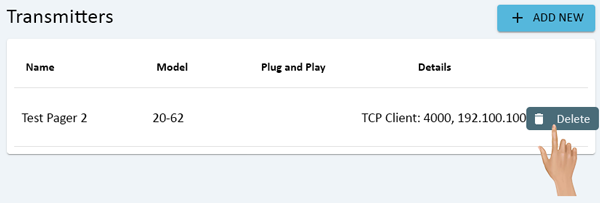
- A pop-up window will load, click on the Delete option in the list.
-
- A Success message will appear at the bottom of the screen.
-
- The Transmitter that was selected for deletion will no longer appear on the Transmitter list.
-
Additional Information Add a Pager | View Capcode | Setup Capcode | Requirements

|