Variables - Duration
From VersaVision Support
![]()
Variables can be setup on Widgets or Dashboards. Each Variable has a specific purpose or data it gathers.
This page is dedicated to the Duration Variable which allows the user to gather the amount of time a monitoring point was active.
This page explains how to Add and Edit a Variable.
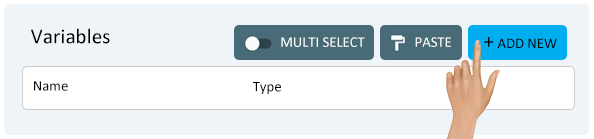
With a new or existing widget or dashboard opened, click on the Variables button at the top-right position above the layout.

On the Variables window click on the Add New button.
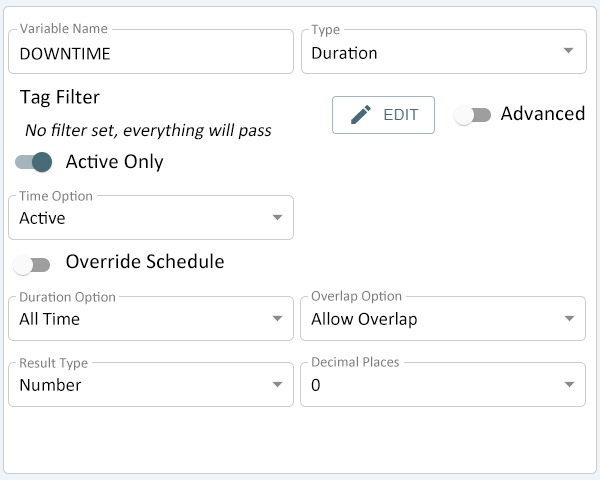
Each New Variable will have 4 property fields available. Depending on the Type selected, these fields may change. Select the Variable Name field.
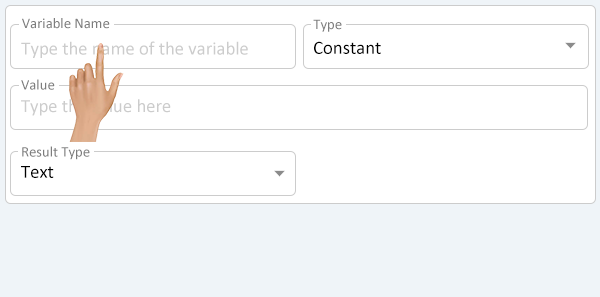
Enter a Name for the Variable being created. Ensure the name is recognizable for use in creating the Dashboard or Widget cell.
- NOTE - a name must be uppercase letters or numbers. When a space is required, the user must use and underscore "_"
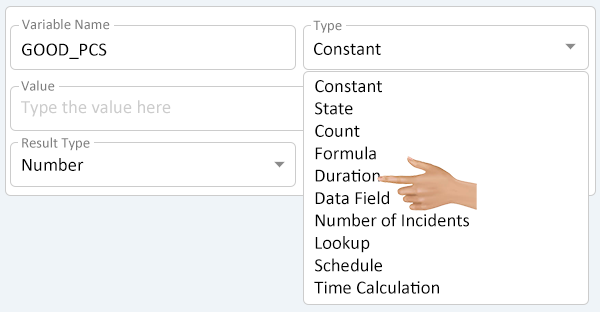
After entering a Variable Name, select the down arrow in the Type field.
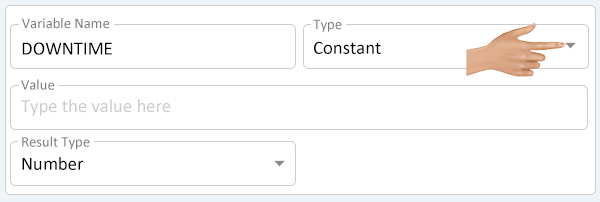
Select Duration from the list.
The Variable Properties will change to show the following fields.
- Tag Filter - select what location(s) and/or monitoring point(s) will be used for the Variable.
- Time Option - select the time window for the Duration.
- Duration Option - provide filter for the Time Option.
- Overlap Option - allows the user to filter the overlap of time when looking at multiple locations or monitoring points.
- Result Type - select how the Duration will be shown.
- Decimal Places - select if the Duration (as a Number) should have decimal places or not.
To setup a Tag Filter for the Variable, click on the Edit button.
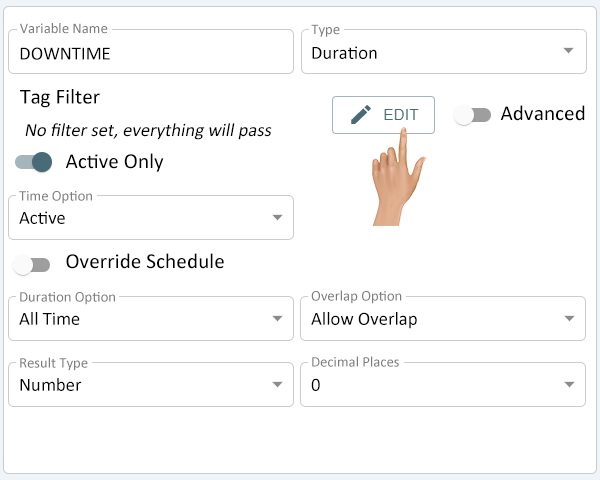
Click Here for instructions on setting up a Tag Filter.
To setup an Advanced Tag Filter, click on the Toggle to enable it.

Click Here for instructions on setting up an Advanced Tag Filter.
The user has the ability to select to collect Duration Time only when the location(s) or monitoring point(s) are active or at any time.
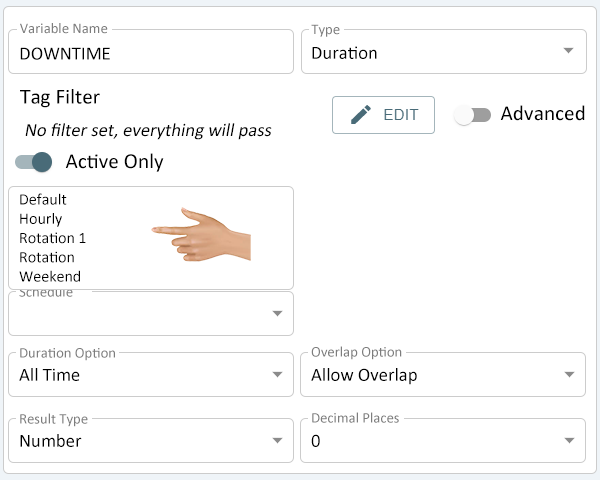
Turn the Active Only switch to On to only collect active Duration Time. This option is temporary, only has data when the Count is active.
Turn the Active Only switch to Off to collect Counts any time. This option is historical.

Click Here for instructions on setting up an Active or Non-Active Time Option.
If the user wants to use a schedule other than the one assigned to the location, click on the toggle for Override Schedule.
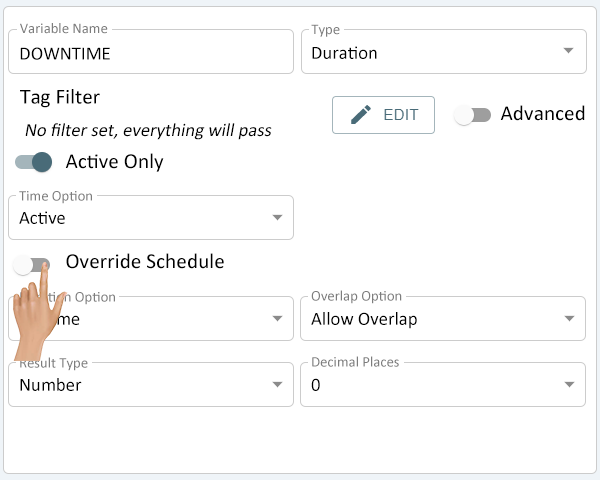
When selecting to override the schedule, an additional Schedule field will load under. Click on the down arrow.
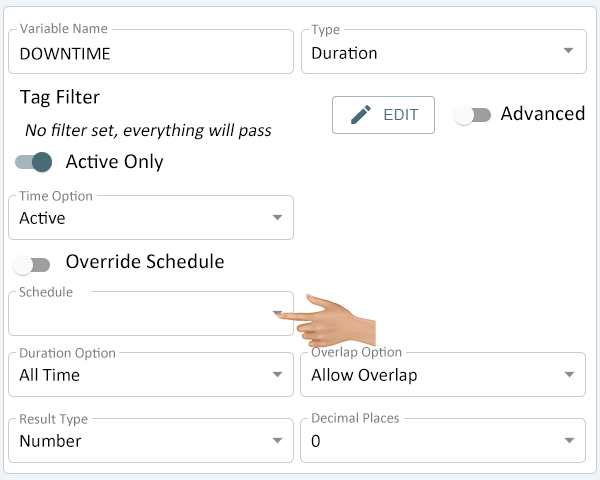
A list of all the schedules setup on the system will show - select the appropriate schedule for the Variable being created.
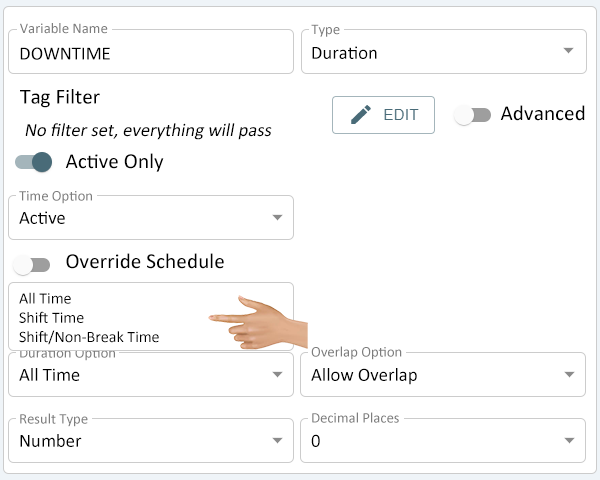
Click on the down arrow in the Duration Option field.
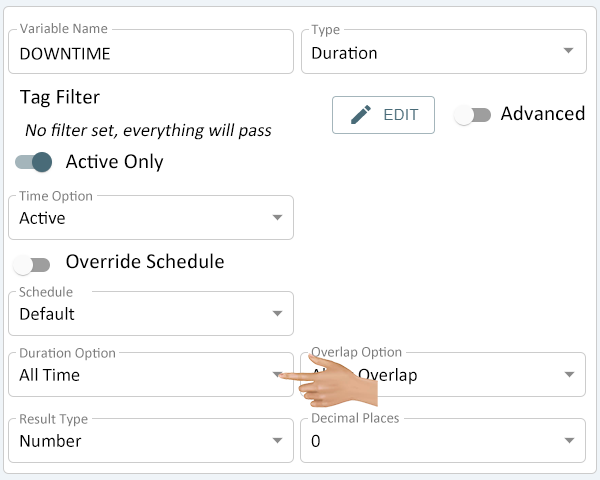
There will be 3 options available - select the best option for the Variable being created.
- All Time - this option will calculate Duration Time at all times - the schedule times will not be considered.
- Shift Time - this option will calculate Duration Time during the shift(s) according to the schedule used.
- Shift/Non-Break Time - this option will calculate Duration Time during the shift(s) time and it will omit any duration time that occurred during a Break.
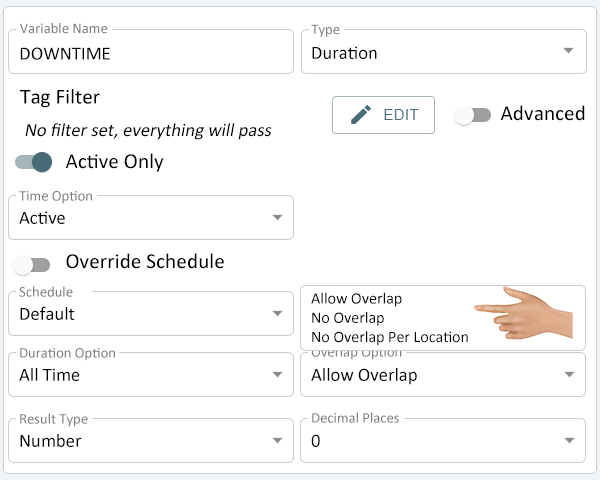
Click on the down arrow in the Overlap Option field.
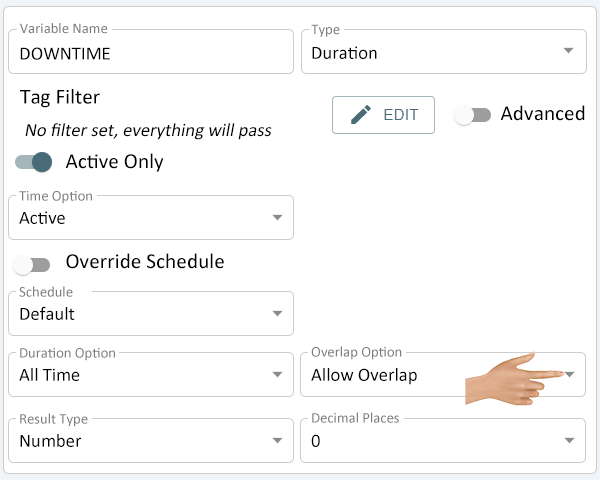
There will be 3 options available - select the best option for the Variable being created.
- Allow Overlap - this option will add all of the Duration Time between all monitoring point(s) and location(s) specified in the Tag Filter.
- No Overlap - this option will add all of the Duration Time between all monitoring point(s) and location(s) specified in the Tag Filter. Any Duration Time that overlaps another monitoring point will be removed.
- No Overlap Per Location - this option will add all of the Duration Time between all monitoring point(s) and location(s) specified in the Tag Filter. Any Duration Time that overlaps another location will be removed.
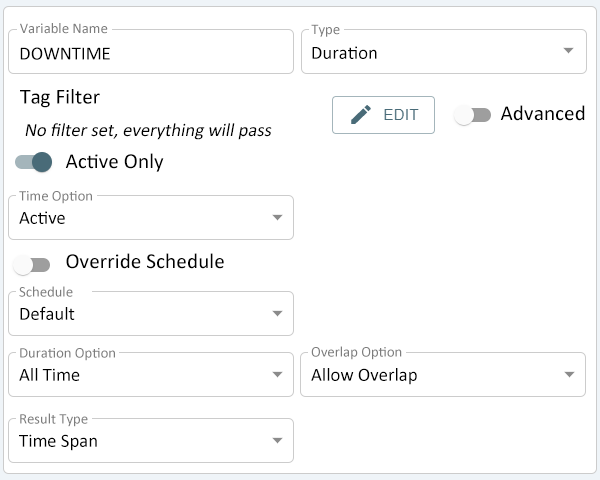
The Result Type field can be set to Number or a Time Span. Click on the down arrow in the Result Type field to change it.
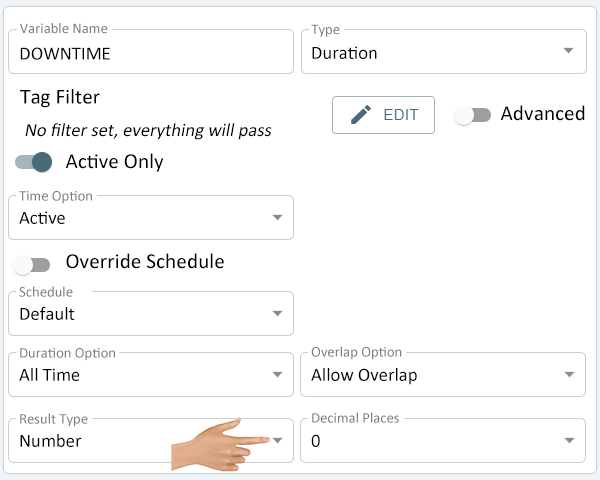
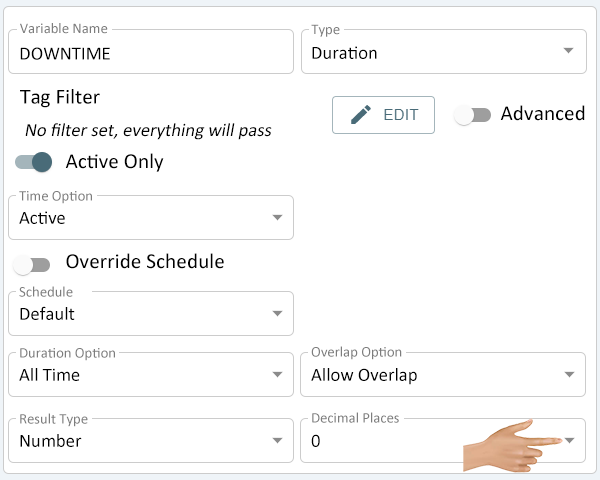
When Number is selected there will be a Decimal Place field next to the Result Type field. Click on the down arrow in the Decimal Places field.
There will be 4 options available - select the best option for the Variable being created.
- 0 - this option will only return a whole number. Example: 3
- 1 - this option will return a number with 1 decimal place. Example: 3.5
- 2 - this option will return a number with 2 decimal place. Example: 3.58
- 3 - this option will return a number with 3 decimal place. Example: 3.586
When Time Span is selected there will be no additional options.

|