Difference between revisions of "Installation Guides - Hardware"
From VersaVision Support
| (7 intermediate revisions by 2 users not shown) | |||
| Line 1: | Line 1: | ||
<BR> | <BR> | ||
<span style="box-shadow:2px 2px 15px #90A4AE; border-radius:5px; padding:20px">[[File:Install-Guide-Main | <span style="box-shadow:2px 2px 15px #90A4AE; border-radius:5px; padding:20px">[[File:Install-Guide-Main.png|250px|link=Installation Guides - Hardware]]</span> | ||
<BR> | <BR> | ||
<div style="text-align: center;"><span style="color:#0054a6; font-size:150%;"><u>'''INSTALLATION GUIDES'''</u></span></div> | <div style="text-align: center;"><span style="color:#0054a6; font-size:150%;"><u>'''INSTALLATION GUIDES - HARDWARE'''</u></span></div> | ||
<BR> | |||
<div style="box-shadow:2px 2px 15px #90A4AE; border-radius:5px; padding:10px"> | |||
<span style="color:#90A4AE; font-size:130%">'''USB - Coordinator'''</span> | |||
---- | |||
:<div style="text-align: center;"><span style="color:#0054a6; font-size:150%;">'''Installation on New Computer - Computer Provided by VersaCall'''</span></div> | |||
:<div style="text-align: center;"><span style="color:#0054a6; font-size:120%;">Select a Guide Below for Detailed Instructions</span></div> | |||
<div class="zoom_img" > | |||
{|style="background: transparent; color:black" border="0" height="400" align="center" valign="bottom" cellpadding=10px cellspacing=10px | |||
|+style="background:transparent"| | |||
|-align="center" | |||
|- | |||
|+style="background:transparent"| | |||
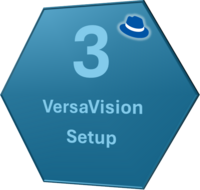
|[[File:New-USB-Step4.png|200px|Click for Additional Information|link=IT - Coordinator Requirements]] || [[File:New-USB-Step1.png|200px|Click for The Guide|link=Installation - USB Coordinator]] || [[File:New-USB-Step2.png|200px|Click for The Guide|link=New System - USB Coordinator - VersaVision Setup]] || [[File:New-USB-Step3.png|200px|Click for The Guide|link=Coordinator - Check Status]] | |||
|} | |||
---- | |||
:<div style="text-align: center;"><span style="color:#0054a6; font-size:150%;">'''Add-On Coordinator Installation - Computer Provided by VersaCall'''</span></div> | |||
:<div style="text-align: center;"><span style="color:#0054a6; font-size:120%;">Select a Guide Below for Detailed Instructions</span></div> | |||
<BR> | |||
<div class="zoom_img" > | |||
{|style="background: transparent; color:black" border="0" height="400" align="center" valign="bottom" cellpadding=10px cellspacing=10px | |||
|+style="background:transparent"| | |||
|-align="center" | |||
|- | |||
|+style="background:transparent"| | |||
|[[File:Add-USB-Step4.PNG|200px|Click for Additional Information|link=IT - Coordinator Requirements]] || [[File:Add-USB-Step1.PNG|200px|Click for The Guide|link=Installation - USB Coordinator]] || [[File:Add-USB-Step2.PNG|200px|Click for The Guide|link=Existing System - USB Coordinator - Add On]] || [[File:Add-USB-Step3.PNG|200px|Click for The Guide|link=Coordinator - Check Status]] | |||
|} | |||
<BR> | |||
</div> | |||
</div> | |||
</div> | |||
<BR> | |||
<div style="box-shadow:2px 2px 15px #90A4AE; border-radius:5px; padding:10px"> | |||
<span style="color:#90A4AE; font-size:130%">'''Network (RealPort) - Coordinator'''</span> | |||
---- | |||
:<div style="text-align: center;"><span style="color:#0054a6; font-size:150%;">'''Installation on Linux (Ubuntu) OS'''</span></div> | |||
:<div style="text-align: center;"><span style="color:#0054a6; font-size:120%;">Select a Guide Below for Detailed Instructions</span></div> | |||
<div class="zoom_img" > | |||
{|style="background: transparent; color:black" border="0" height="400" align="center" valign="bottom" cellpadding=10px cellspacing=10px | |||
|+style="background:transparent"| | |||
|-align="center" | |||
|- | |||
|+style="background:transparent"| | |||
|[[File:LinuxRP-Step-5.png|200px|Click for Additional Information|link=IT - Coordinator Requirements]] || [[File:LinuxRP-Step-1.png|200px|Click for The Guide|link=Installation - Network Coordinator (RealPort)]] || [[File:LinuxRP-Step-2.png|200px|Click for The Guide|link=Linux - Driver Install - Real Port Coordinator]] || [[File:LinuxRP-Step-3.png|200px|Click for The Guide|link=Linux - VersaVision Setup - Real Port Coordinator]] || [[File:LinuxRP-Step-4.png|200px|Click for The Guide|link=Coordinator - Check Status]] | |||
|} | |||
---- | |||
:<div style="text-align: center;"><span style="color:#0054a6; font-size:150%;">'''Installation on Red Hat (8 or 9) OS'''</span></div> | |||
:<div style="text-align: center;"><span style="color:#0054a6; font-size:120%;">Select a Guide Below for Detailed Instructions</span></div> | |||
<BR> | |||
<div class="zoom_img" > | |||
{|style="background: transparent; color:black" border="0" height="400" align="center" valign="bottom" cellpadding=10px cellspacing=10px | |||
|+style="background:transparent"| | |||
|-align="center" | |||
|- | |||
|+style="background:transparent"| | |||
|[[File:RH-RP-Step5.png|200px|Click for Additional Information|link=IT - Coordinator Requirements]] || [[File:RH-RP-Step1.png|200px|Click for The Guide|link=Installation - Network Coordinator (RealPort)]] || [[File:RH-RP-Step2.png|200px|Click for The Guide|link=Red Hat - Driver Install - Real Port Coordinator]] || [[File:RH-RP-Step3.png|200px|Click for The Guide|link=Red Hat - VersaVision Setup - Real Port Coordinator]] || [[File:RH-RP-Step4.png|200px|Click for The Guide|link=Coordinator - Check Status]] | |||
|} | |||
<BR> | |||
</div> | |||
</div> | |||
</div> | |||
<BR> | <BR> | ||
<div style="box-shadow:2px 2px 15px #90A4AE; border-radius:5px; padding:10px"> | <div style="box-shadow:2px 2px 15px #90A4AE; border-radius:5px; padding:10px"> | ||
| Line 8: | Line 68: | ||
<BR> | <BR> | ||
::<span style="border:thin solid #90A4AE; border-radius:5px; padding:5px">[[Wired Input|Additional Information]]</span> | ::<span style="border:thin solid #90A4AE; border-radius:5px; padding:5px">[[Wired Input|Additional Information]]</span> | ||
::<span style="border:thin solid #90A4AE; border-radius:5px; padding:5px">[[Installation - IO Wired Input|Step by Step Instructions]]</span> | ::<span style="border:thin solid #90A4AE; border-radius:5px; padding:5px">[[Installation - IO Wired Input|Step by Step Installation Instructions]]</span> | ||
::<span style="border:thin solid #90A4AE; border-radius:5px; padding:5px">[https://vv-support.versacall.com/images/d/d7/VV_Wired_Input_Installation.pdf | ::<span style="border:thin solid #90A4AE; border-radius:5px; padding:5px">[https://vv-support.versacall.com/images/d/d7/VV_Wired_Input_Installation.pdf Installation PDF Download Available Here]</span> | ||
</div> | </div> | ||
<BR> | <BR> | ||
| Line 16: | Line 76: | ||
<BR> | <BR> | ||
::<span style="border:thin solid #90A4AE; border-radius:5px; padding:5px">[[Stacklight|Additional Information]]</span> | ::<span style="border:thin solid #90A4AE; border-radius:5px; padding:5px">[[Stacklight|Additional Information]]</span> | ||
::<span style="border:thin solid #90A4AE; border-radius:5px; padding:5px">[[Installation - Light Stack Add-On|Step by Step Instructions]]</span> | ::<span style="border:thin solid #90A4AE; border-radius:5px; padding:5px">[[Installation - Light Stack Add-On|Step by Step Installation Instructions]]</span> | ||
::<span style="border:thin solid #90A4AE; border-radius:5px; padding:5px">[https://vv-support.versacall.com/images/7/76/VV_Light_Stack_Installation.pdf | ::<span style="border:thin solid #90A4AE; border-radius:5px; padding:5px">[https://vv-support.versacall.com/images/7/76/VV_Light_Stack_Installation.pdf Installation PDF Download Available Here]</span> | ||
</div> | </div> | ||
<BR> | <BR> | ||
| Line 23: | Line 83: | ||
<span style="color:#90A4AE; font-size:130%">'''Articulating Arm Mount'''</span> | <span style="color:#90A4AE; font-size:130%">'''Articulating Arm Mount'''</span> | ||
<BR> | <BR> | ||
::<span style="border:thin solid #90A4AE; border-radius:5px; padding:5px">[[Installation - Articulating Arm Mount|Step by Step Instructions]]</span> | ::<span style="border:thin solid #90A4AE; border-radius:5px; padding:5px">[[Installation - Articulating Arm Mount|Step by Step Installation Instructions]]</span> | ||
::<span style="border:thin solid #90A4AE; border-radius:5px; padding:5px">[https://vv-support.versacall.com/images/0/0b/Arm_Mount_Installation.pdf | ::<span style="border:thin solid #90A4AE; border-radius:5px; padding:5px">[https://vv-support.versacall.com/images/0/0b/Arm_Mount_Installation.pdf Installation PDF Download Available Here]</span> | ||
</div> | </div> | ||
<BR> | <BR> | ||
| Line 31: | Line 91: | ||
<BR> | <BR> | ||
::<span style="border:thin solid #90A4AE; border-radius:5px; padding:5px">[[IT - USB Connected Light Stack|Additional Information]]</span> | ::<span style="border:thin solid #90A4AE; border-radius:5px; padding:5px">[[IT - USB Connected Light Stack|Additional Information]]</span> | ||
::<span style="border:thin solid #90A4AE; border-radius:5px; padding:5px">[[Installation - USB Stack Light|Step by Step Instructions]]</span> | ::<span style="border:thin solid #90A4AE; border-radius:5px; padding:5px">[[Installation - USB Stack Light|Step by Step Installation Instructions]]</span> | ||
::<span style="border:thin solid #90A4AE; border-radius:5px; padding:5px">[https://vv-support.versacall.com/images/4/4e/USB_Stack_Light_Installation.pdf | ::<span style="border:thin solid #90A4AE; border-radius:5px; padding:5px">[https://vv-support.versacall.com/images/4/4e/USB_Stack_Light_Installation.pdf Installation PDF Download Available Here]</span> | ||
</div> | </div> | ||
---- | ---- | ||
Latest revision as of 15:48, 7 May 2024

INSTALLATION GUIDES - HARDWARE
USB - Coordinator
- Installation on New Computer - Computer Provided by VersaCall
- Select a Guide Below for Detailed Instructions
 |
 |
 |
|
- Add-On Coordinator Installation - Computer Provided by VersaCall
- Select a Guide Below for Detailed Instructions
 |
 |
 |
|
Network (RealPort) - Coordinator
- Installation on Linux (Ubuntu) OS
- Select a Guide Below for Detailed Instructions
 |
 |
 |
 |

|
- Installation on Red Hat (8 or 9) OS
- Select a Guide Below for Detailed Instructions
 |
 |
 |
 |

|
IO Module - Wired Inputs
IO Module - Wired Outputs - Light Stack Add On
Articulating Arm Mount
USB Light Stack - Add On

|